Excellent.
I have owned 2 690s and 8 RD688 dumps.
If i may add some advice if you plan on using it daily or fairly often. Replace the trans with an 8LL and change the front hubs to hub pilot. Also change the tag axle to hub pilot and replace that tag with a 11R22.5. The cost will pay for itself in less wear on those tires.
If you are only seldom working it then carry on. Pull the inspection plate on your rear trunions and check for slop.. you may just need a tighten or so. Also inspect the trunion grease.
You are using an out of date browser. It may not display this or other websites correctly.
You should upgrade or use an alternative browser.
You should upgrade or use an alternative browser.
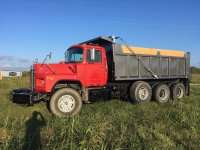
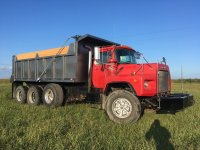
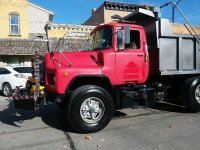
Dump Truck Build: 2000 Mack DM690S
- Thread starter Creekside
- Start date
Creekside
Thread starter
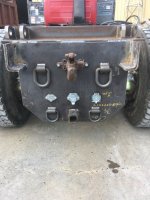
Trailer hitch is welded in. Still more welding to do and I’m adding gussets where it is welded to the frame but it’s in and fit like a glove.
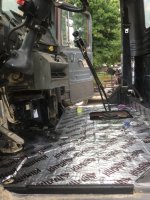
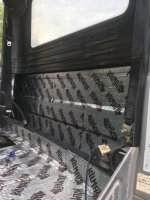
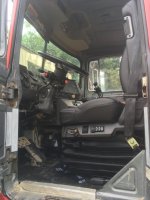
Spent the day working on the interior of the cab, test fit my new Pinnacle seat($$$$) and got two layers of bed liner laid on the cab floor and back of the cab. This will provide some insulation, sound deadening and help prevent rust. I have a box of Kilmat off Amazon that will go on the floor and back wall next followed by the original floor mats and interior pieces.
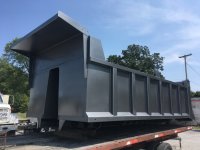
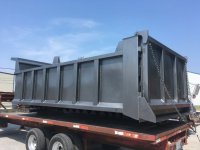
Sounds like we’re painting the bed on Tuesday if all goes well.
Attachments
Man, that is some serious, and great skills and hard work. I congratulate you and keep up the updates and great workTrailer hitch is welded in. Still more welding to do and I’m adding gussets where it is welded to the frame but it’s in and fit like a glove.
Spent the day working on the interior of the cab, test fit my new Pinnacle seat($$$$) and got two layers of bed liner laid on the cab floor and back of the cab. This will provide some insulation, sound deadening and help prevent rust. I have a box of Kilmat off Amazon that will go on the floor and back wall next followed by the original floor mats and interior pieces.
Sounds like we’re painting the bed on Tuesday if all goes well.
Creekside
Thread starter
Got two layers of bed liner rolled on the floor and the back of the cab Saturday. Put down a layer of Kilmat over the bed liner today. I now have both seats installed and I’m working on getting the original floor mats reinstalled. The interior is looking fantastic
Attachments
Creekside
Thread starter
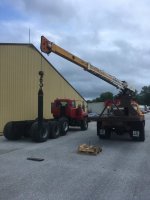
The bed is now painted and reinstalled. Didn't get any pics of it back on the truck yet as it got too dark. The Carbon Fiber Metallic turned out absolutely amazing on it. In the last pic here you can see us preparing to drop the lift cylinder in.
Attachments
Creekside
Thread starter
Creekside
Thread starter
I'm on the home stretch now. Today saw the tarp system get installed and most of the bed lighting installed. Got the air cylinder installed for the tailgate, still have to build a small mount for the MAC valve that will actuate the cylinder. Need to build a rear support for the hydraulic pump as the PTO has an aluminum bell housing and won't take the abuse pf the overhung load. This will be a piece of black pipe out of the suction port with an exhaust clamp and piece of flat bar up to an existing threaded hole in the back of the transmission.
Attachments
Creekside
Thread starter
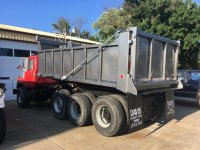
Here you go guys. It’s basically done, there’s a few things I’ll tidy up and tweak as I run it but the big things are done. It is hopefully getting a load today. I’ll try to update this post with some more pictures as time goes on.
Attachments
Creekside
Thread starter
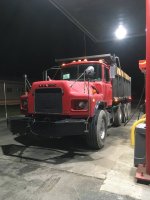
Just a little update, moved 9 loads at 20 tons each today. This was my longest day so far in the truck. I started getting things ready at 5:45am yesterday after getting off work at 1am that morning. I ran the truck until I had to go to work at my real job. So far it’s averaging 6.5mpg and I’m super happy with that. We have some pretty long and steep hills that really work the little 300hp.
Stay tuned, I’ve been gathering parts for a conversion from the Dayton wheels on the steer axle to modern hub pilot aluminum wheels for a better ride and more consistent mounting.
Stay tuned, I’ve been gathering parts for a conversion from the Dayton wheels on the steer axle to modern hub pilot aluminum wheels for a better ride and more consistent mounting.
Attachments
I’ve seen those on school buses as well.Interesting looking wheels on the Mack.
Creekside
Thread starter
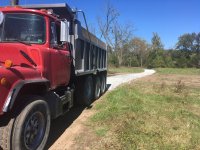
Closed out the week with just over 300 tons of material moved. Overall I couldn’t be happier with the amount of business coming in and the performance of the truck. I’ve put somewhere around 1000 miles on the truck since it’s been in service now. It’s booked pretty much solid all next week too.
Attachments
That’s awesome to hear. I like the truck, Thank You for the updates and hard workClosed out the week with just over 300 tons of material moved. Overall I couldn’t be happier with the amount of business coming in and the performance of the truck. I’ve put somewhere around 1000 miles on the truck since it’s been in service now. It’s booked pretty much solid all next week too.
This has been such an impressive project to follow. Very different size of equipment than reworking a 60’s sedan where a human can pick up the parts by hand and carry them around the shop. Was a specific paint formulation used for the bed since it is a working surface?
Creekside
Thread starter
Not anymore, it is where the mixer hydraulic pump was installed. If you look back to earlier posts there’s pics of it being lifted out with a skidsteer. I left the bumper because of the massive tow points attached to it, I didn’t want to loose those being I will use the truck in fields and stuff.Is there any machinery mounted directly behind the front bumper?
Creekside
Thread starter
Nope, it’s an equipment urethane if I remember correctly. I went into an automotive paint shop in Springfield MO and told them I was painting a dump bed and they directed me to this line. I simply picked the color and wrote the check. We only painted around 18” down inside just for looks. For example the paint on the asphalt apron is mostly gone and metal is shiny from dumping loads. That’s the thing with a dump bed it only really looks new once.This has been such an impressive project to follow. Very different size of equipment than reworking a 60’s sedan where a human can pick up the parts by hand and carry them around the shop. Was a specific paint formulation used for the bed since it is a working surface?
Are you surviving with only 3 hours of sleep every day ?Just a little update, moved 9 loads at 20 tons each today. This was my longest day so far in the truck. I started getting things ready at 5:45am yesterday after getting off work at 1am that morning. I ran the truck until I had to go to work at my real job.
Creekside
Thread starter
I have worked second shift in addition to farming and running a towing business for several years now. I don’t even remember what a full night of sleep is.Are you surviving with only 3 hours of sleep every day ?
Creekside
Thread starter
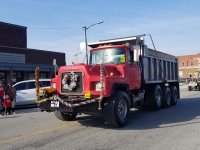
I put the Mack in a couple of our local Christmas parades today. It was a blast and a lot of the little kids absolutely loved it. I had hoped to get the cab buffed but my work schedule didn’t allow any downtime this week.
Attachments
Similar threads
- Replies
- 3
- Views
- 318
- Replies
- 7
- Views
- 2K
- Replies
- 6
- Views
- 376
- Replies
- 3
- Views
- 2K
- Replies
- 28
- Views
- 2K

