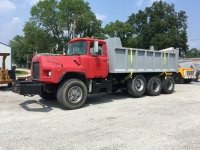
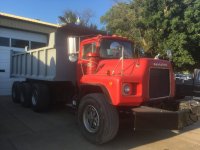
Dump Truck Build: 2000 Mack DM690S

**** son, you do some top of the mark work is all I can say. I always loved the style of the “R” Model Mack’s. Probably reason why dad bought his 83’ day cab R model from his old employer too 🍺🍺👍🇺🇸
Thanks, I'm doing my best here. Never really worked on a Mack before so I'm learning one piece at a time.
 
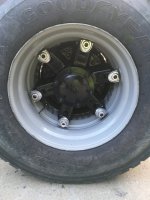
Not much progress lately, especially nothing worth showing in pictures but I’m super proud of how the wheels and hubs turned out. All of this was spray painted by me. Wheels are Dove Gray, hubs are just basic Rustoleum Gloss Black and the hardware is propane tank paint. I did dismount all 8 drive tires and had the wheels professionally sand blasted prior to painting. I won’t touch the steer wheels or pusher axle wheels as there’s no reason to remove them at this time and they weigh probably double what I do. Not willing to wrestle them around just to paint stuff.
 

Attachments

  • 5FF69944-220E-483E-ADD2-17E3D90108D8.jpeg
    5FF69944-220E-483E-ADD2-17E3D90108D8.jpeg
    137.2 KB · Views: 74
Grew up around Mack’s … drove 18‘s and body load 10’s … get one in a ditch and a crane would just spin the front and then drop it like a bad habit, LoL …
But that’s not to say KW didn’t make some HD off-road units … just not as well known for doing it in the dirt.

View attachment 59680View attachment 59681
F3015CF8-1F43-432E-88A4-D52FCBD6DA3A.jpeg
EFF85A56-F1B6-41F5-9B42-EBC86AD3E6CD.jpeg
Some more big boys from Kenworth.
 
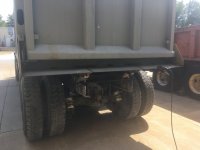
No pictures today but the Mack moved under it's own power again! To say I'm happy is an understatement. If all goes well I will be temporarily setting the bed on tomorrow to determine where to shorten the back of the frame and to see how the cab guard will fit. I'll be posting pictures of that project as soon as I can.
 
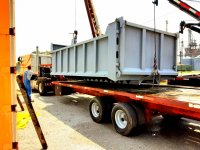
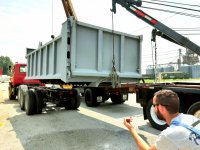
The bed is sitting on the truck for the first time! Cab guard and asphalt apron installation will be next followed by the rear hinge assembly and finally the tank and cylinder mount. The bed will come off 1 maybe 2 more times before the final installation.
 

Attachments

  • 0C18FB18-8404-4B7F-A90C-9C911CD65CC1.jpeg
    0C18FB18-8404-4B7F-A90C-9C911CD65CC1.jpeg
    229.5 KB · Views: 92
  • F7AE40E9-B14E-4D95-A1DE-A1F077803C8F.jpeg
    F7AE40E9-B14E-4D95-A1DE-A1F077803C8F.jpeg
    541.6 KB · Views: 91
  • 5C607FE7-2756-4E0F-BC39-BC5F1DAB8724.jpeg
    5C607FE7-2756-4E0F-BC39-BC5F1DAB8724.jpeg
    536.2 KB · Views: 82
  • C45DFEC1-C722-443F-ADE0-7F29B2EE25DD.jpeg
    C45DFEC1-C722-443F-ADE0-7F29B2EE25DD.jpeg
    315.1 KB · Views: 91
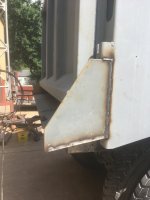
The bed was taken back off today. I have installed the cab guard and am presently working on a final location and mounting the front saddle for the bed. This is the part that the cylinder mounts to along with the hydraulic tank and it keeps the bed centered on the frame when it is fully lowered. More pics of that process will be posted in the coming days.
 

Attachments

  • 4861E763-99F8-4ABA-A790-B9D386FB6E78.jpeg
    4861E763-99F8-4ABA-A790-B9D386FB6E78.jpeg
    164.4 KB · Views: 89
  • CB7AEE10-8D2D-428C-B56C-2C35BE55890D.jpeg
    CB7AEE10-8D2D-428C-B56C-2C35BE55890D.jpeg
    157.8 KB · Views: 90
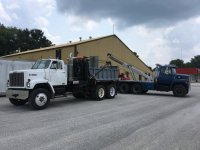
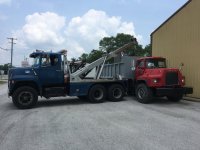
Is that your Ford probably with a Detroit Diesel engine crane in picture? Very cool and thank you for all the updates. 🇺🇸🇨🇦🍺🍺
The blue ford has a 391 gas i believe and the yellow crane is a 361 or 391. Both belong to a good friend of mine. The GMC Brigadier wrecker is mine and has an 8V-71 Detroit.
 
Today was nothing but a struggle but one rail is cut. Go read my thread in Tool Time for a laugh. A fabrication tip, some silver spray paint on black or unfinished steel makes a lead pencil show up nicely. It is much more accurate than soap stone where heat isn’t a concern. You can see the hinge plate that gets welded into the frame as well as my welding rig in the background.
 

Attachments

  • C3A07FFC-7406-4513-9DE6-9B9C1420D53F.jpeg
    C3A07FFC-7406-4513-9DE6-9B9C1420D53F.jpeg
    243.1 KB · Views: 75
  • 474E8B70-C783-463B-8849-CB32352020BC.jpeg
    474E8B70-C783-463B-8849-CB32352020BC.jpeg
    267.1 KB · Views: 75
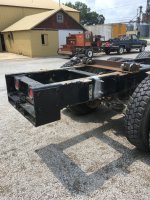
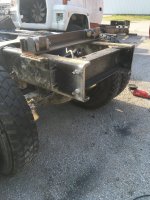
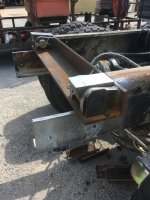
Got the back of the frame cut and rear crossmember removed last night. Ready to cut the step into the frame for the hinge plate today.
 

Attachments

  • F3010F1C-2017-413E-A7EF-033209AB0527.jpeg
    F3010F1C-2017-413E-A7EF-033209AB0527.jpeg
    227.1 KB · Views: 47
  • C5CFB5F2-7C23-4E2A-B92E-4F822AE7C9DA.jpeg
    C5CFB5F2-7C23-4E2A-B92E-4F822AE7C9DA.jpeg
    236.5 KB · Views: 47
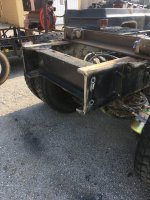
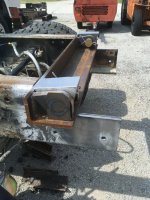
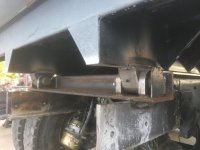
Yesterday marked another major milestone in this project. The steps are cut and the hinge is sitting in the frame. I’ll be doing more grinding to get everything perfectly square today before welding it in. I made a long step because I’ll be installing a rear hitch plate and the extra frame will help with mounting that. When complete the frame will only extend past the hinge maybe an inch. 99% of this was done by hand with a 7” grinder with a small part done with a Stihl gas saw on the rare occasion it actually would run.
 

Attachments

  • 563B01CA-ACDC-41AF-B274-41EE5591DECB.jpeg
    563B01CA-ACDC-41AF-B274-41EE5591DECB.jpeg
    236.1 KB · Views: 57
  • 8E5A3583-2DB0-44FD-BB51-8FEBDBE3C525.jpeg
    8E5A3583-2DB0-44FD-BB51-8FEBDBE3C525.jpeg
    204.1 KB · Views: 57
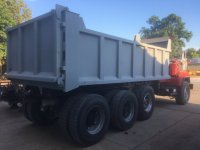
Dump bed is officially attached. Doing some welding work on it right now and will probably add some more lights to it before it comes off for paint. Also drilling holes to install the tarp system.
 

Attachments

  • 6B8DDE63-1EF5-4CEE-9CDE-26E248A59C51.jpeg
    6B8DDE63-1EF5-4CEE-9CDE-26E248A59C51.jpeg
    112.1 KB · Views: 72
  • 680D214F-1939-4BE6-8FC5-3A2A8792E189.jpeg
    680D214F-1939-4BE6-8FC5-3A2A8792E189.jpeg
    96.8 KB · Views: 72
  • EEB40108-3740-4796-AC30-F1C3D9BCC350.jpeg
    EEB40108-3740-4796-AC30-F1C3D9BCC350.jpeg
    138 KB · Views: 72
Asphalt apron is now installed. I chose to run the MIG on this part just for simplicity. Everything up to now has been stick from my vintage Airco welder. I don’t know the exact year it was made but it is powered by a Willys F head engine.
 

Attachments

  • 311BFCFF-FCD8-4473-9754-44501BDD1C10.jpeg
    311BFCFF-FCD8-4473-9754-44501BDD1C10.jpeg
    84.2 KB · Views: 71
  • 9DA69709-FD49-4A3F-988B-22A43C722AFB.jpeg
    9DA69709-FD49-4A3F-988B-22A43C722AFB.jpeg
    104.7 KB · Views: 71
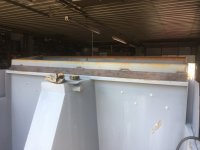
Welded on a piece of 4” X 1/8” flat bar today between the cab guard and the front of the bed. This prevents stuff from hanging up there and also prevents moisture from getting between the guard and bed as easily. The guard will be removed to have the back painted and the front of the bed painted then reinstalled and the exterior painted together. The plate will be welded to the bed upon reassembly. I am trying to eliminate as many areas for rust as possible.

Tomorrow I’ll install a 2” X 2” X 1/8” piece of angle to the top of the tailgate. This piece prevents buildup of “windshield breakers” that bounce off the top edge of the tailgate on the highway.
 

Attachments

  • FB927D1C-9BA8-4EC5-8227-4D9013109020.jpeg
    FB927D1C-9BA8-4EC5-8227-4D9013109020.jpeg
    102.4 KB · Views: 58
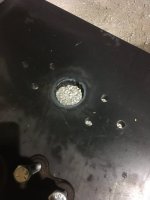
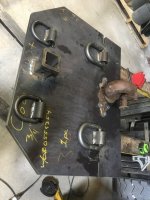
Had a big week and made a lot of progress. The bed should be headed to paint in the next couple days, I have almost all of my exhaust parts now(removing the old muffler as it would discharge against the cab guard), have a brand new Pinnacle seat, and my custom hitch plate is almost ready to weld in. The plate is 3/4” A36 and I had it burnt out by a local steel shop on their CNC plasma table to fit my frame dimensions. Scored the pintle hitch on marketplace for $35. I’m installing a RV style plug, commercial 7 pin, and small 6 pin. That gives me the option to pull anything with only a 4 flat adapter needed which is unlikely I’ll pull anything with that system.

The torch tip I had wouldn’t pierce the plate cleanly but with a pilot hole drilled I was able to cut the holes for the pintle and receiver tube without issue.
 

Attachments

  • 8B4C02DC-F2B2-4693-AB96-0EBD39F2B9AC.jpeg
    8B4C02DC-F2B2-4693-AB96-0EBD39F2B9AC.jpeg
    92.3 KB · Views: 58
  • D1E24D6E-12DB-45DE-94F3-7B57D29EA100.jpeg
    D1E24D6E-12DB-45DE-94F3-7B57D29EA100.jpeg
    144 KB · Views: 58
Back
Top