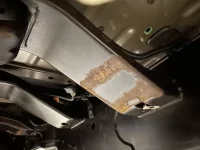
I wasn't looking forward to my Monday, given my 8am appointment was a rack & pinion on a 2015 Grand Cherokee 3.6. 8 hour job by the book, requiring supporting the engine from the top and removing the subframe/cradle. To heck with that. For anyone tasked with this particular job, I'll make it REALLY easy for you:
Remove the steering shaft from the rack
Remove lines from rack
Unbolt line brackets from subframe
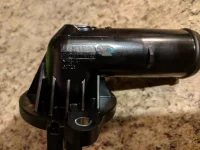
Unplug and unbolt the electric PS pump motor from it's bracket (you can dangle it from the hoses)
Remove outer tie rods from knuckle and inner tie rods
Remove both inner tie rod boots and tie rods
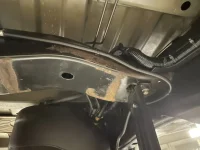
Unbolt and rotate the rack towards you and slide it to the right, then forward and out. To install, just remove the inner tie rods from the replacement rack and reverse the procedure. Be sure to put a dab of red Loctite on the threads of the inner tie rods before reinstallation.
I had the entire job done in about an hour and a half, including filling and bleeding. I used Pentosin CHF11S fluid as called for by Jeep. Performed and alignment and it was good to go. The same truck also got a new thermostat and a few other small repairs. Fun fact: called the dealer for the 'stat, as I've found aftermarket units don't work well in Mopar products. I was told that there were 49,000 on backorder with no ETA.... Great!
I instead ordered a Mahle unit from WorldPac, which upon inspection was 100% an OEM part with the Mopar PN and logo ground off. Cheaper, too! They had over 100 in stock, no clue as to why Mopar can't seem to get their hands on any!


")


