Very Nice job and thanks for the attention to detail !!!!!
Bo
Originally Posted By: Hokiefyd
I did the timing belt on our 2005 Acura MDX today. In a nutshell, it was a very pleasant experience. I've been conditioned to think that timing belts should be avoided at all costs and that they're difficult to replace (and they may be in some cases), almost necessitating a large garage bill every 100k miles. I was so pleased to find out that the intimidation of the job was so much more than the job itself.
I give at least half of the credit for my success to Eric The Car Guy. I paid for and downloaded his video on replacing a Honda J-series timing belt. He said that the video will provide all the confidence needed to do the job, and he was right. He goes through bolt-by-bolt (on a 3.0L Accord) through the entire job, stopping to show the differences between the two different kinds of timing belt tensioners (our MDX had the grenade pin type). He also recommended to tackle the crankshaft pulley bolt first, before everything else, because if you can't get that off you simply can't do the job.
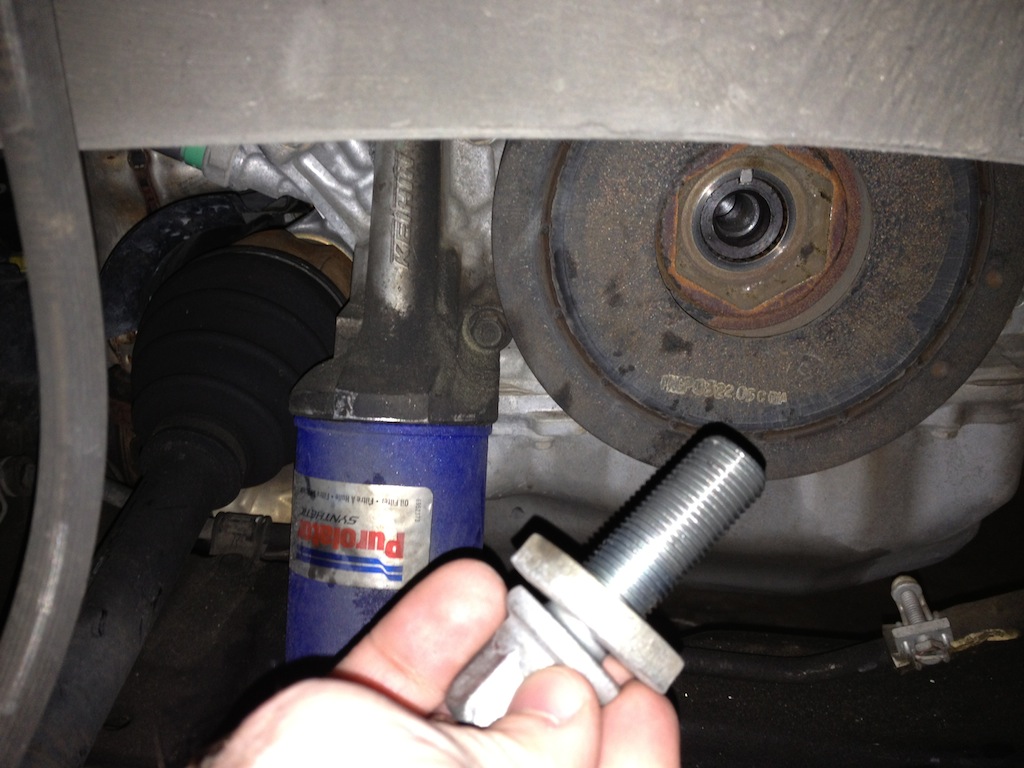
I did that last night, to ensure that I was good to go for today. I got the bolt off by using the Honda crankshaft holder tool rented at O'Reillys and wedging the breaker bar I attached to that against my garage floor, at about the 7:00 position. I was of course pulling on another breaker bar on the bolt itself, counterclockwise. After much consternation, that bolt came loose. Home free! Here it is:
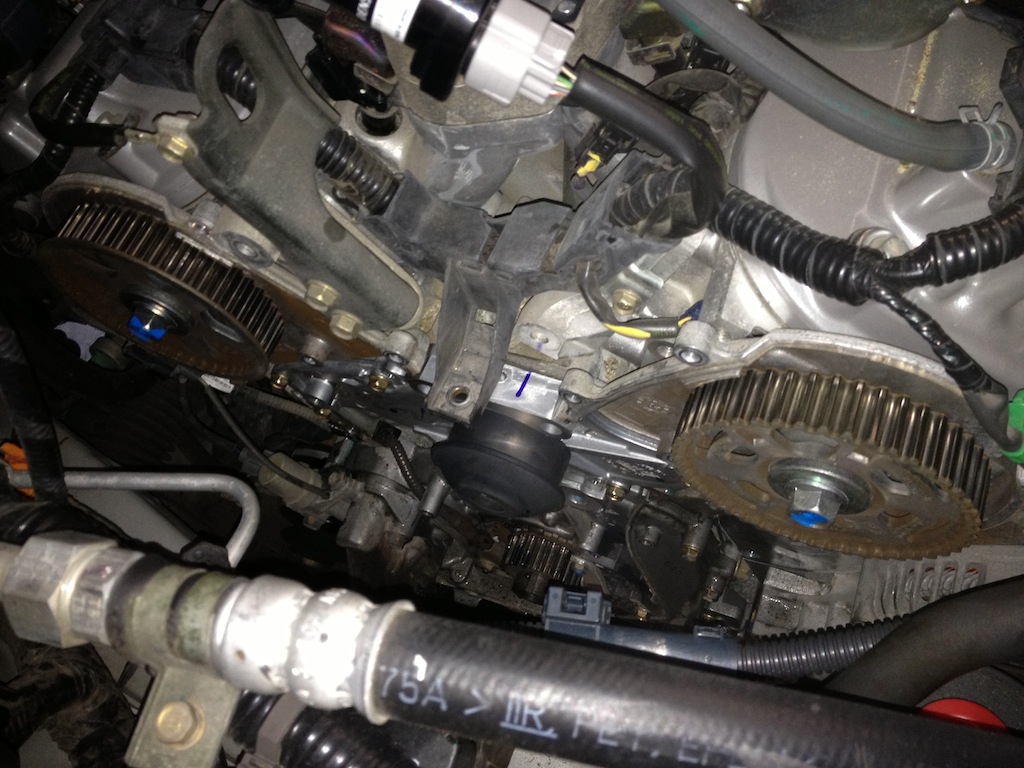
I also had zero trouble moving the power steering pump out of the way, and getting the timing covers off. I did this before my friend came over (soldier with some wrenching experience). Here's the nekkid timing belt area, with the side engine mount still in place:

Here's a view at the bottom, at the crankshaft sprocket:

Another view of the same, looking further up:

Fast forward some, and we have the side engine mount off (engine supported with a jack and 2x4), the belt off, the idler and tensioner pulleys off, the tensioner itself off, and the old water pump off. In fact, the new water pump is already on in this picture:
The timing belt fought us some going on, but the reference marks are very easy to see on this engine. The crankshaft sprocket has a small arrow at 12:00 that lines up with an arrow on the block. Both camshaft sprockets have marks that line up with marks on the cylinder heads. Very easy to do and nearly impossible to mess up. The problem was, the rear camshaft just BARELY stays at what I will call the 12:00 position (mark straight up and down, to match the reference mark on the cylinder head). Rotate it clockwise just a touch and it'll snap over to about the 4:00 position. Rotate it counterclockwise just a touch and it'll snap back to about the 8:00 position. At first, this scared me to death, but after moving it back and forth with a wrench (which is much easier said than done), I found that there is apparently no piston-to-valve contact...at least not in the exact position the crankshaft was in (with #1, on the rear bank, at TDC).
So anyway, it took us 4-5 tries of getting the belt on. You have to keep the belt pretty well-tensioned on the clockwise side of each sprocket, all the way down to the crankshaft sprocket, and let all the slack be taken up at the tensioner itself. So it was difficult to keep the belt tensioned enough for us to get it "toothed" properly on each sprocket, but not so tensioned that it'd pull the rear camshaft off of 12:00. Here is the view with the new parts on:

After we got it installed, and I checked all the marks three or four times, I re-installed the crankshaft bolt and turned the engine over 360 degrees, just to ensure that at the absolute very least, nothing crashed inside. I knew nothing would, as all of our reference marks were dead-on, but just for peace of my mind. We then re-installed the side engine mount and I started the engine and let it run for about 10 seconds, again, just to be absolutely-positively sure that it was right (and it was). I didn't take long to get everything re-installed after that.
We were done by lunch. Total work time: 5-1/2 hours, including an hour of me [censored] around with it last night by myself.
The old parts, as "warned" to me by others, are still in very serviceable condition. They look like they have half or fewer miles than they actually do (93,700 actual miles). These parts appear to be extremely durable, very well-built, and the whole system seems designed very well. There is zero indicating that any of these were even close to failure. I was duly impressed with this job. Here are the old parts...could be re-used I'm sure:

Honda advises that the timing belt be changed every 105,000 miles or every 7 years, which ever comes first. Our car has, as noted before, less than the recommended mileage, but it is 8 years old. And some of those years were spent in storage in the desert southwest (when my folks owned it), so I wanted to get the old belt off in case of dry rot or anything else of that nature. That worry was unfounded.
Again, I can't say again how pleasurable this job was. I'd do it again in a heartbeat, and would look forward to helping anyone else with a job like this if I had the opportunity. It's not nearly as difficult as you make it out to be in your own mind. And Honda obviously designed-in access for servicing it, so it's not as if you have to remove half the engine to get to it, either. Go slow and methodical and you can certainly see a very smart method for gaining access for the whole job.
I will be glad to answer any questions about the process if anyone has them.
Bo
Originally Posted By: Hokiefyd
I did the timing belt on our 2005 Acura MDX today. In a nutshell, it was a very pleasant experience. I've been conditioned to think that timing belts should be avoided at all costs and that they're difficult to replace (and they may be in some cases), almost necessitating a large garage bill every 100k miles. I was so pleased to find out that the intimidation of the job was so much more than the job itself.
I give at least half of the credit for my success to Eric The Car Guy. I paid for and downloaded his video on replacing a Honda J-series timing belt. He said that the video will provide all the confidence needed to do the job, and he was right. He goes through bolt-by-bolt (on a 3.0L Accord) through the entire job, stopping to show the differences between the two different kinds of timing belt tensioners (our MDX had the grenade pin type). He also recommended to tackle the crankshaft pulley bolt first, before everything else, because if you can't get that off you simply can't do the job.
I did that last night, to ensure that I was good to go for today. I got the bolt off by using the Honda crankshaft holder tool rented at O'Reillys and wedging the breaker bar I attached to that against my garage floor, at about the 7:00 position. I was of course pulling on another breaker bar on the bolt itself, counterclockwise. After much consternation, that bolt came loose. Home free! Here it is:
I also had zero trouble moving the power steering pump out of the way, and getting the timing covers off. I did this before my friend came over (soldier with some wrenching experience). Here's the nekkid timing belt area, with the side engine mount still in place:
Here's a view at the bottom, at the crankshaft sprocket:
Another view of the same, looking further up:
Fast forward some, and we have the side engine mount off (engine supported with a jack and 2x4), the belt off, the idler and tensioner pulleys off, the tensioner itself off, and the old water pump off. In fact, the new water pump is already on in this picture:
The timing belt fought us some going on, but the reference marks are very easy to see on this engine. The crankshaft sprocket has a small arrow at 12:00 that lines up with an arrow on the block. Both camshaft sprockets have marks that line up with marks on the cylinder heads. Very easy to do and nearly impossible to mess up. The problem was, the rear camshaft just BARELY stays at what I will call the 12:00 position (mark straight up and down, to match the reference mark on the cylinder head). Rotate it clockwise just a touch and it'll snap over to about the 4:00 position. Rotate it counterclockwise just a touch and it'll snap back to about the 8:00 position. At first, this scared me to death, but after moving it back and forth with a wrench (which is much easier said than done), I found that there is apparently no piston-to-valve contact...at least not in the exact position the crankshaft was in (with #1, on the rear bank, at TDC).
So anyway, it took us 4-5 tries of getting the belt on. You have to keep the belt pretty well-tensioned on the clockwise side of each sprocket, all the way down to the crankshaft sprocket, and let all the slack be taken up at the tensioner itself. So it was difficult to keep the belt tensioned enough for us to get it "toothed" properly on each sprocket, but not so tensioned that it'd pull the rear camshaft off of 12:00. Here is the view with the new parts on:
After we got it installed, and I checked all the marks three or four times, I re-installed the crankshaft bolt and turned the engine over 360 degrees, just to ensure that at the absolute very least, nothing crashed inside. I knew nothing would, as all of our reference marks were dead-on, but just for peace of my mind. We then re-installed the side engine mount and I started the engine and let it run for about 10 seconds, again, just to be absolutely-positively sure that it was right (and it was). I didn't take long to get everything re-installed after that.
We were done by lunch. Total work time: 5-1/2 hours, including an hour of me [censored] around with it last night by myself.
The old parts, as "warned" to me by others, are still in very serviceable condition. They look like they have half or fewer miles than they actually do (93,700 actual miles). These parts appear to be extremely durable, very well-built, and the whole system seems designed very well. There is zero indicating that any of these were even close to failure. I was duly impressed with this job. Here are the old parts...could be re-used I'm sure:
Honda advises that the timing belt be changed every 105,000 miles or every 7 years, which ever comes first. Our car has, as noted before, less than the recommended mileage, but it is 8 years old. And some of those years were spent in storage in the desert southwest (when my folks owned it), so I wanted to get the old belt off in case of dry rot or anything else of that nature. That worry was unfounded.
Again, I can't say again how pleasurable this job was. I'd do it again in a heartbeat, and would look forward to helping anyone else with a job like this if I had the opportunity. It's not nearly as difficult as you make it out to be in your own mind. And Honda obviously designed-in access for servicing it, so it's not as if you have to remove half the engine to get to it, either. Go slow and methodical and you can certainly see a very smart method for gaining access for the whole job.
I will be glad to answer any questions about the process if anyone has them.
") [actually, I handed off a set to the mechanic and a $20 but it is really an easy job on Honda V6 engine when it is in a van or suv.]
[actually, I handed off a set to the mechanic and a $20 but it is really an easy job on Honda V6 engine when it is in a van or suv.]

