DIY Strut Replacement

Status
Not open for further replies.

JHZR2

Staff member
Joined
Dec 14, 2002
Messages
52,855
Location
New Jersey
There are a couple videos on Youtube and maybe some other pictorals, but I asked a lot of questions and went through the learning curve doing my strut job. Thus I wrote up this DIY, which I posted onto the Saab forum I frequent, but wanted to put it here too for anyone who may be inclined to do this job and wants to know how...

I needed to replace a strut bearing on my 2004 9-3 with 72k miles. Ive owned the car since new, and in the last few months, I noted the strut binding when turning to the right. Ive owned the car since new, and it hasnt gotten a ton of use in the last year or so. Ill also note that I did notice that during cold weather, going over bumps, I was getting a crunching sound which I thought was sway bar bushings, but it was the struts!!!

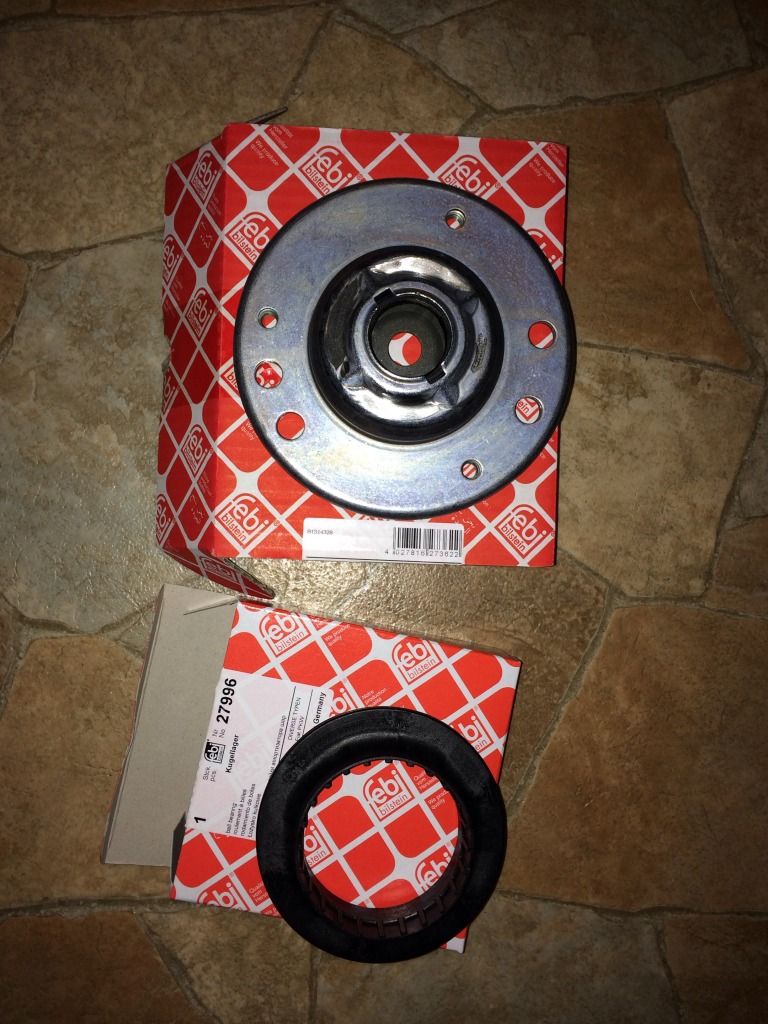
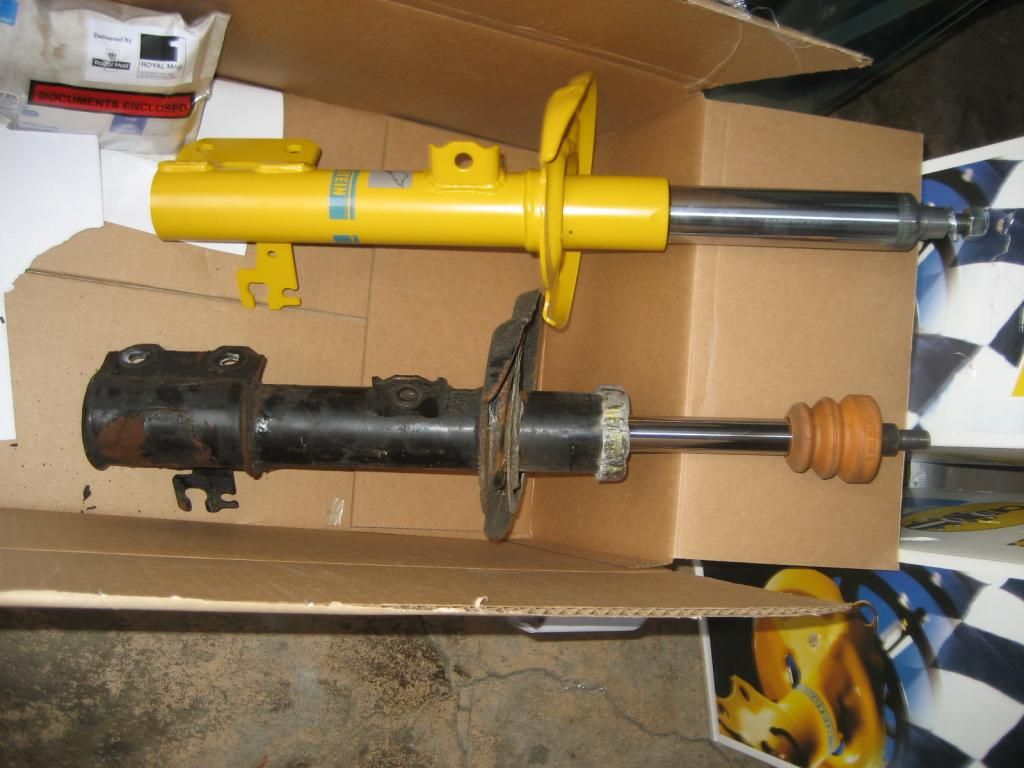
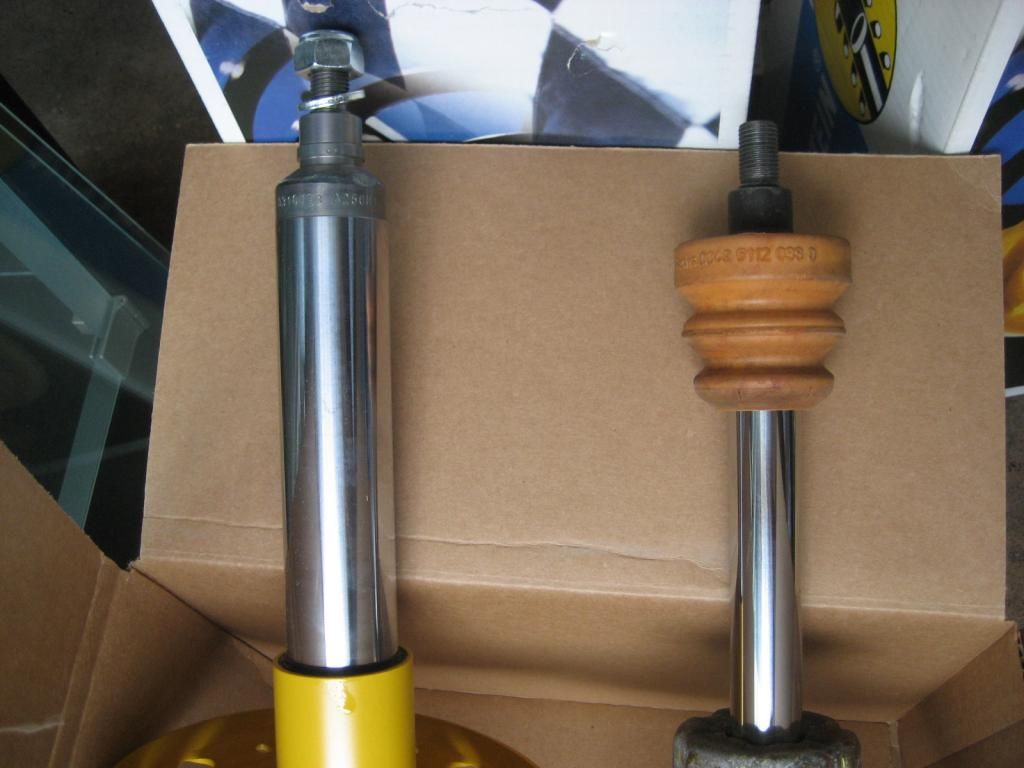
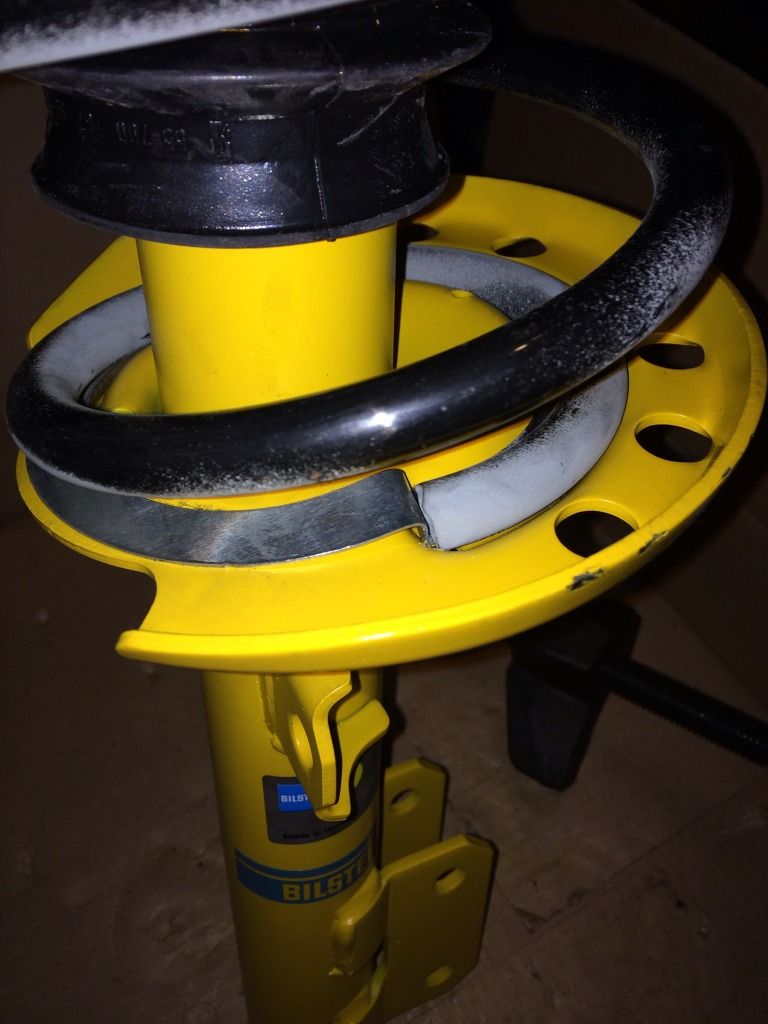
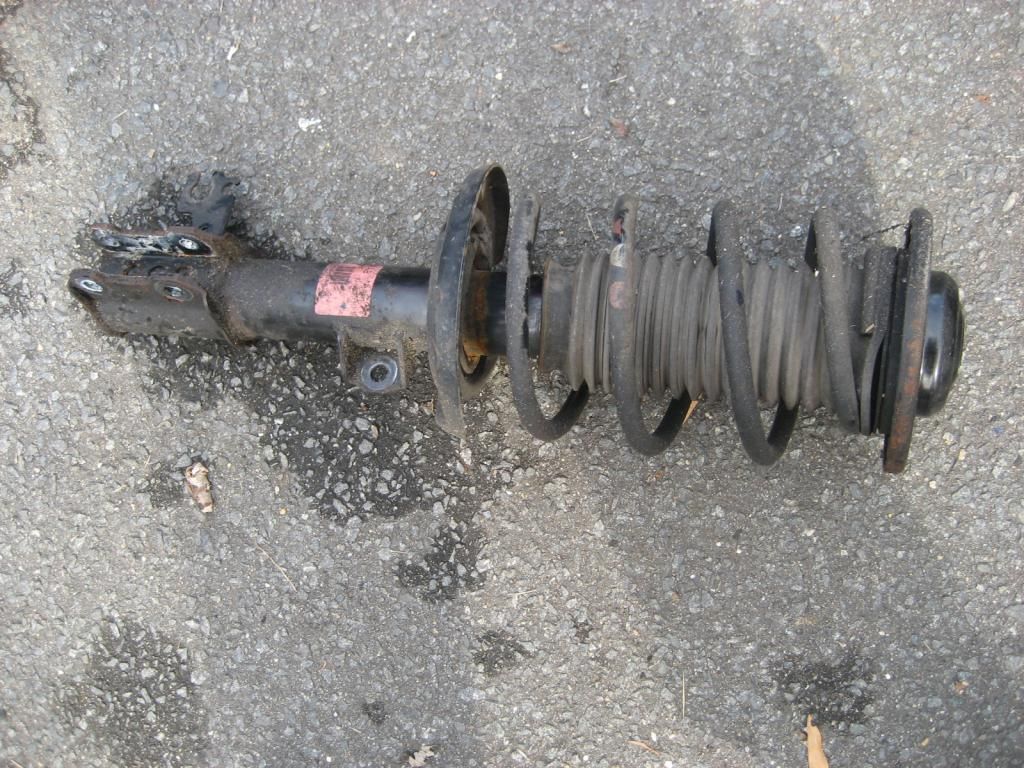
I replaced mine with Bilsteins, which are more expensive than the OE Sachs and aftermarket KYBs, but are IMO a better design. I replaced front struts as well as rear shocks. Ride is much better, and firm but not harsh as others have defined it.

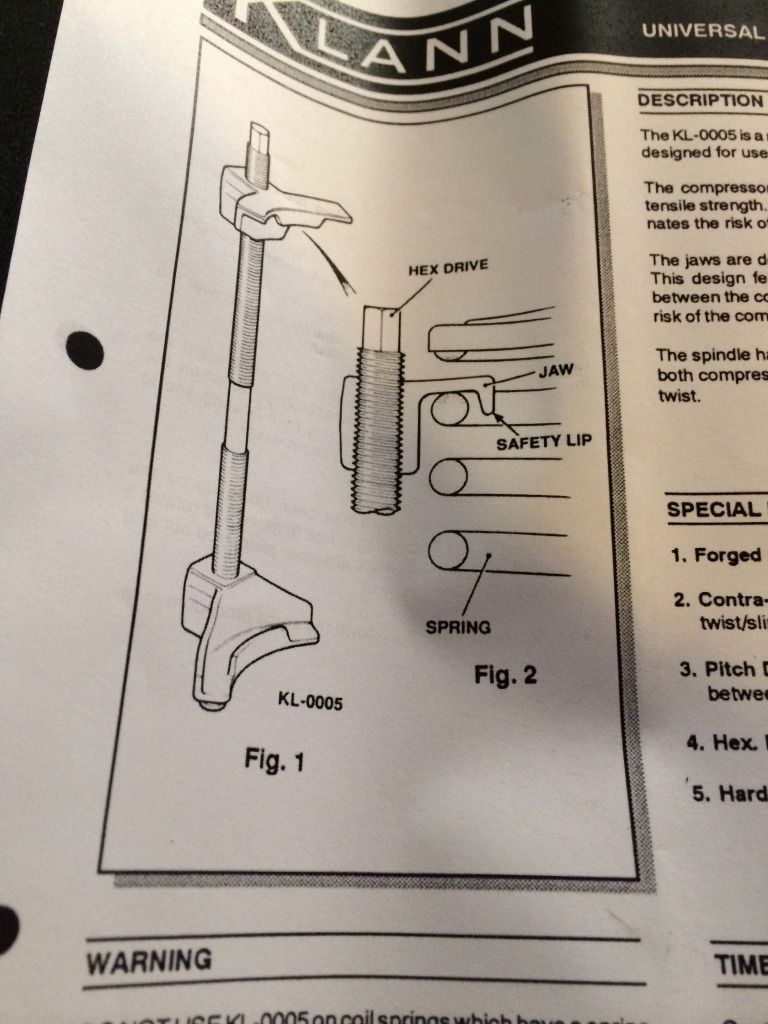
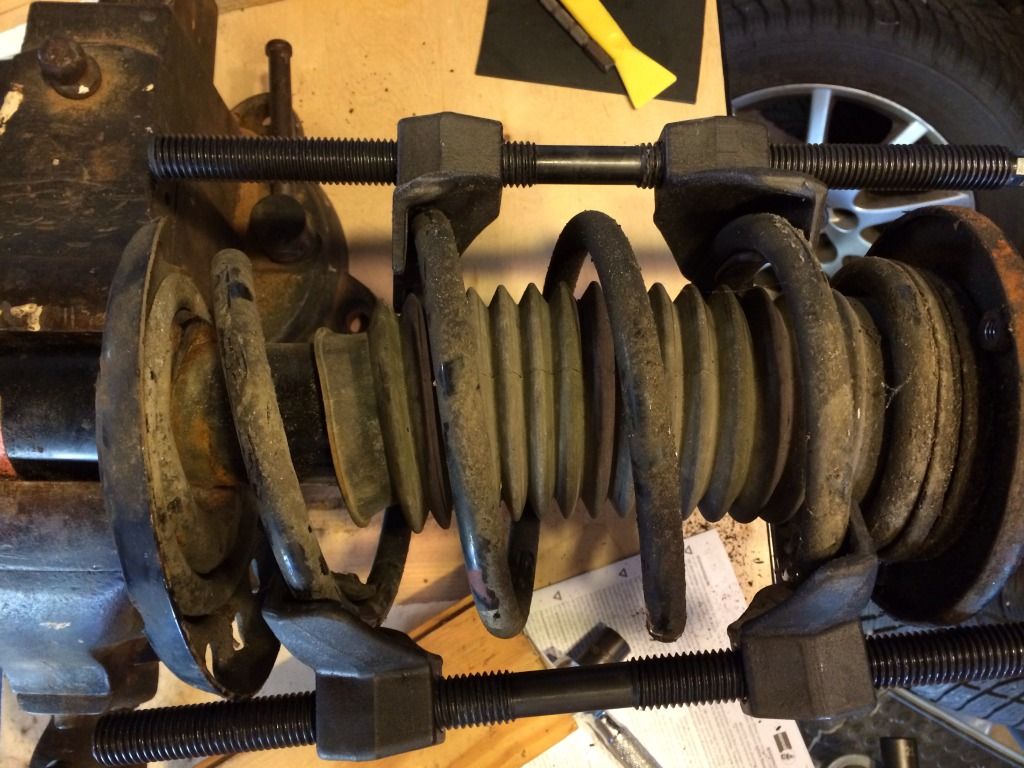
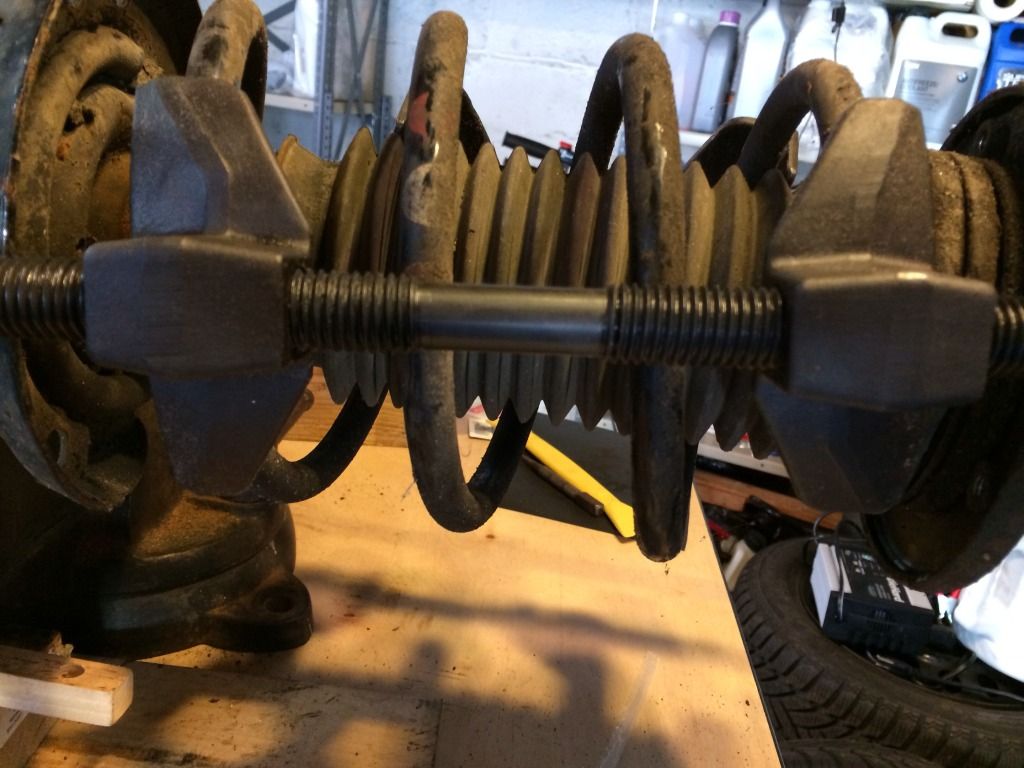
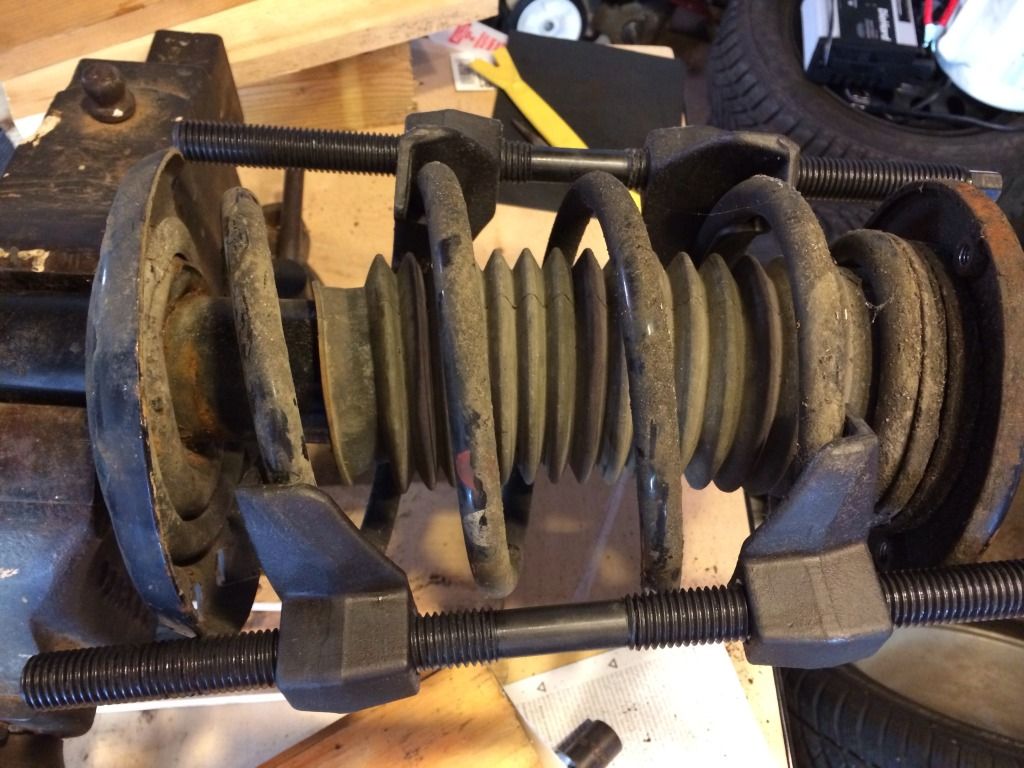
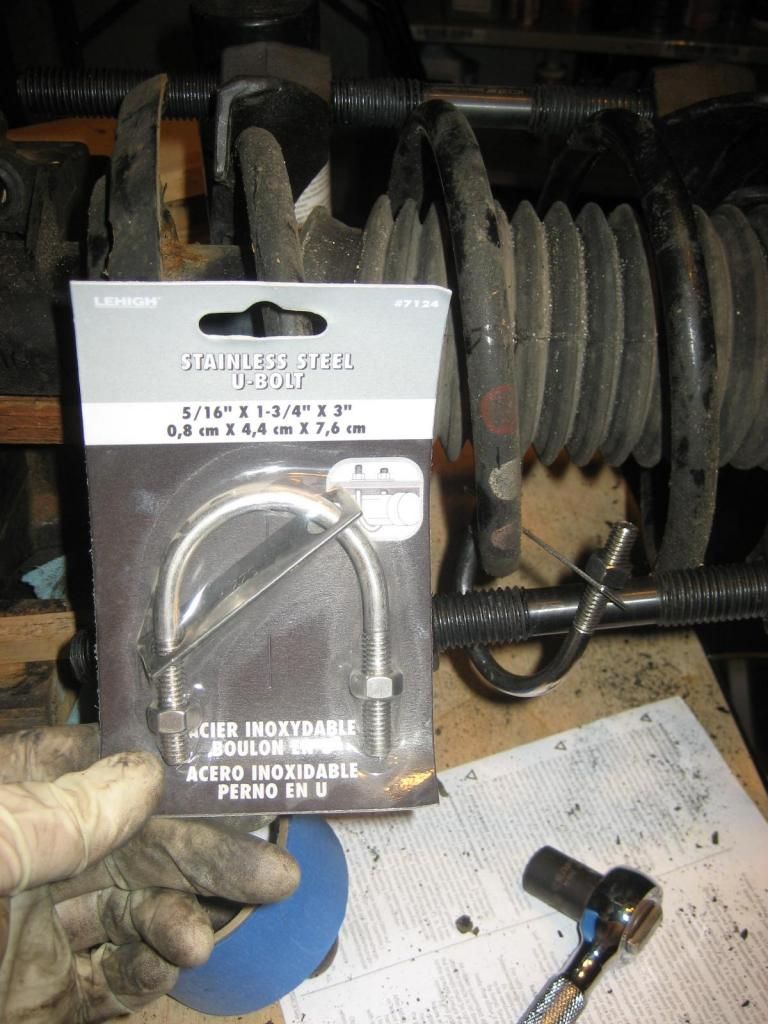
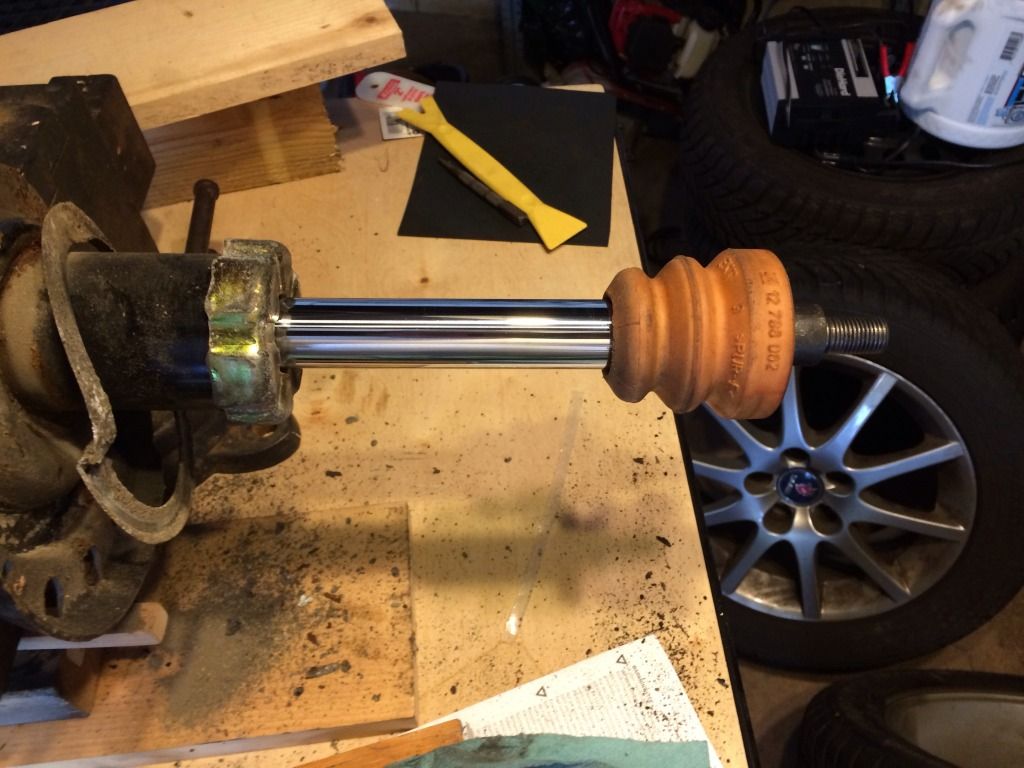
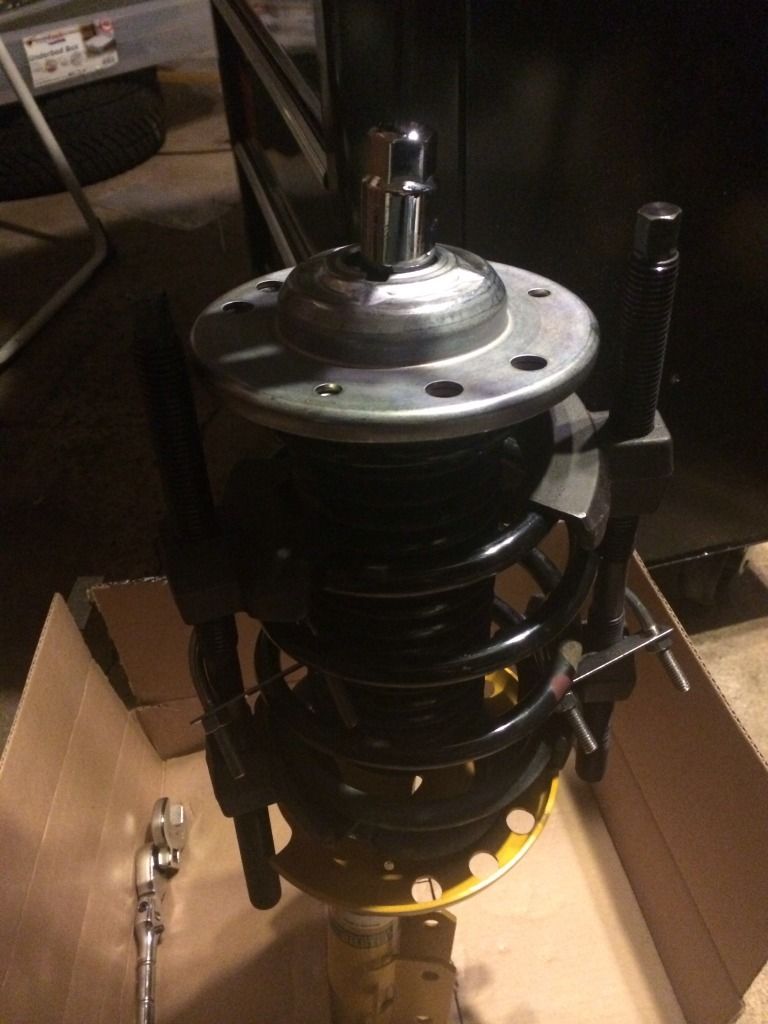
I used a combination of sockets, wrenches, a spring compressor, jack/jackstands, some wood blocks, a flat screwdriver, allen wrenches, female torx sockets, and some Boeshield T-9 and Wurth Film.

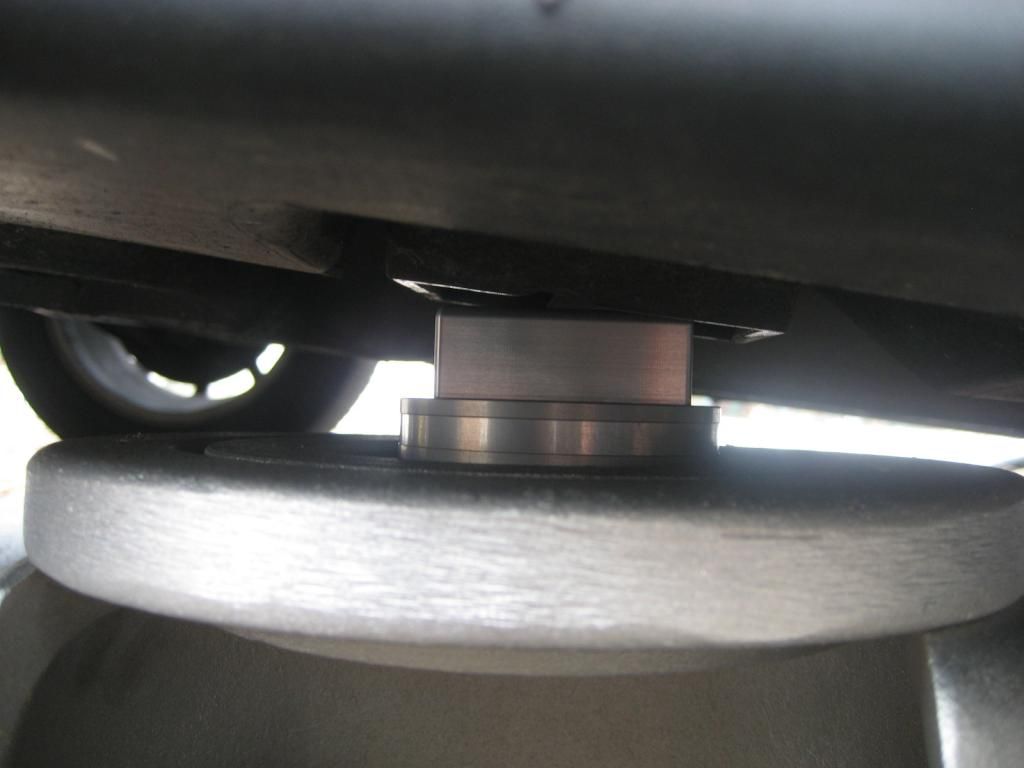
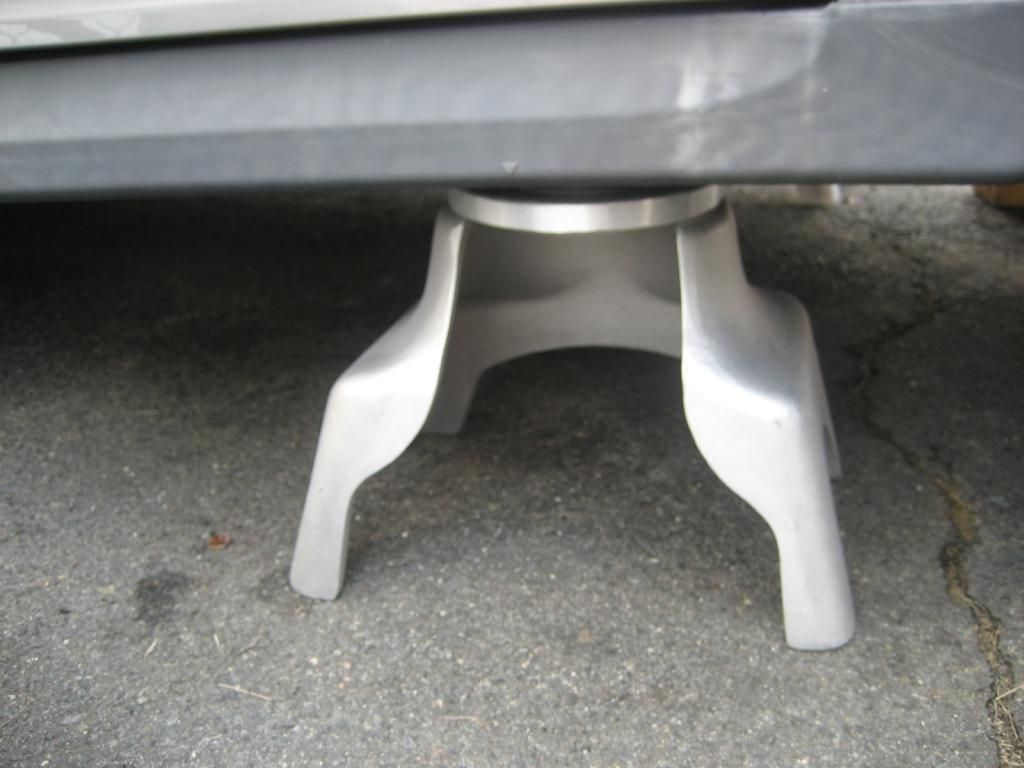
The first step is to suitably support the car. I use jack pads from Reverse Logic and JackPoint Jackstands. I did raise the whole front axle, vs just one side and then the next to get it on the stands, but these pads and stands are more stable and easier to use without causing damage.

IMG_3057_zpsf9040482.jpg


IMG_3061_zps88317129.jpg


IMG_3062_zps5746e8a1.jpg


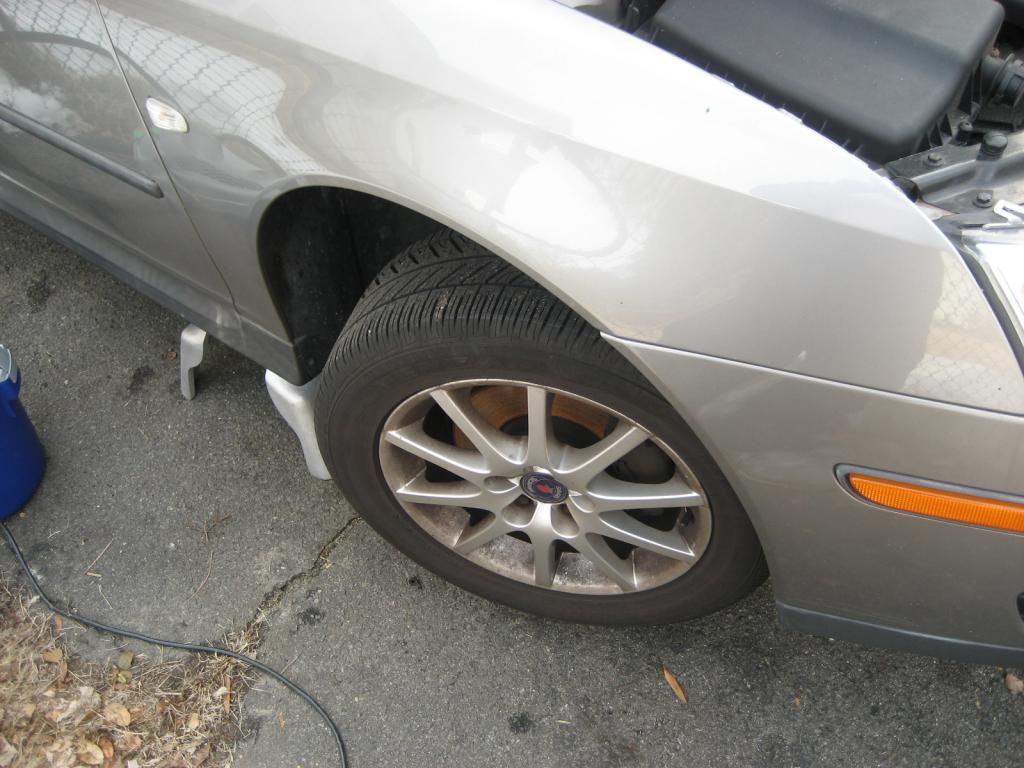
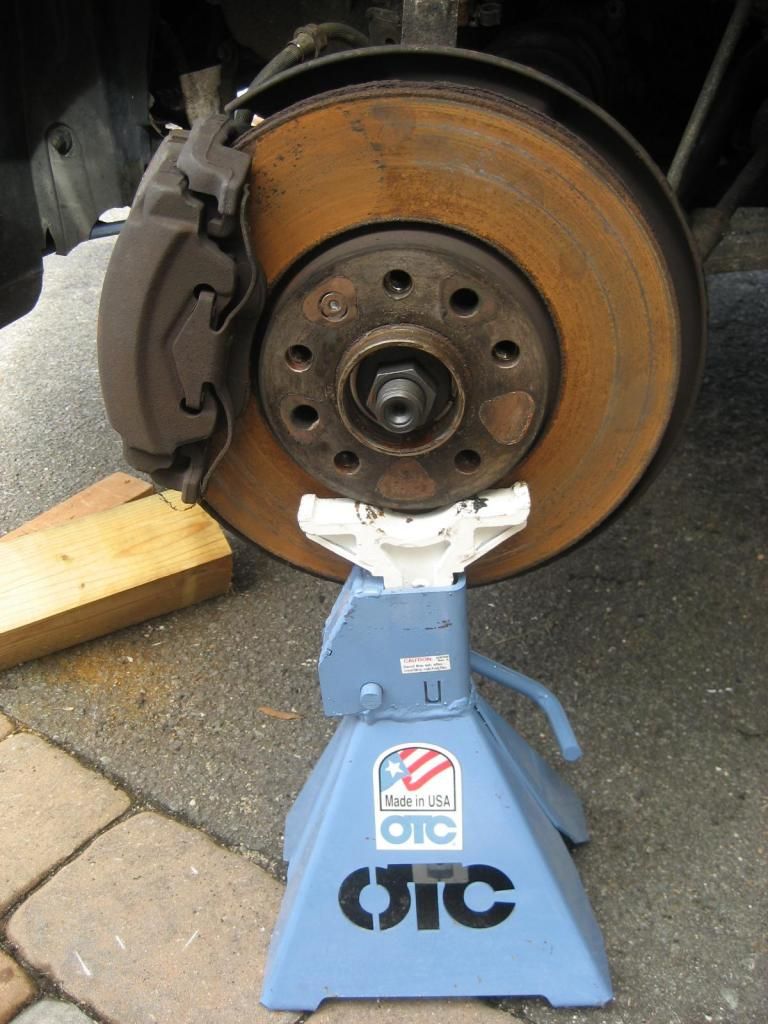
Once up, youll want to support the rotor/steering knuckle for when you remove the strut. I started with some heavy wood but then decided to use a jackstand on the axle.

IMG_3063_zps04a3798f.jpg


IMG_3084_zps1afa0d96.jpg


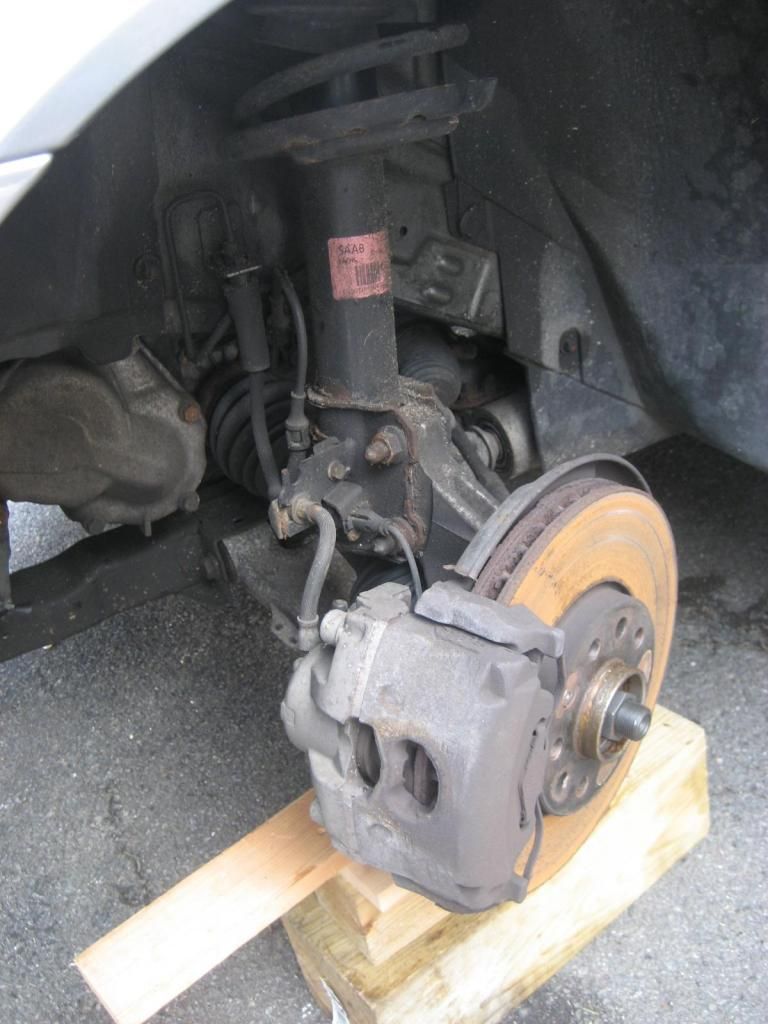
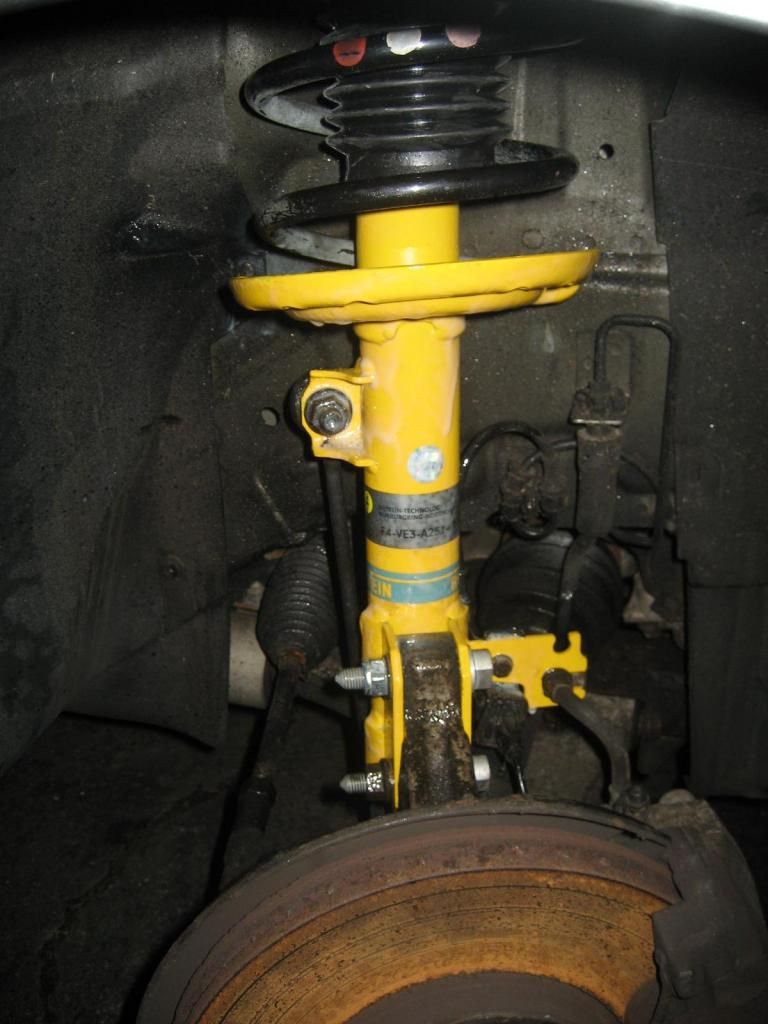
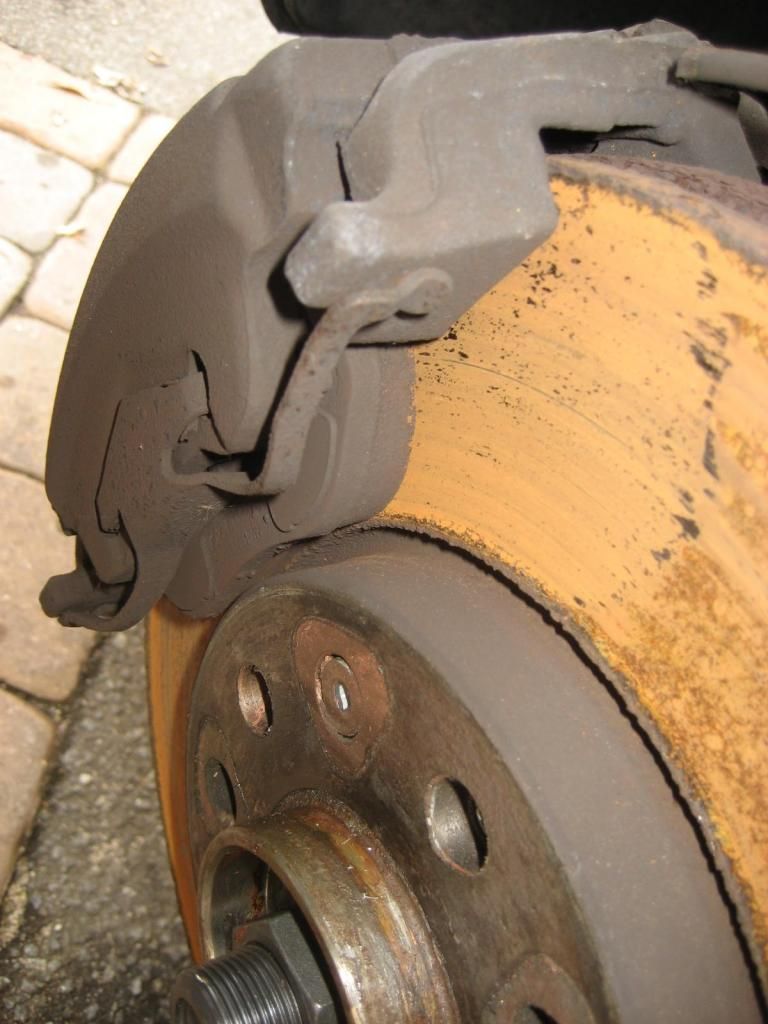
Note that my rotors have always rusted nearly instantly. These are original rotors and pads. Pretty good amount of pad left!

IMG_3064_zps4772ca49.jpg


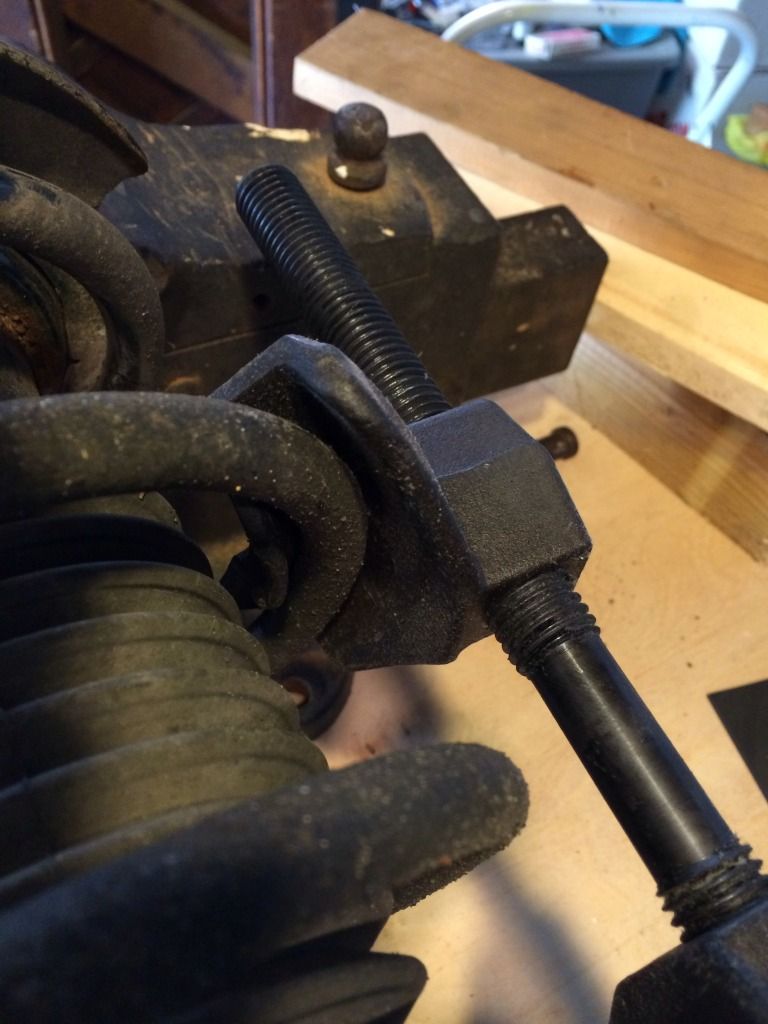
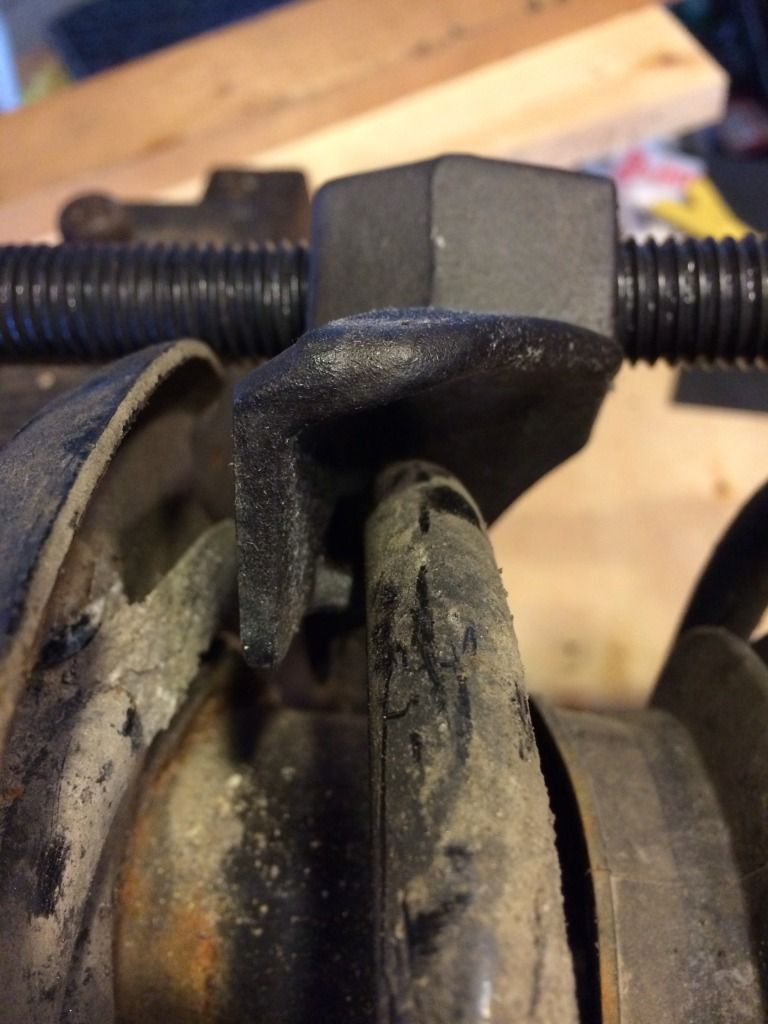
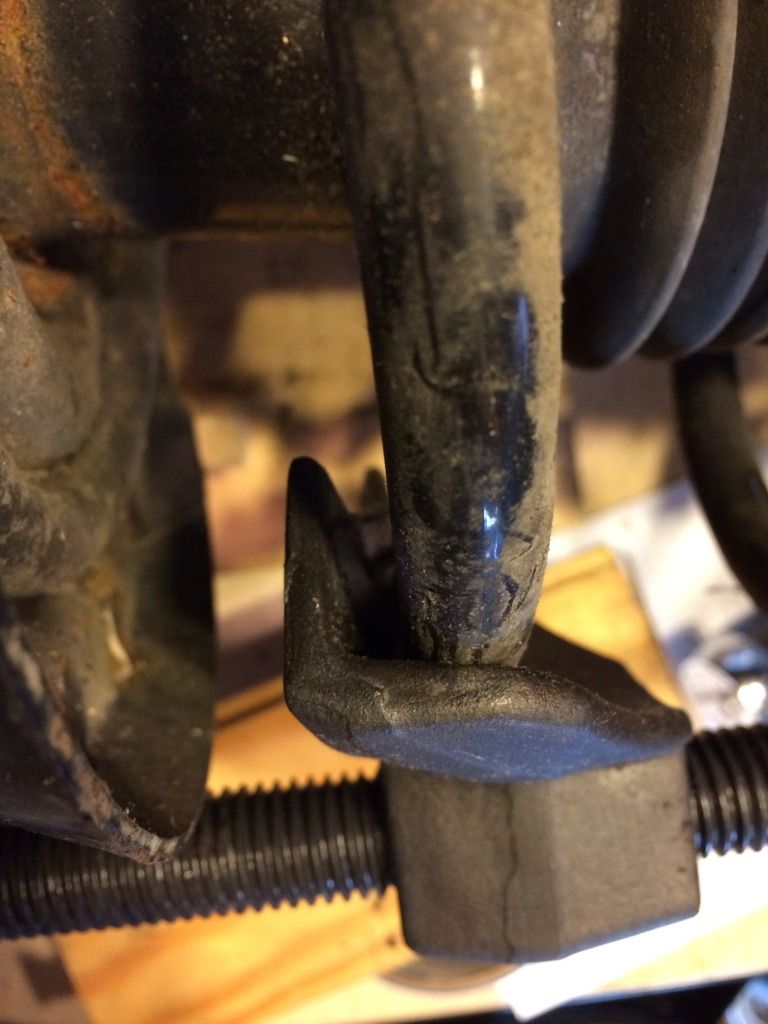
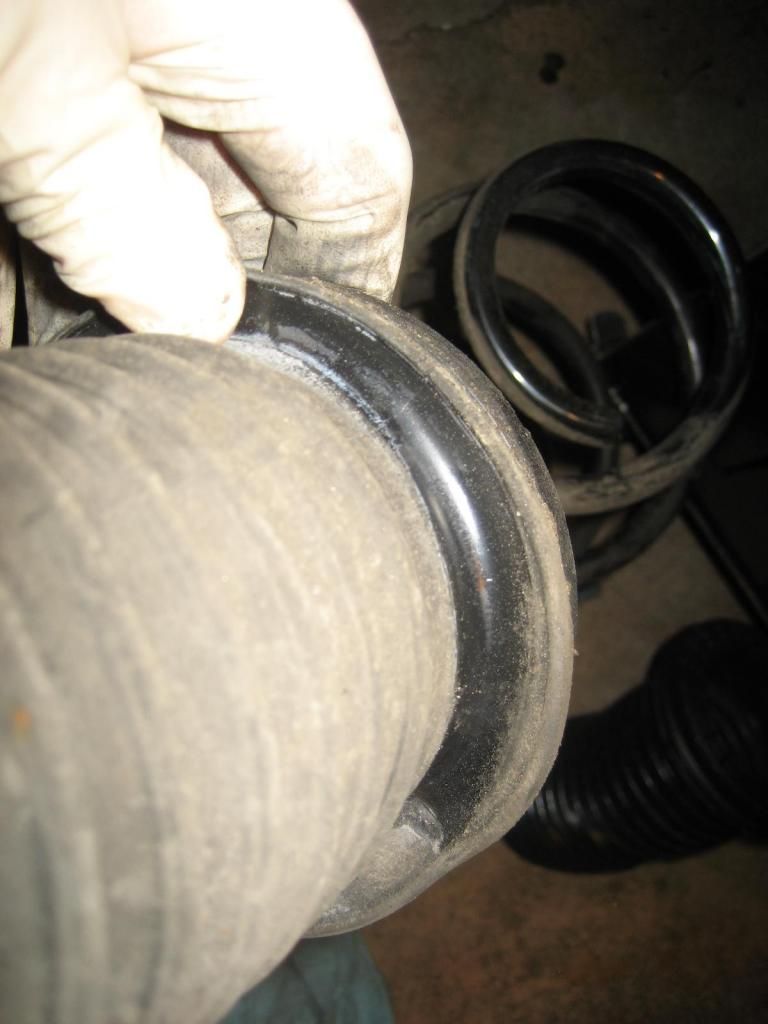
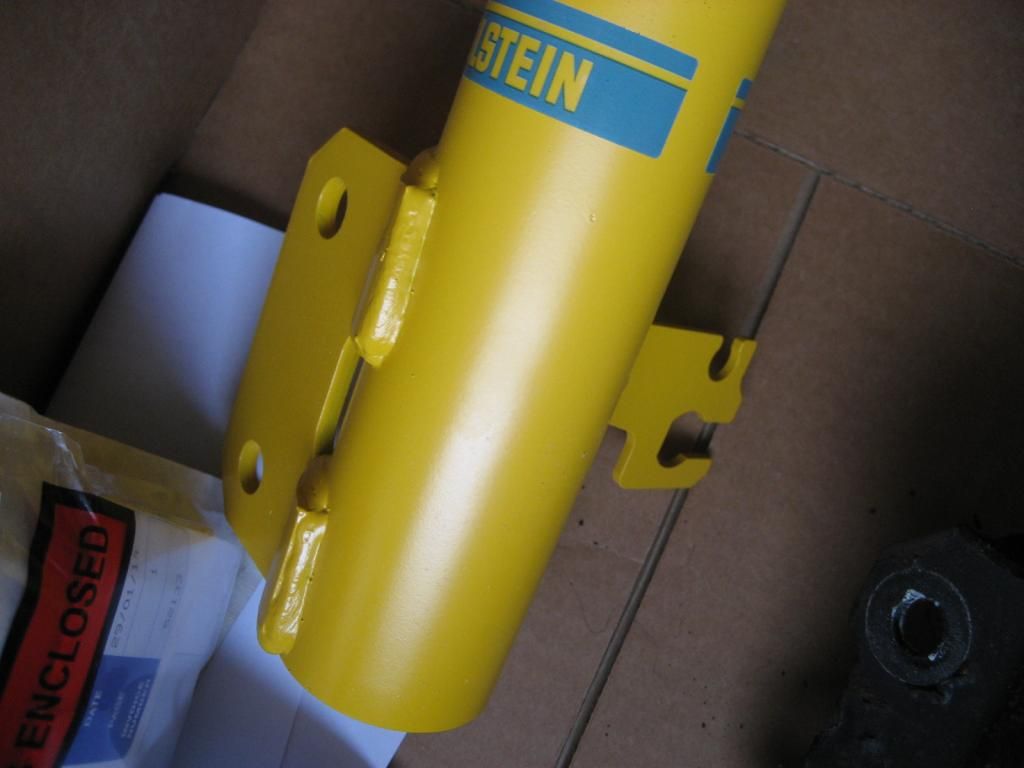
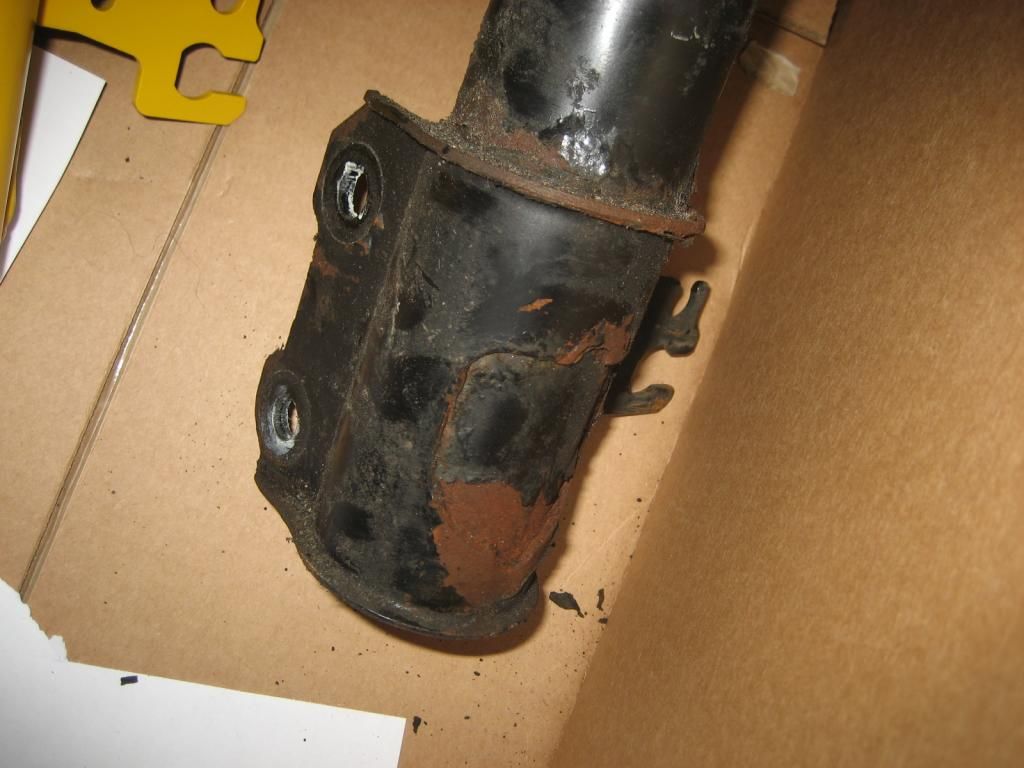
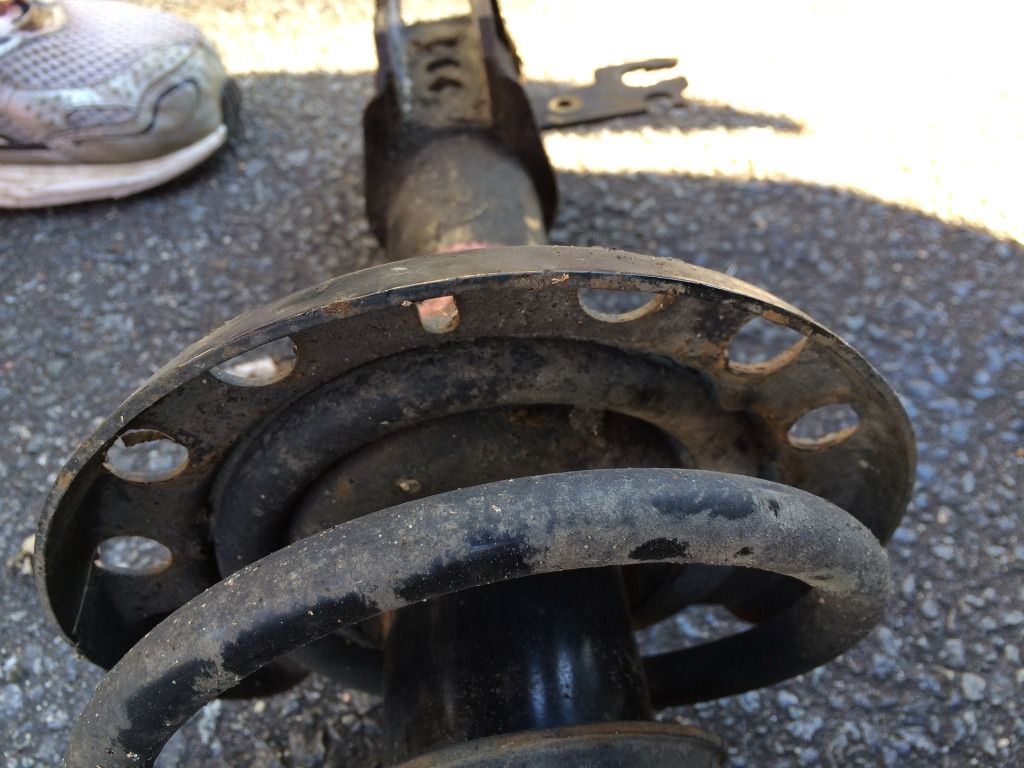
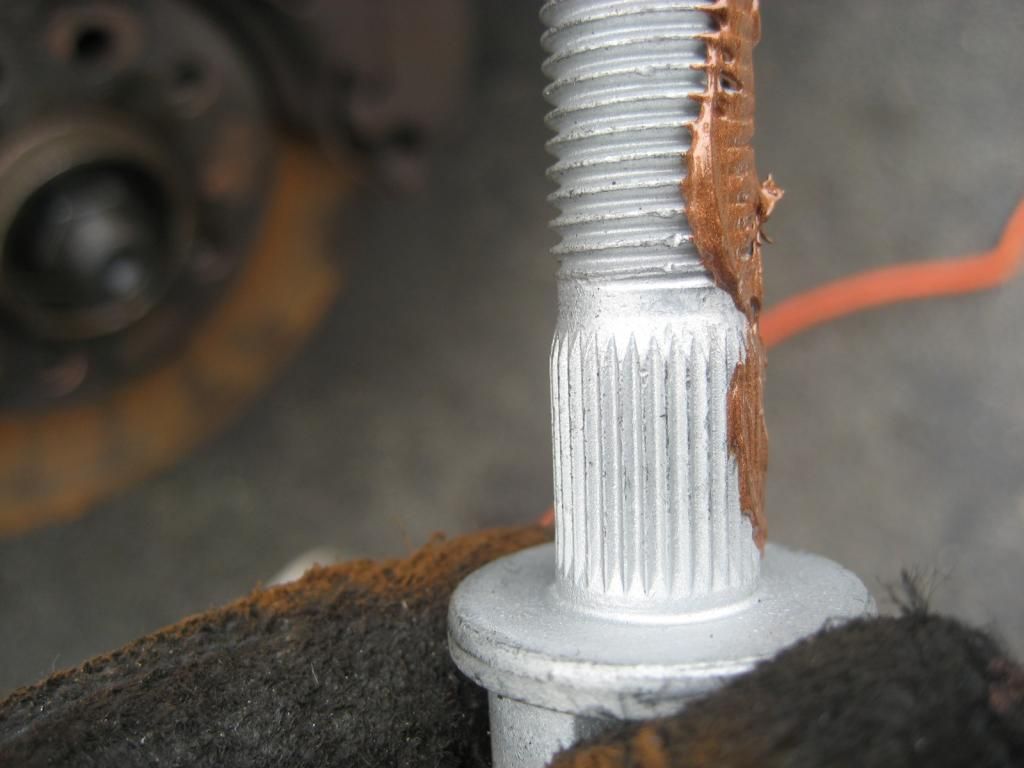
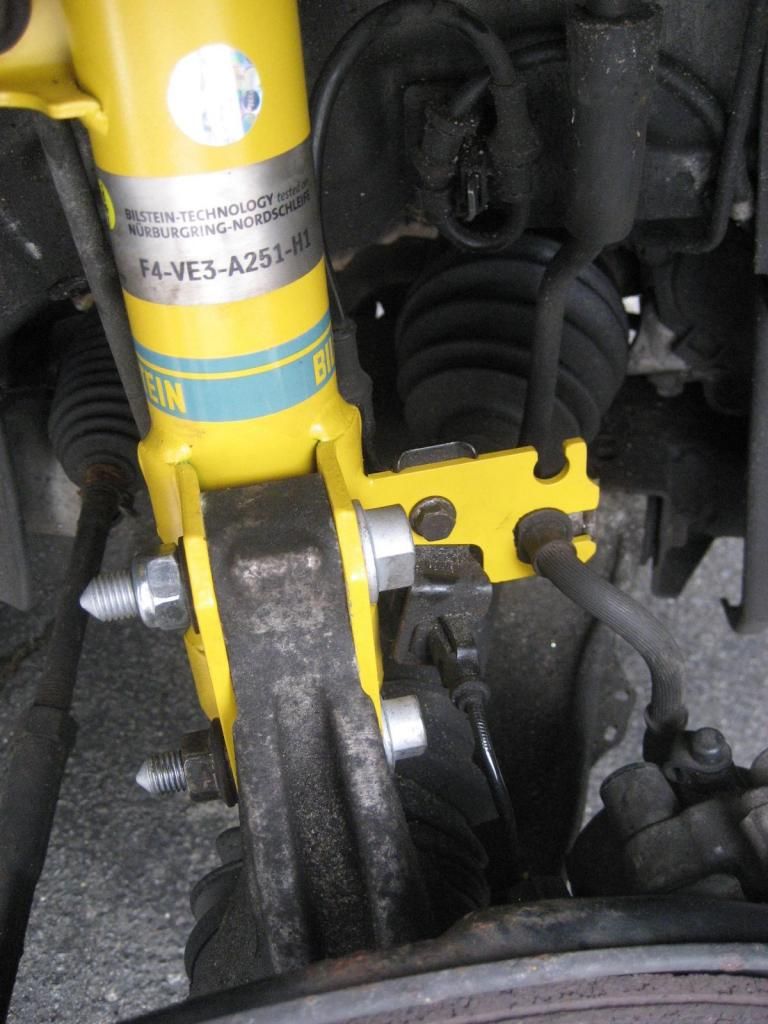
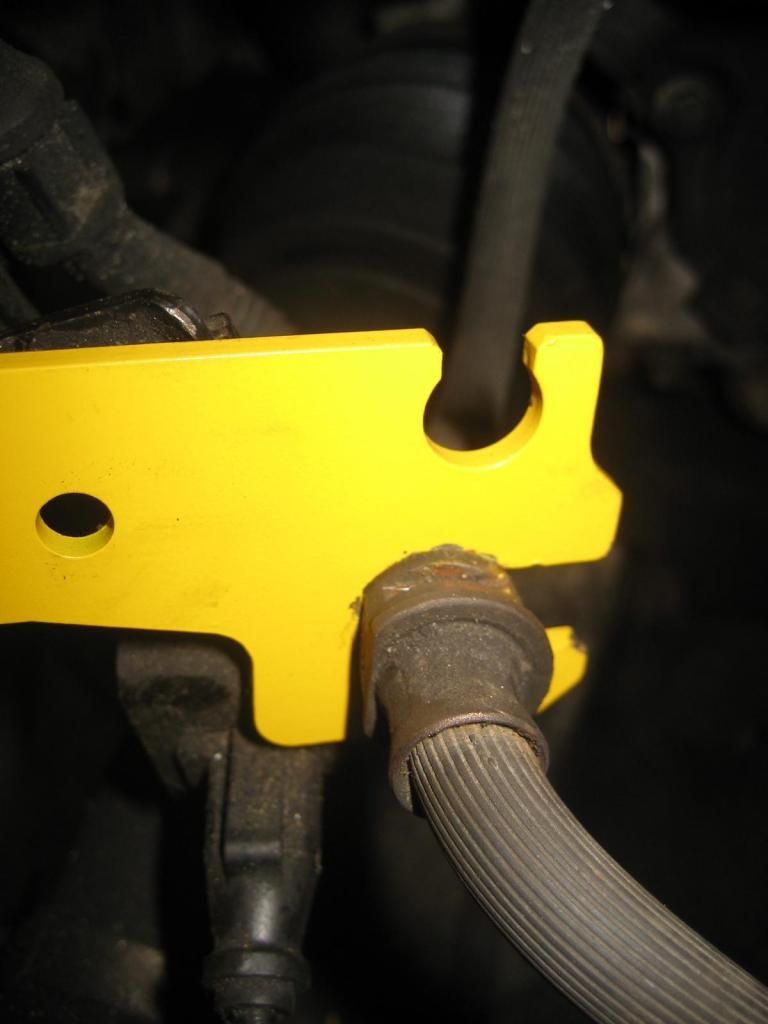
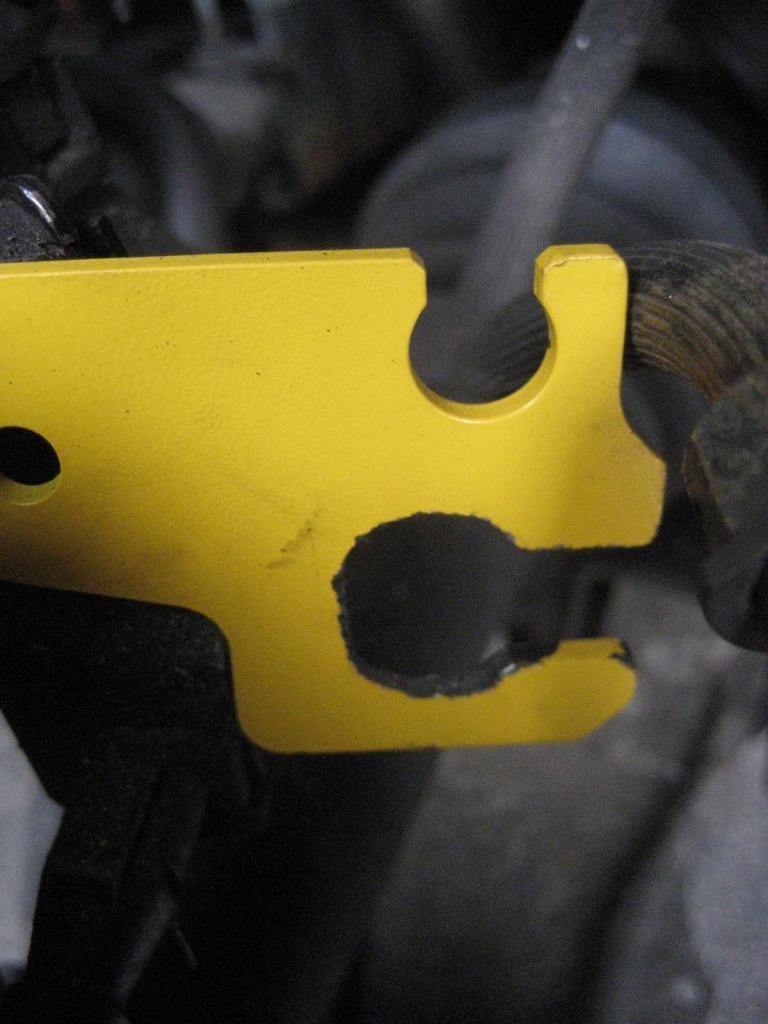
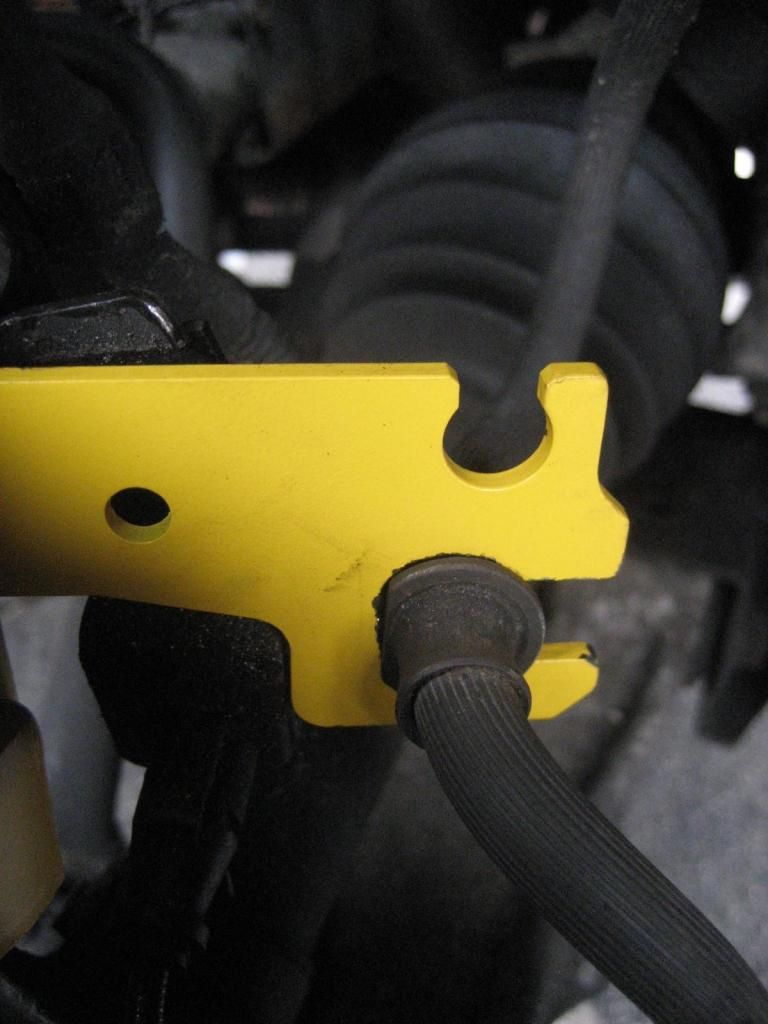
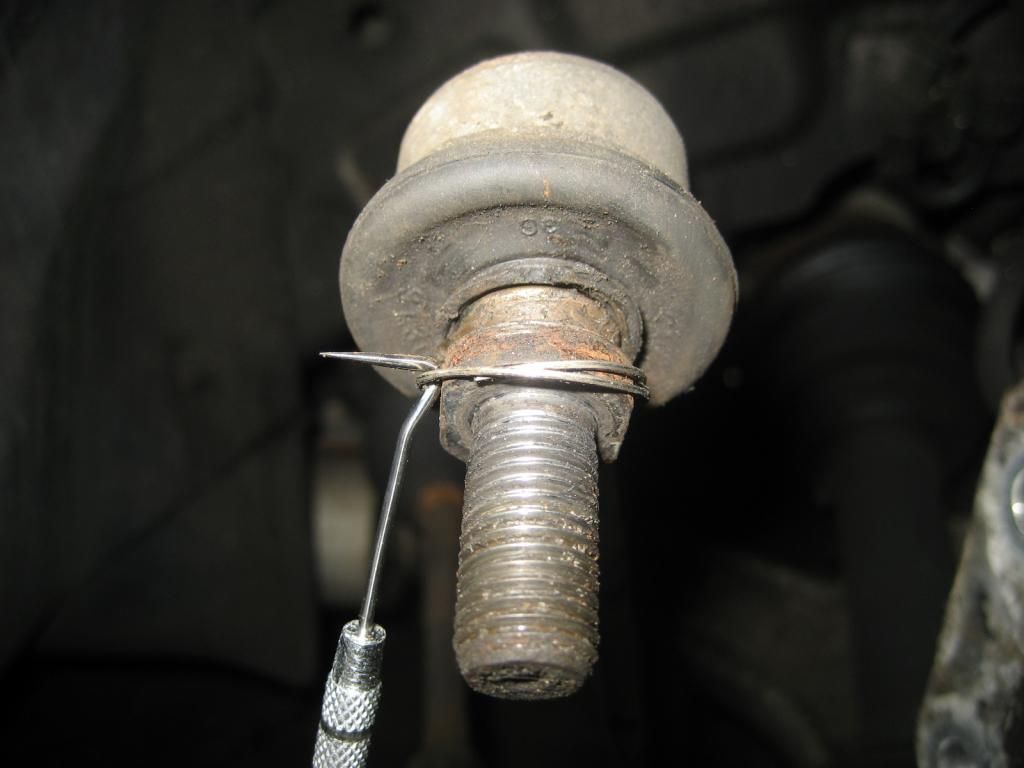
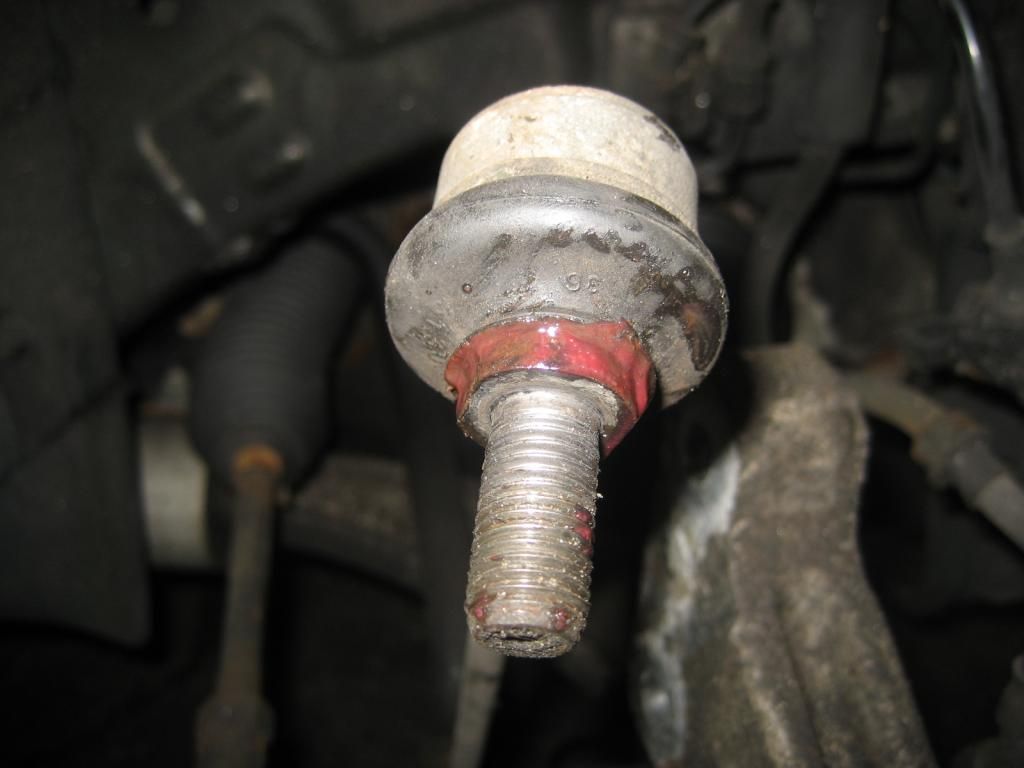
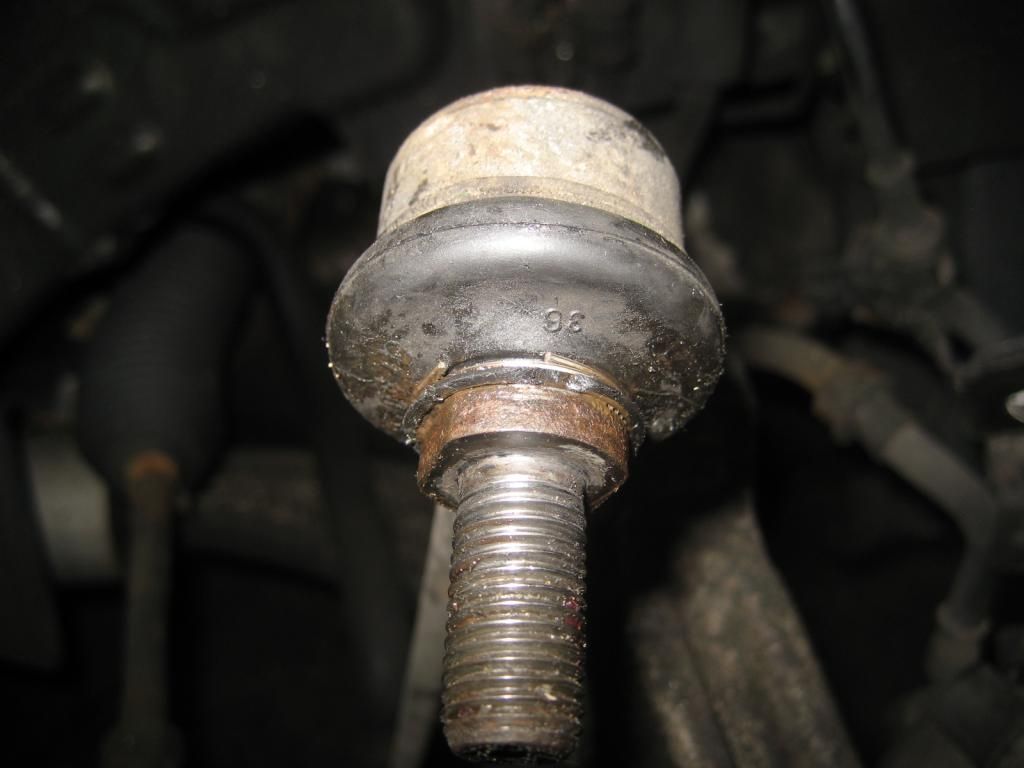
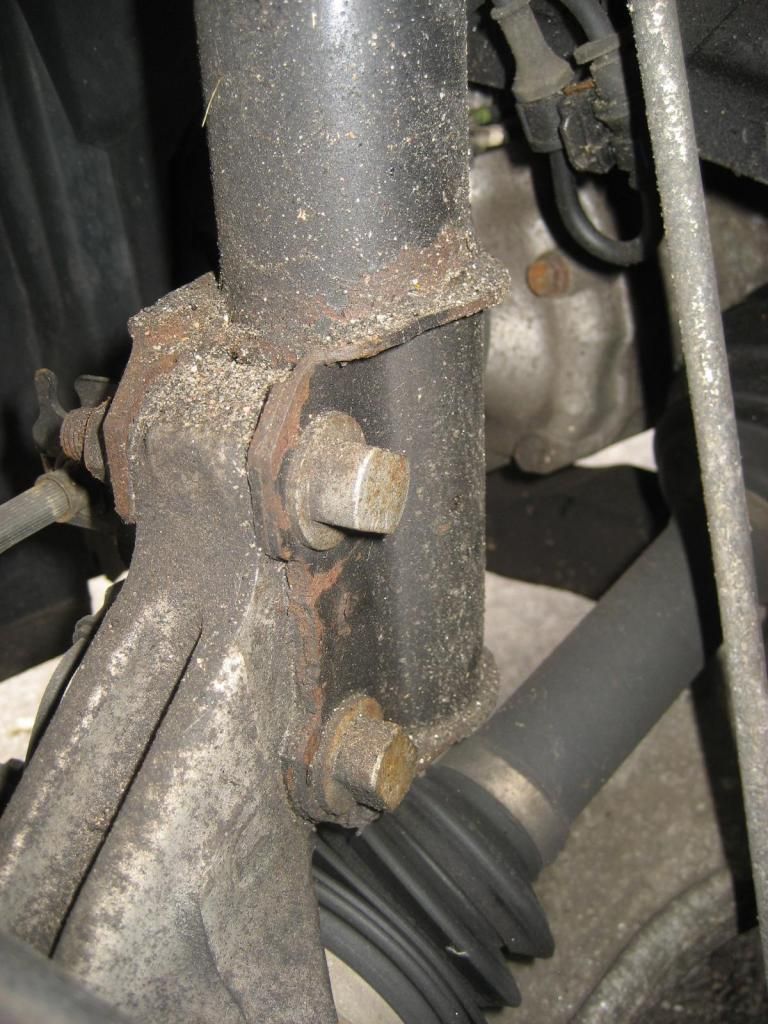
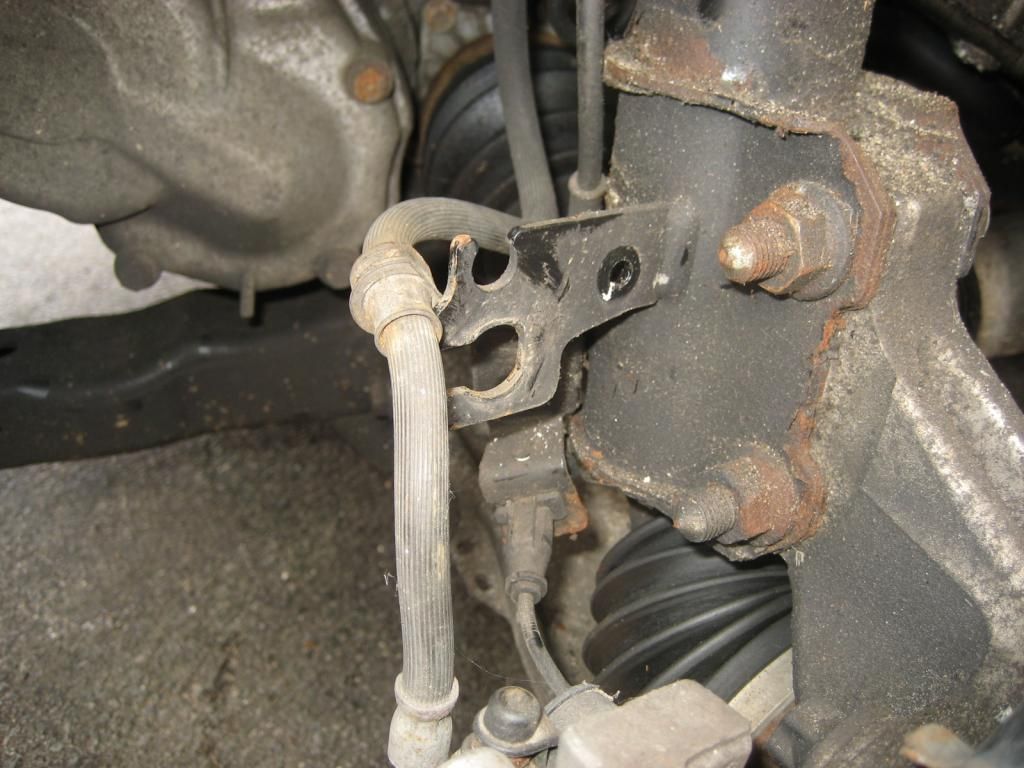
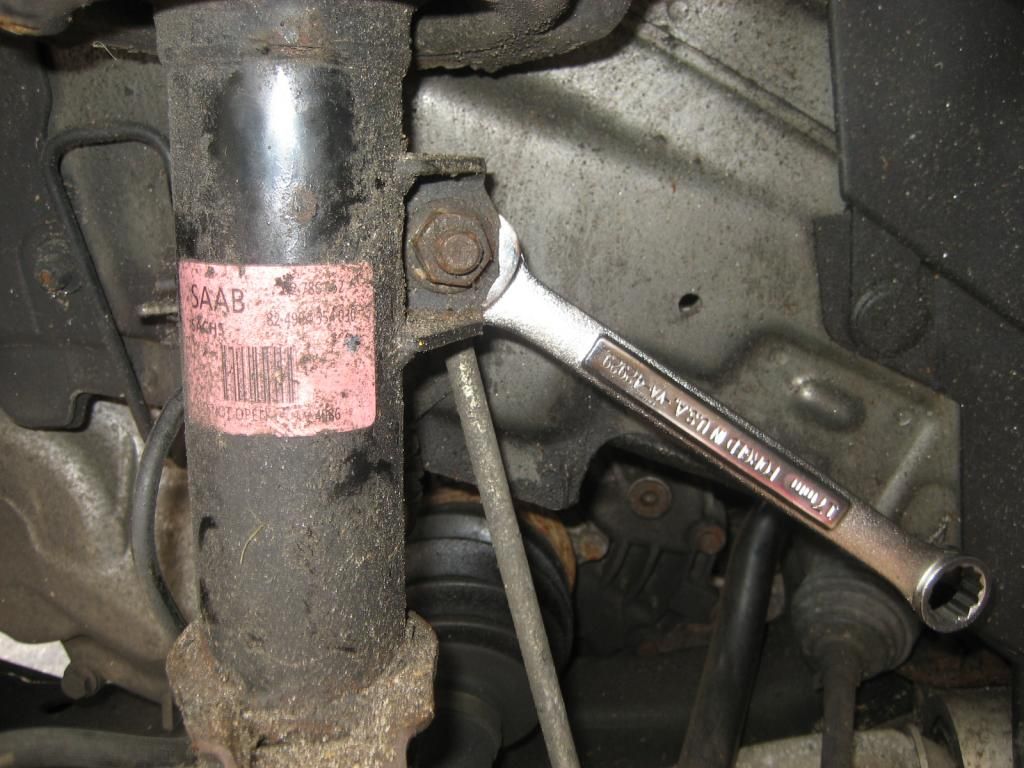
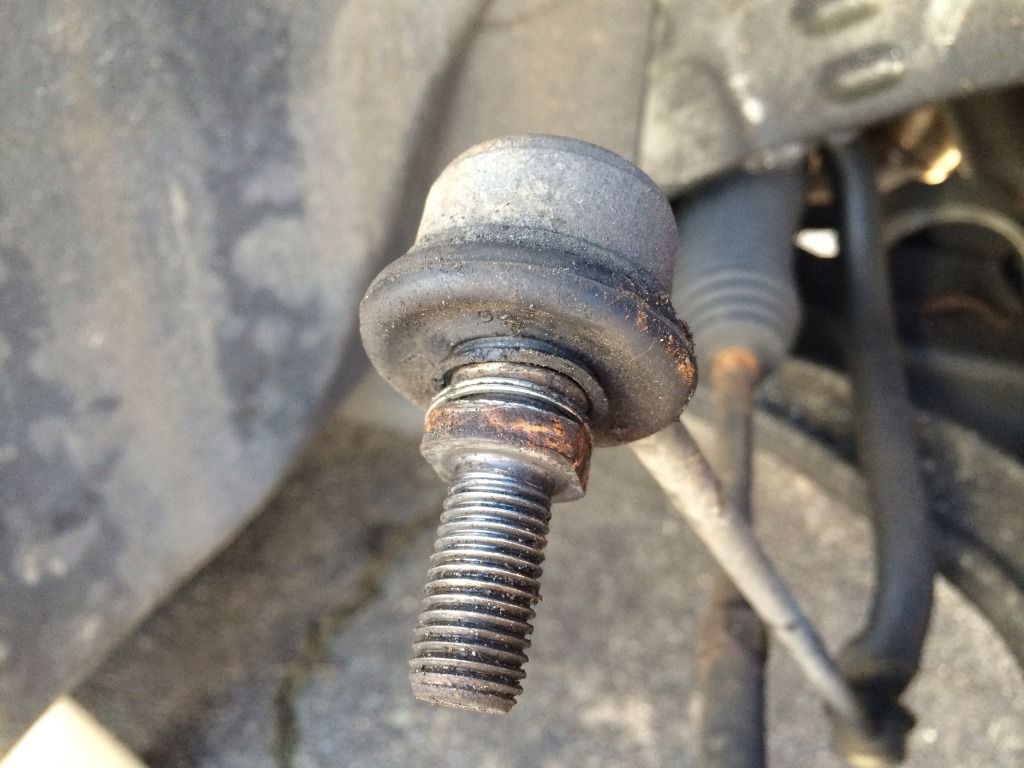
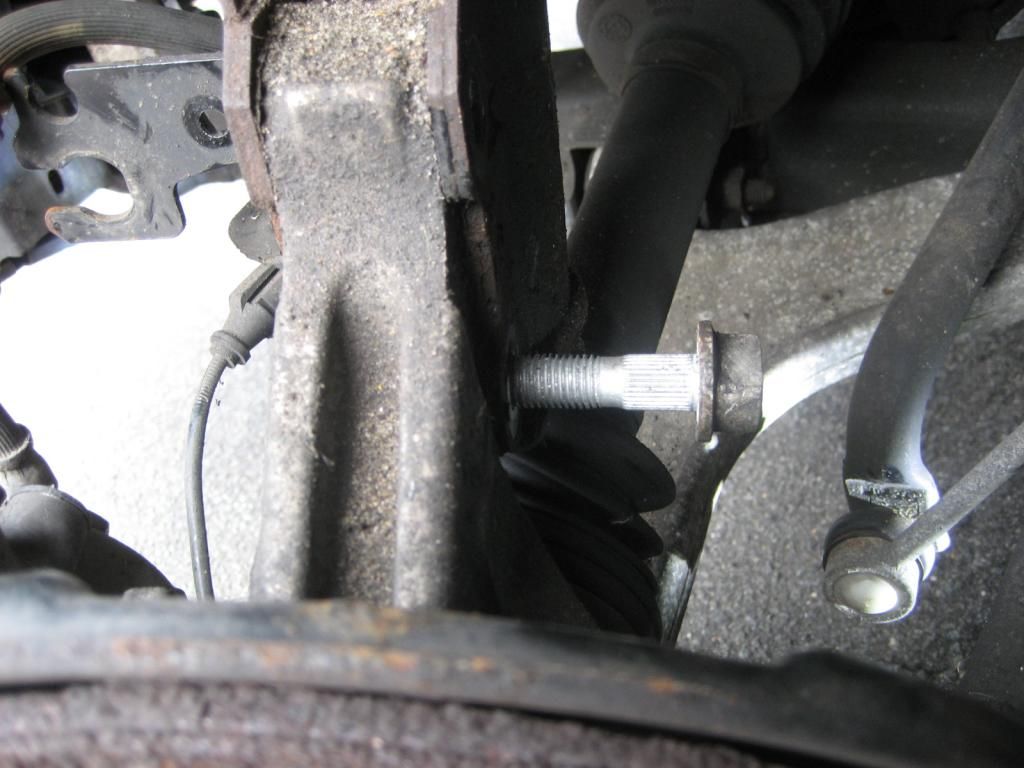
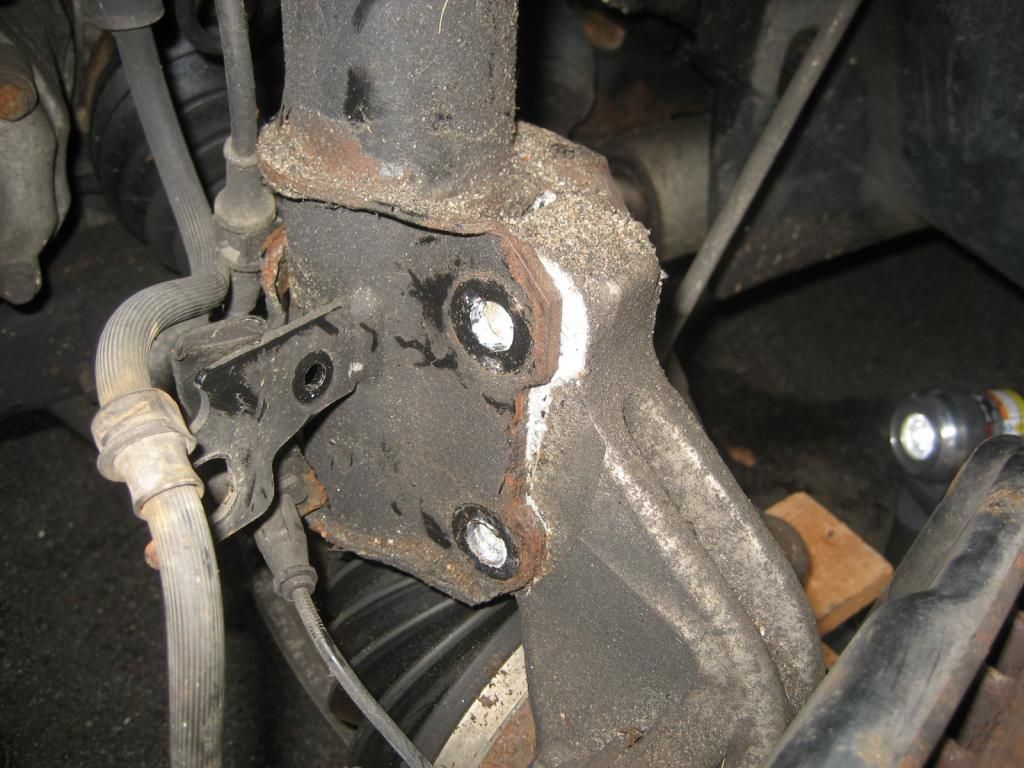
The job starts by removing the strut from the steering knuckle. It is two hammered in bolts (they have a funny head and using an impact, I didnt have to hold the head with a wrench), and then two 18mm nuts. Youll also need to remove the brake line and ABS sensors from the bracket on the strut, and the sway bar link on the side of the strut, which uses the same 18mm nut. That sway bar link needs a wrench (17mm) that is very thin to keep the ball joint from spinning. I knocked one boot off by accident due to using a thick wrench.

IMG_3067_zps38f9b074.jpg


IMG_3068_zpsb3cac78d.jpg


IMG_3069_zps2e801301.jpg


IMG_3074_zpsf87532da.jpg


Be careful!!

32326B2D-2180-4A21-B2AA-CAF13CB4F93B-22400-0000118AE8A0AEED_zps356c5ac2.jpg


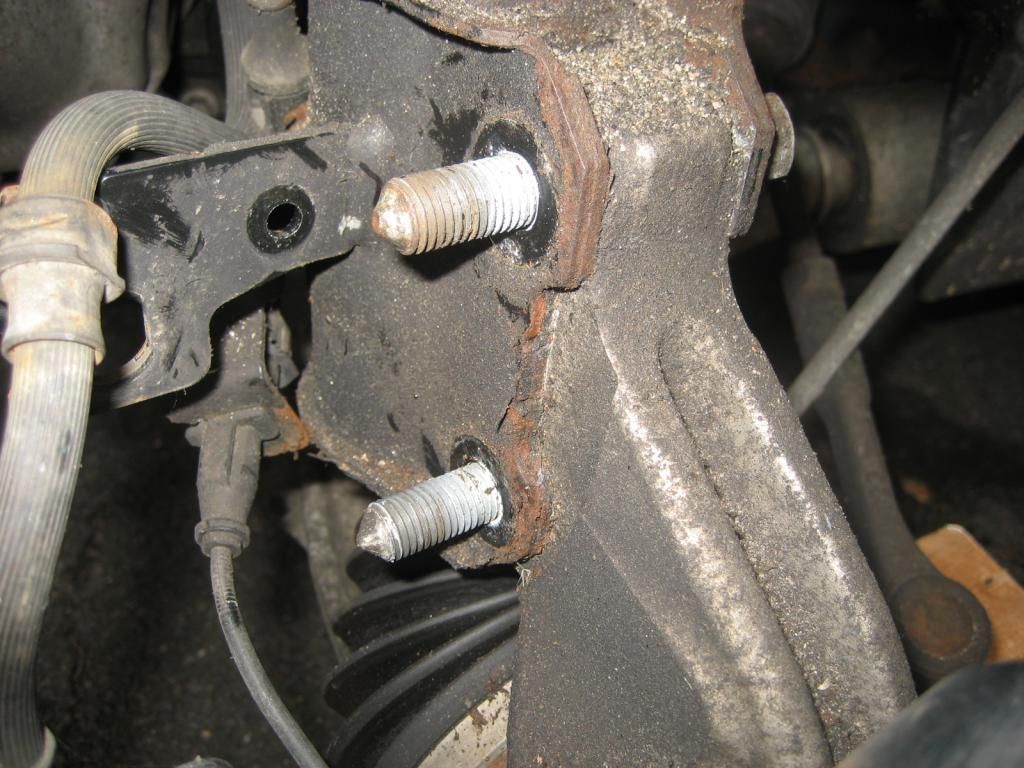
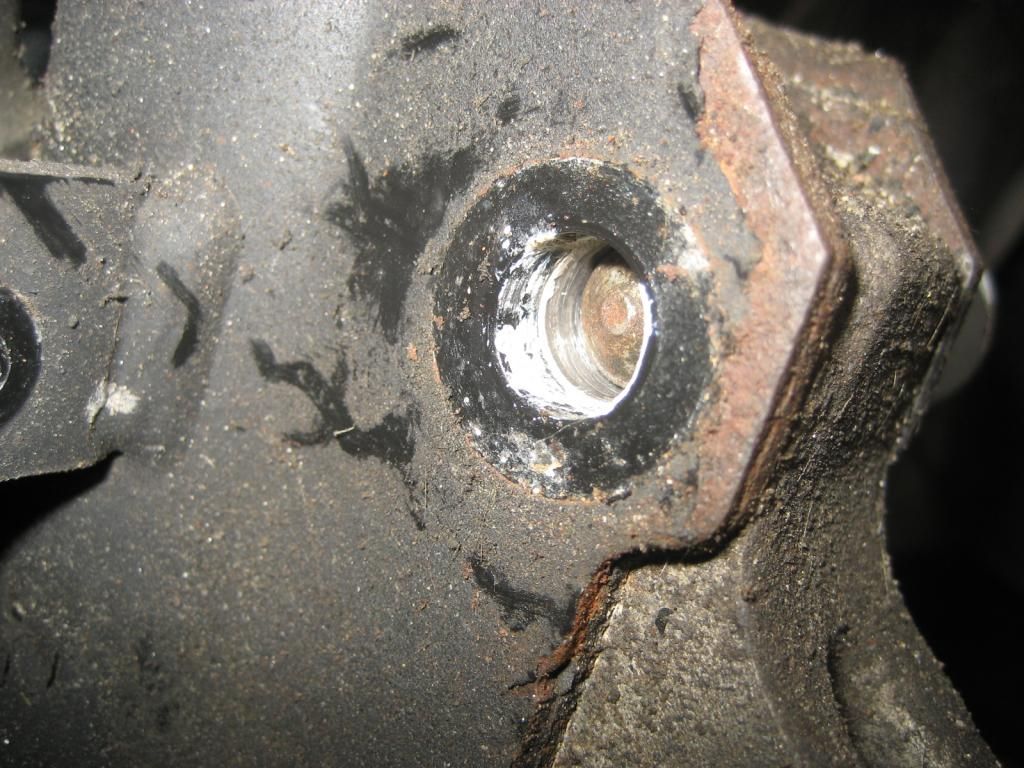
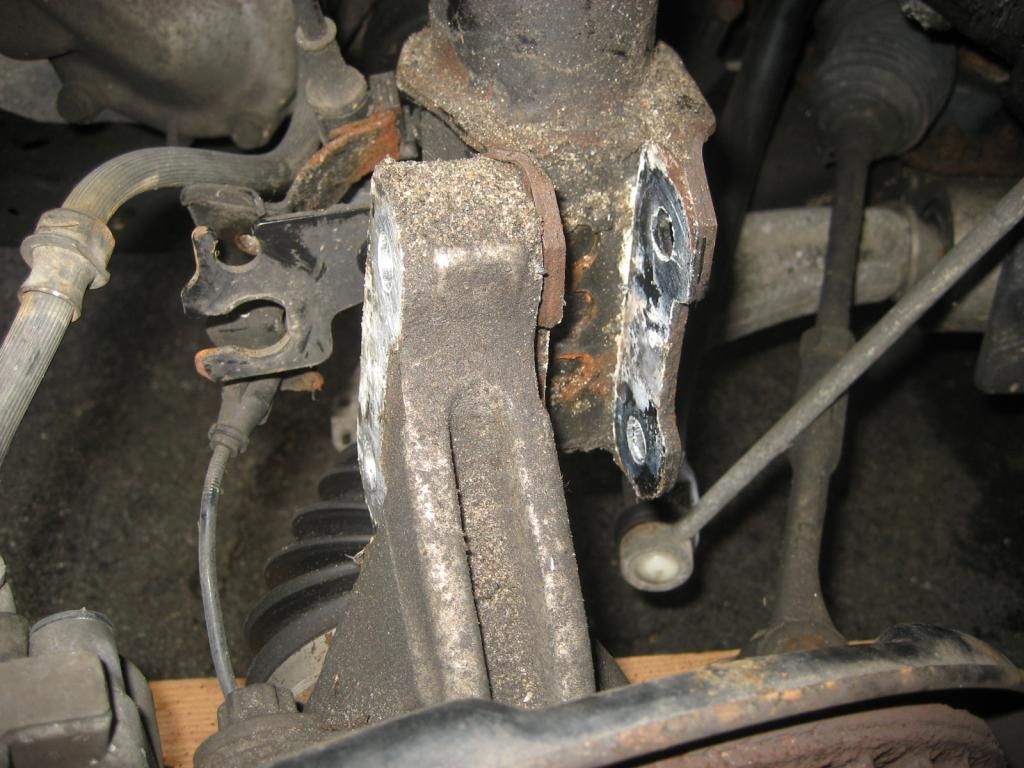
When the steering knuckle nuts are off, then use a hammer to knock the bolts to the point where the threaded end is no longer sticking out.

IMG_3076_zps63dccc94.jpg


IMG_3078_zps77caa910.jpg


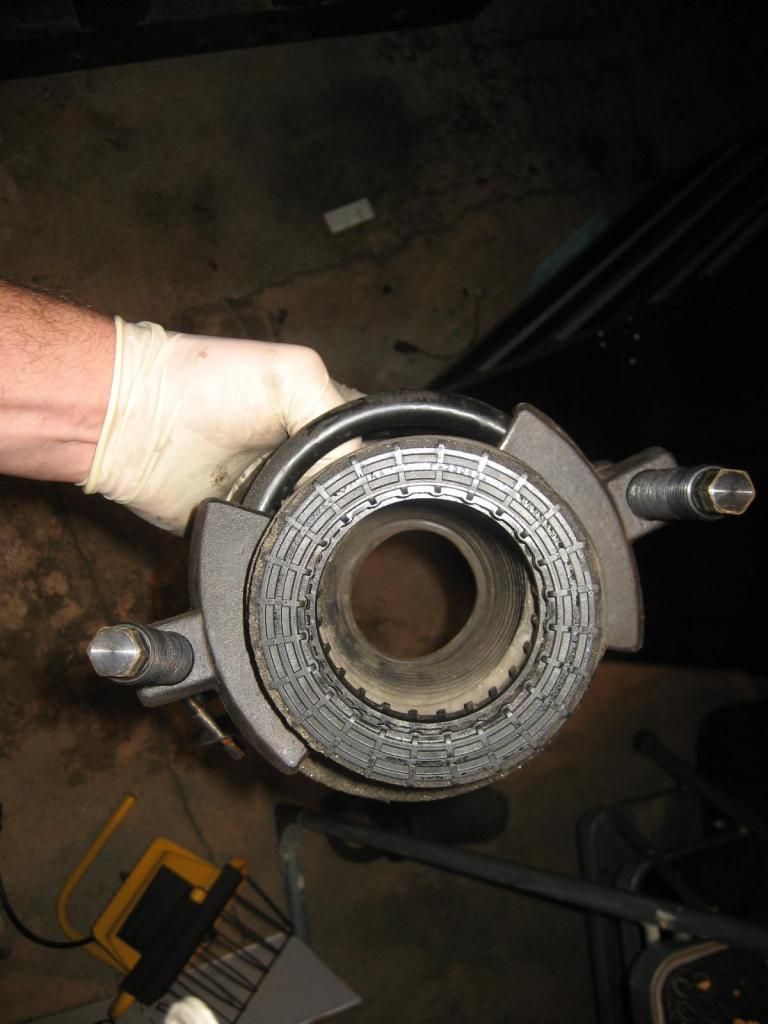
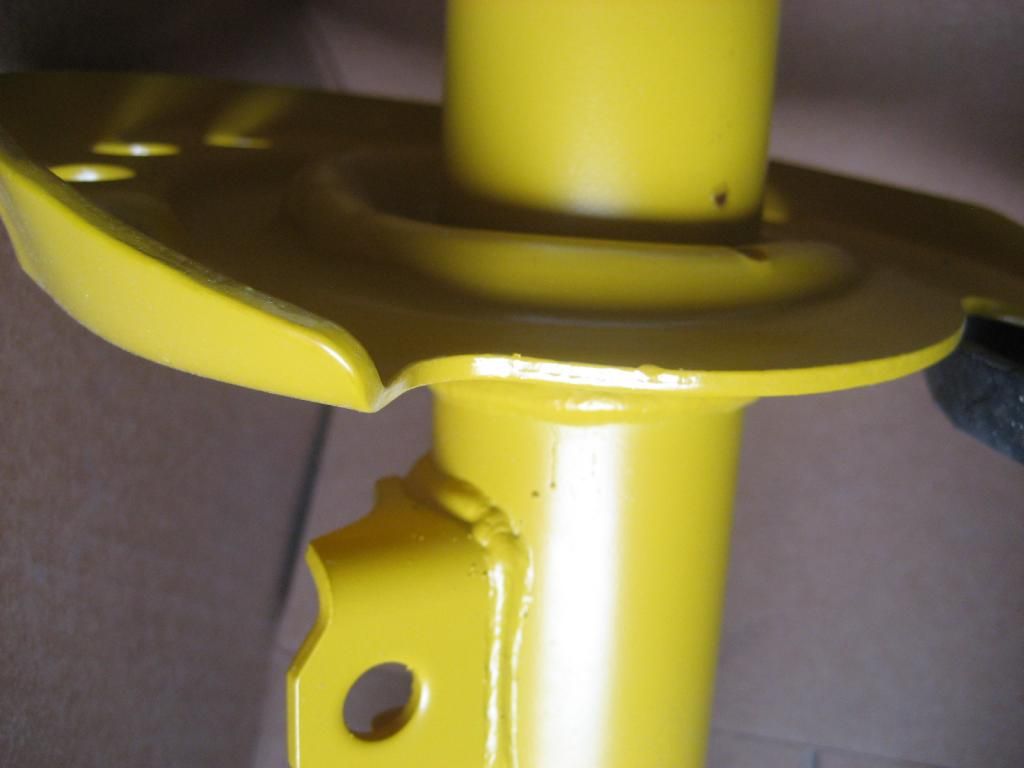
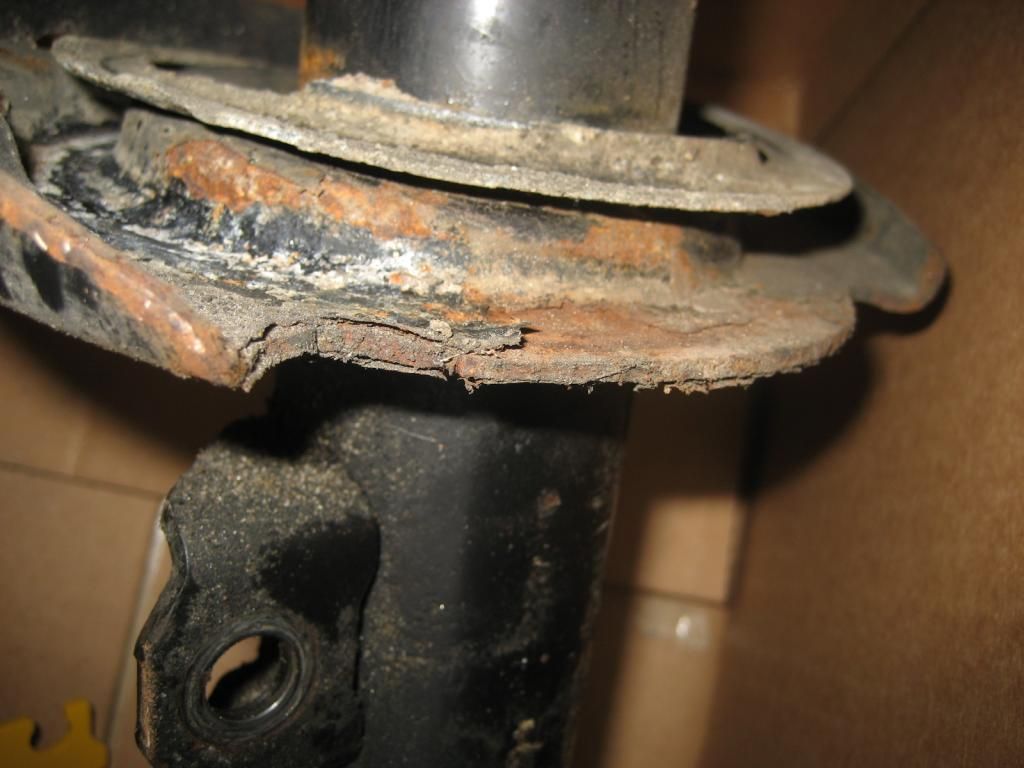
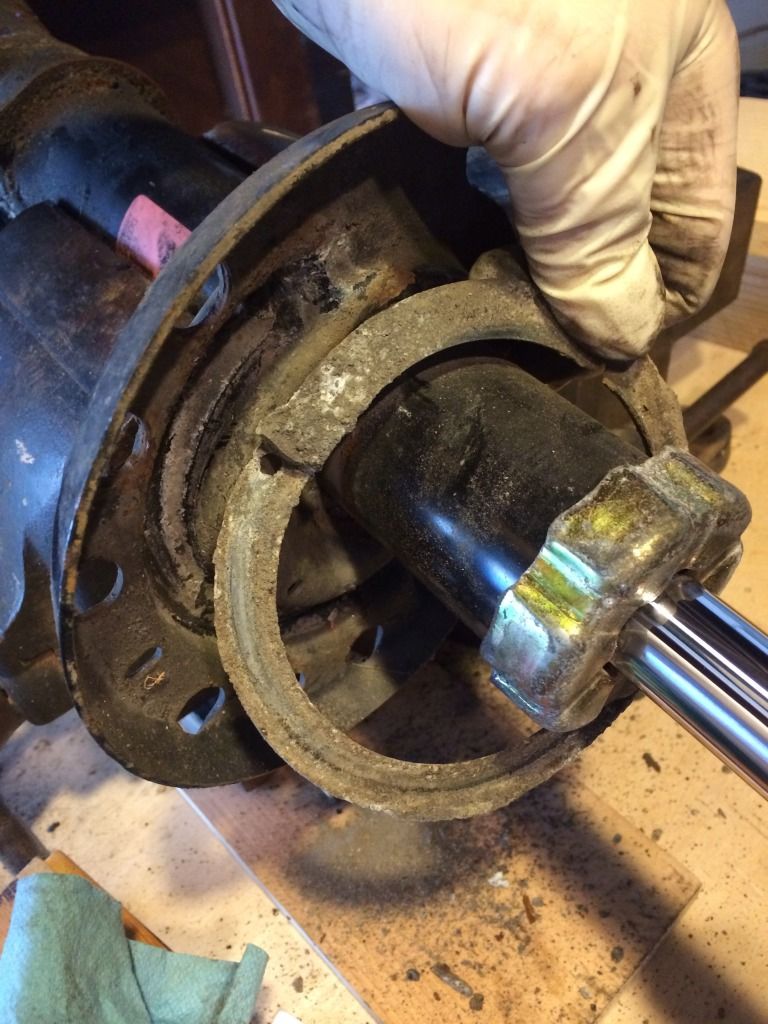
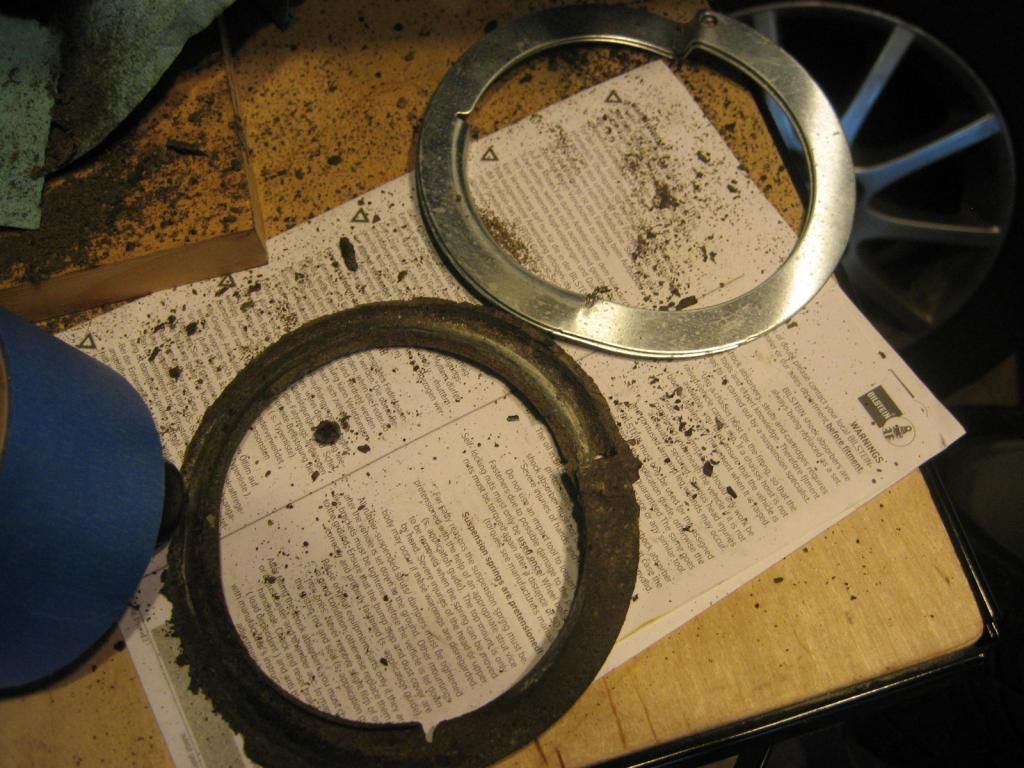
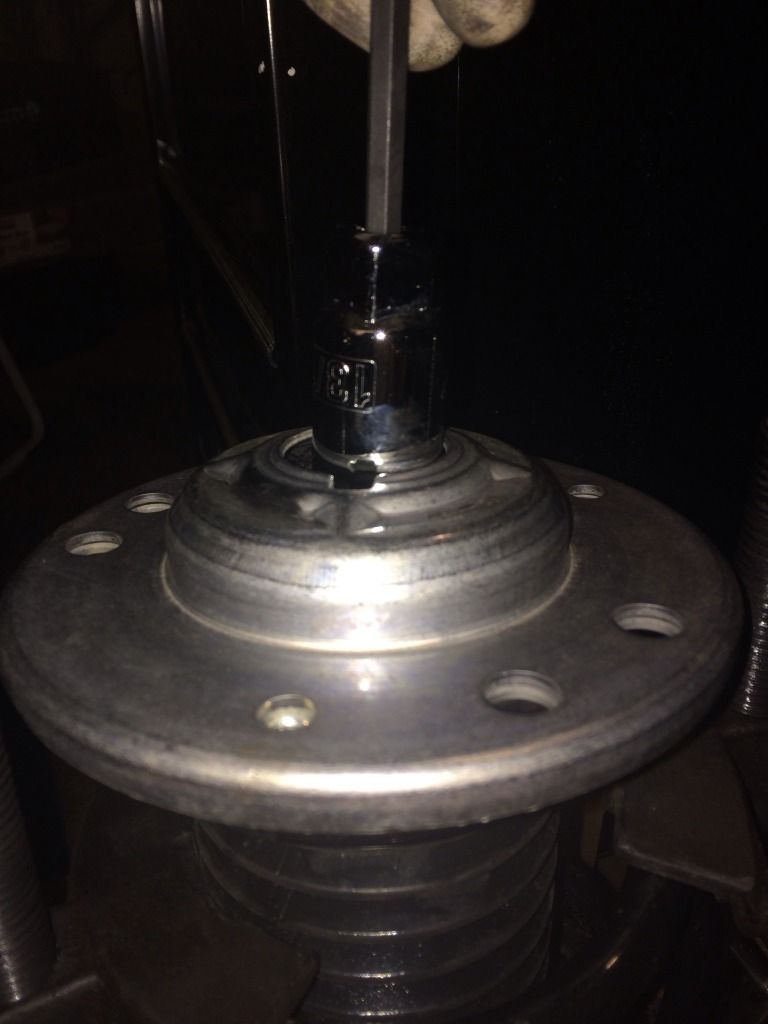
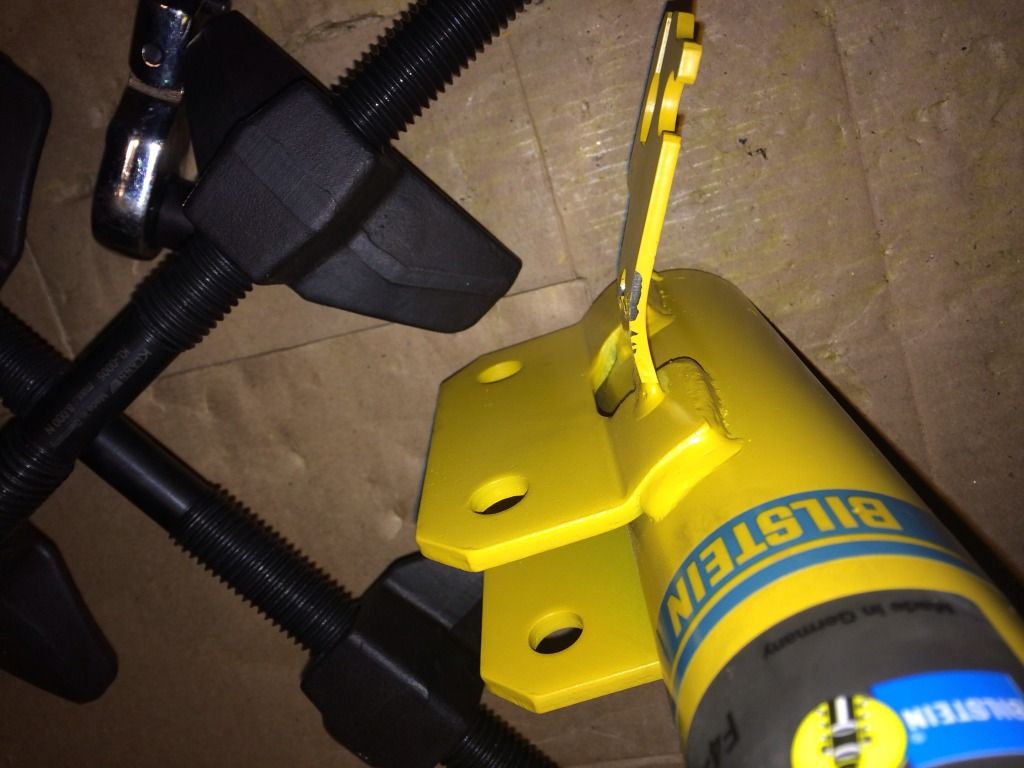
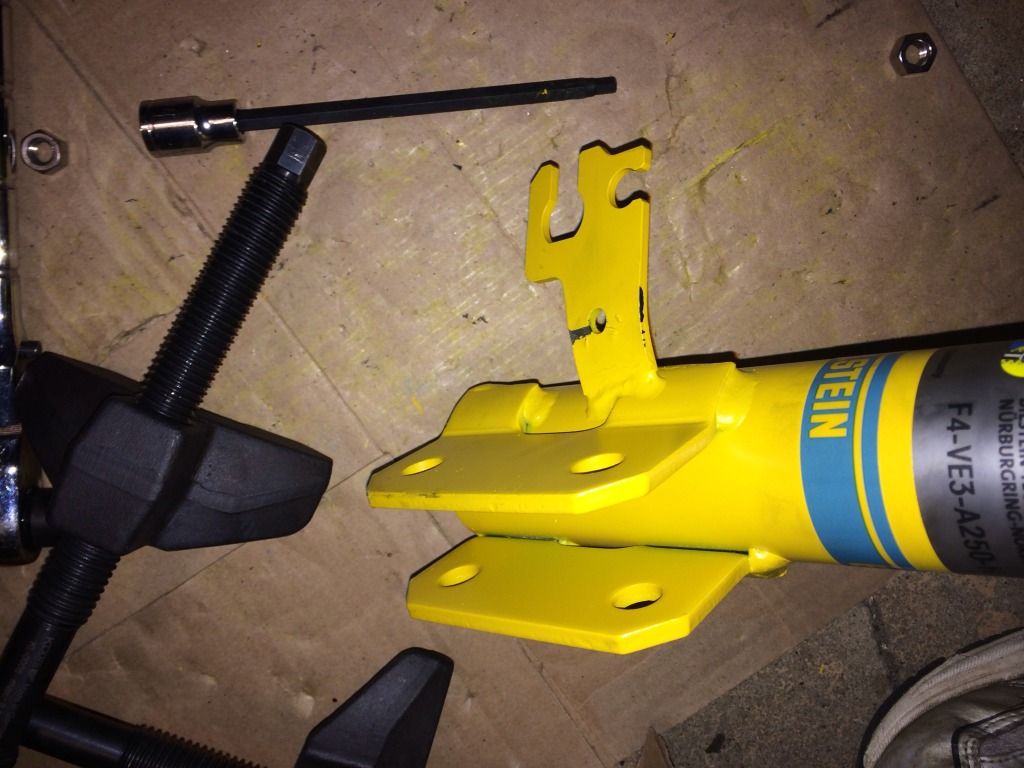
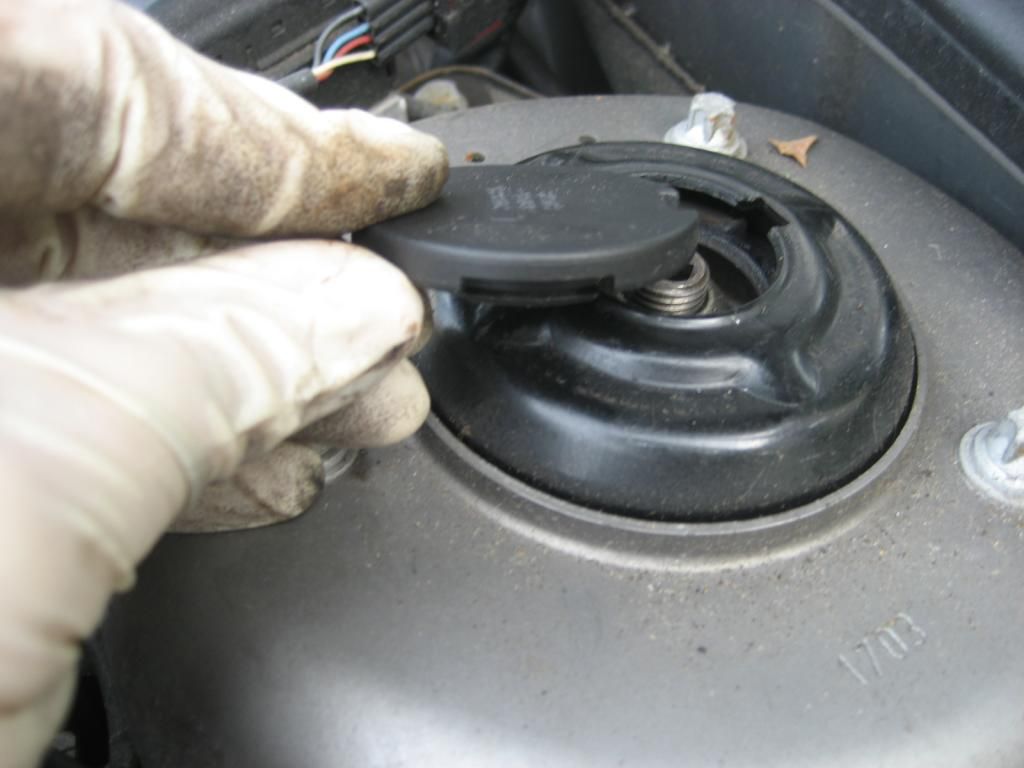
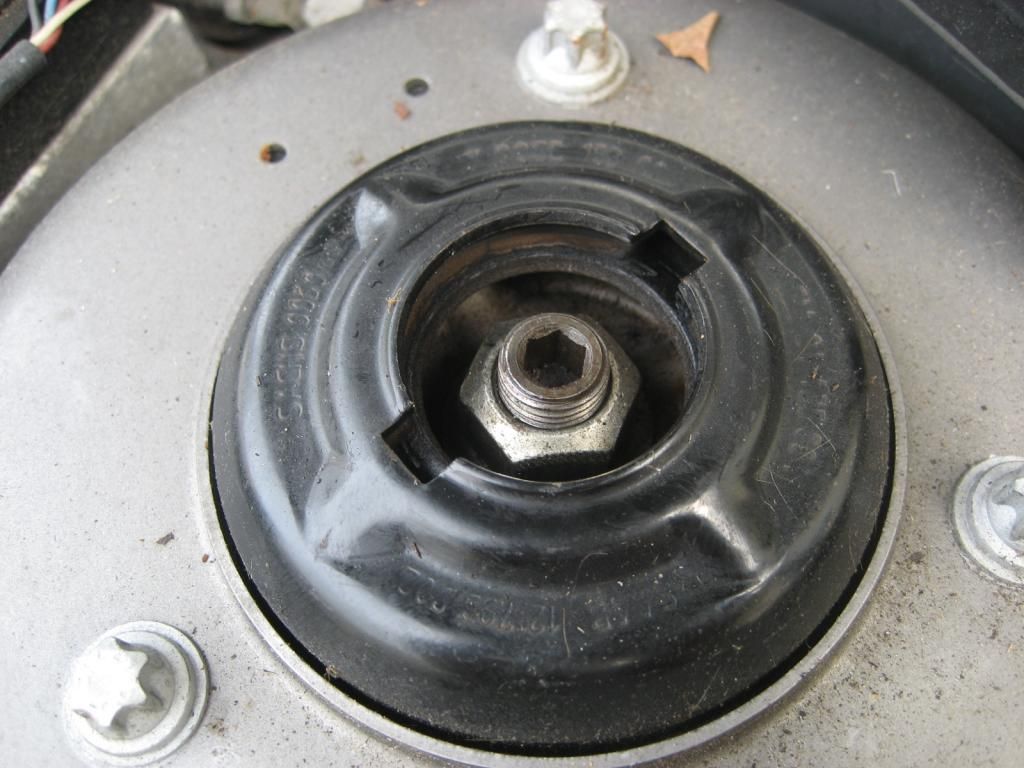
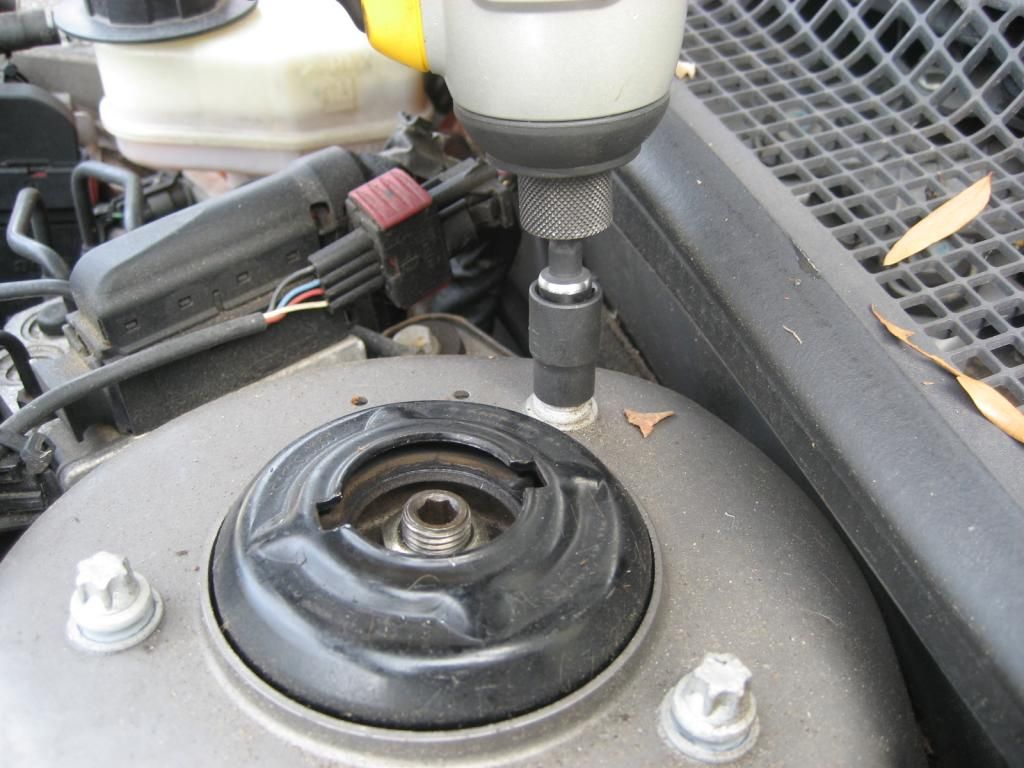
After the items below are removed and the bolts hammered flush, go up top and remove the mount covers (if desired to put them someplace safe). Youll need a star socket to remove the bolts. I used an impact to loosen them, but the torque isnt that great so hand tools are fine, the impact just spun them out faster. I removed two and left one with just a bit of thread.

IMG_3070_zps01d31739.jpg


IMG_3072_zpsdf6d7f6e.jpg


IMG_3073_zps2a297d45.jpg


Next, you can separate the strut from the knuckle, and then move it to a convenient spot.

IMG_3079_zps3e331390.jpg


IMG_3080_zpsa0c046f6.jpg


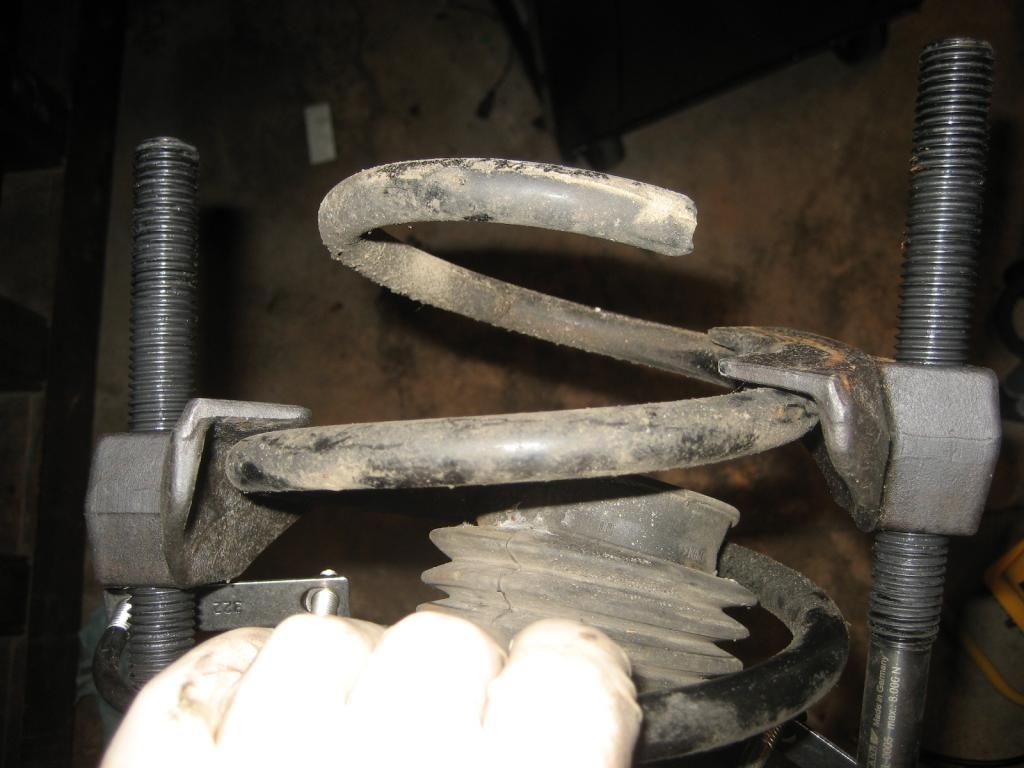
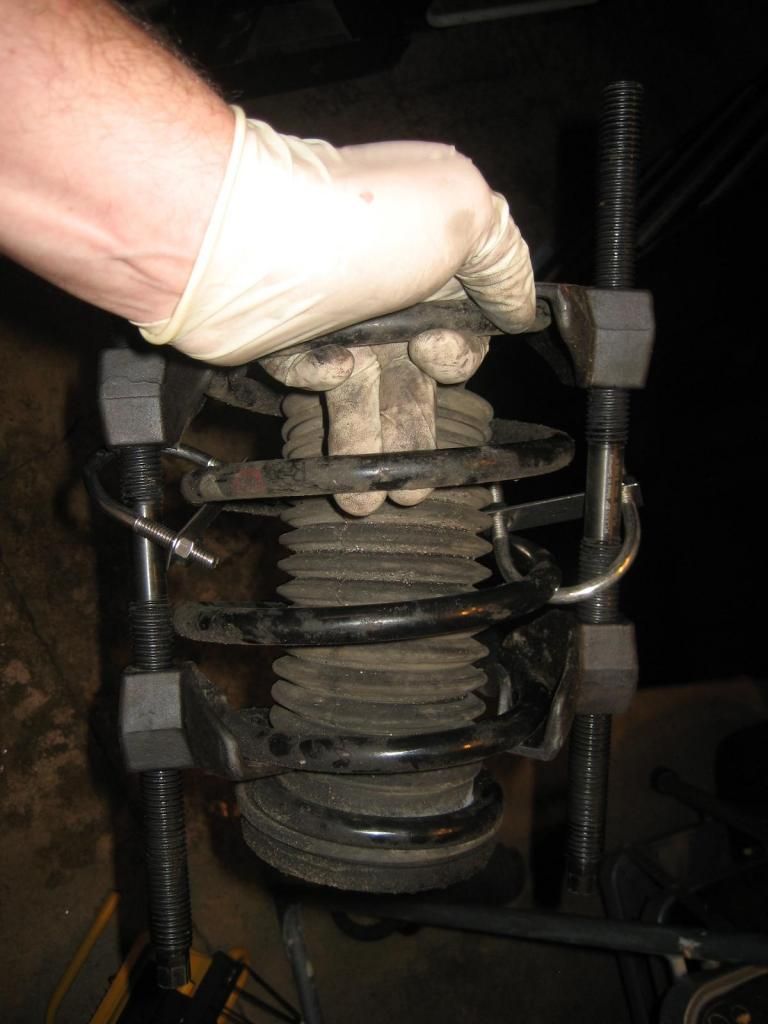
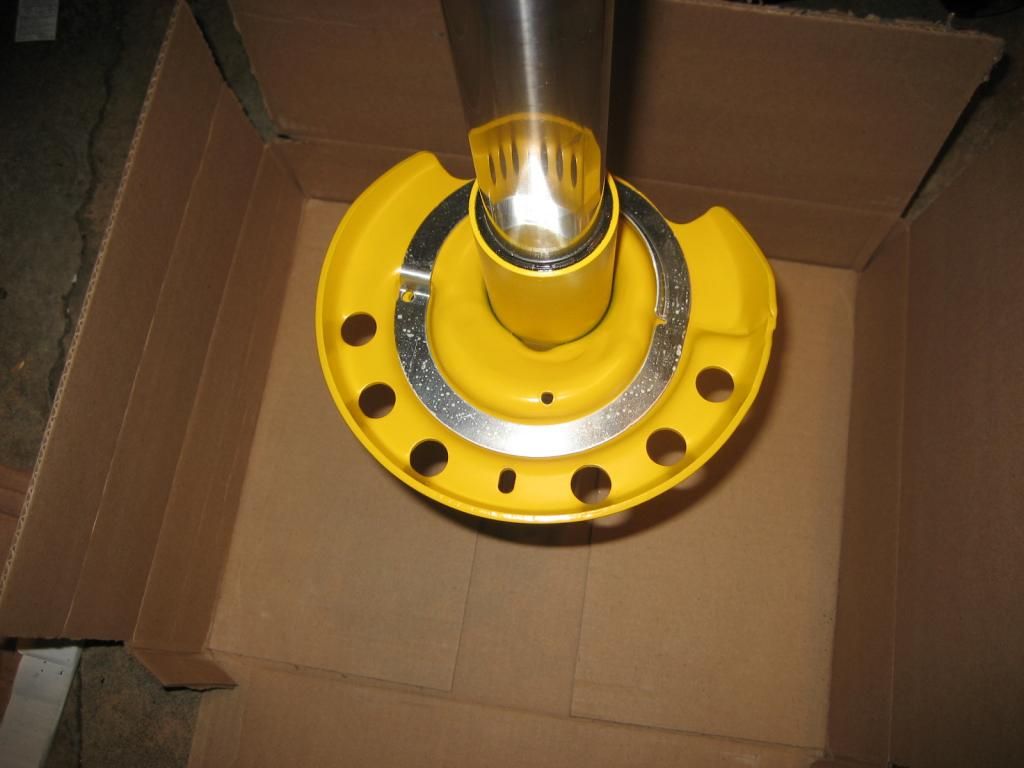
Supporting the strut from the bottom, then remove the final bolt from up top and pull it out.

IMG_3081_zps6e7d0e5e.jpg


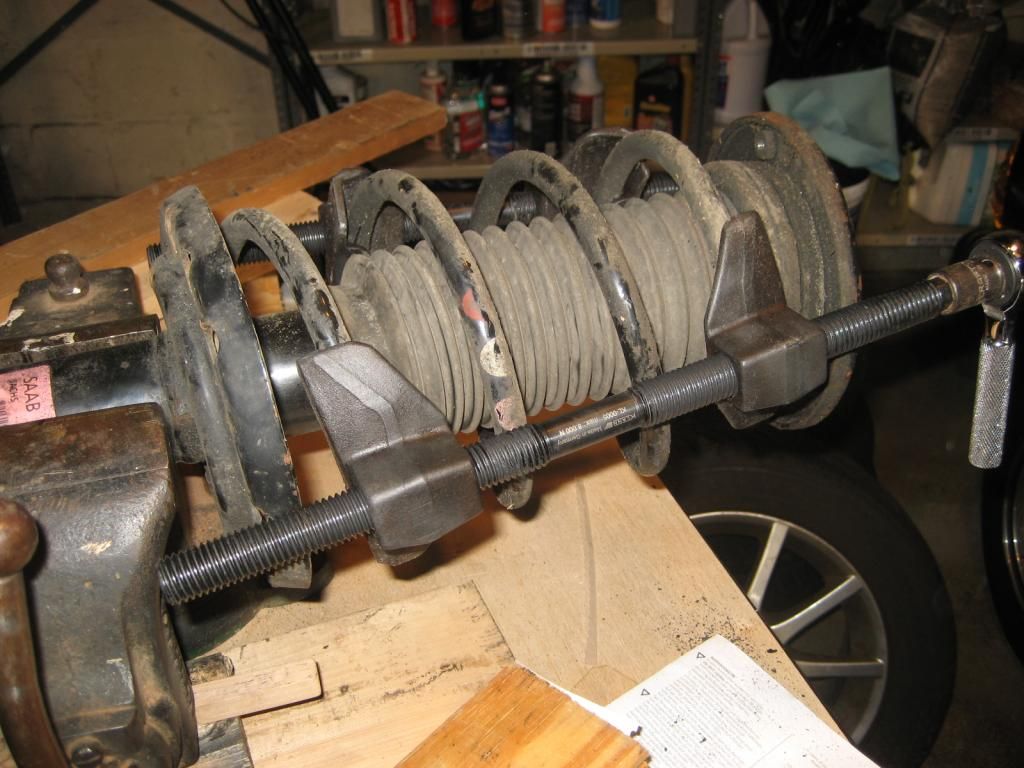
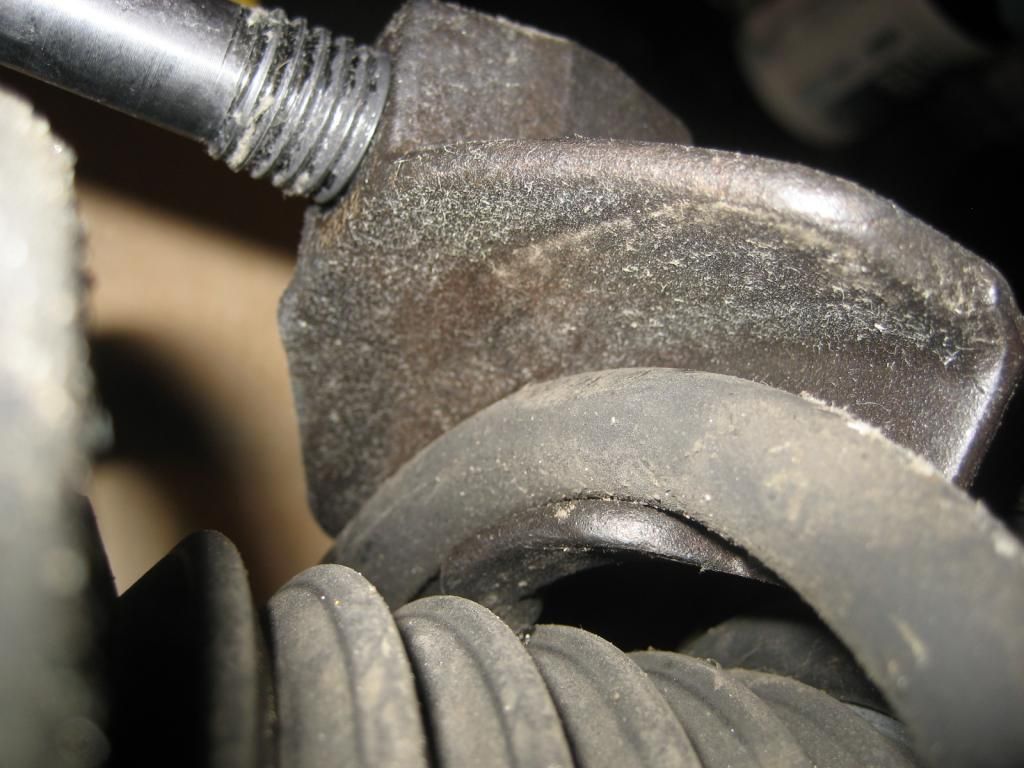
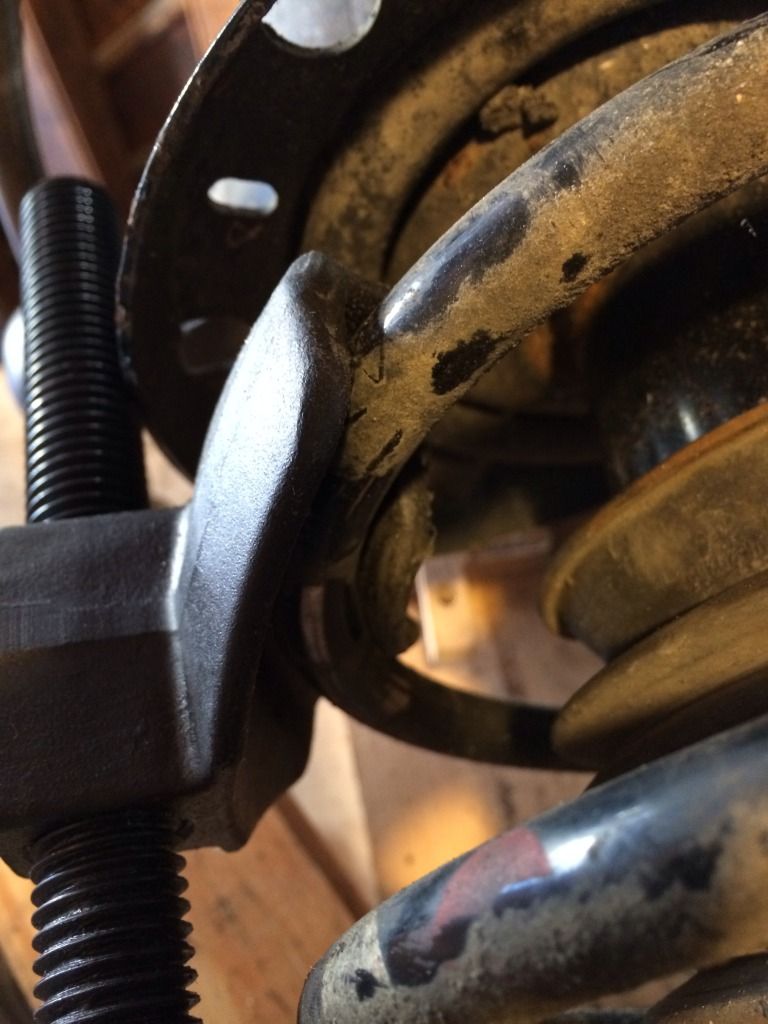
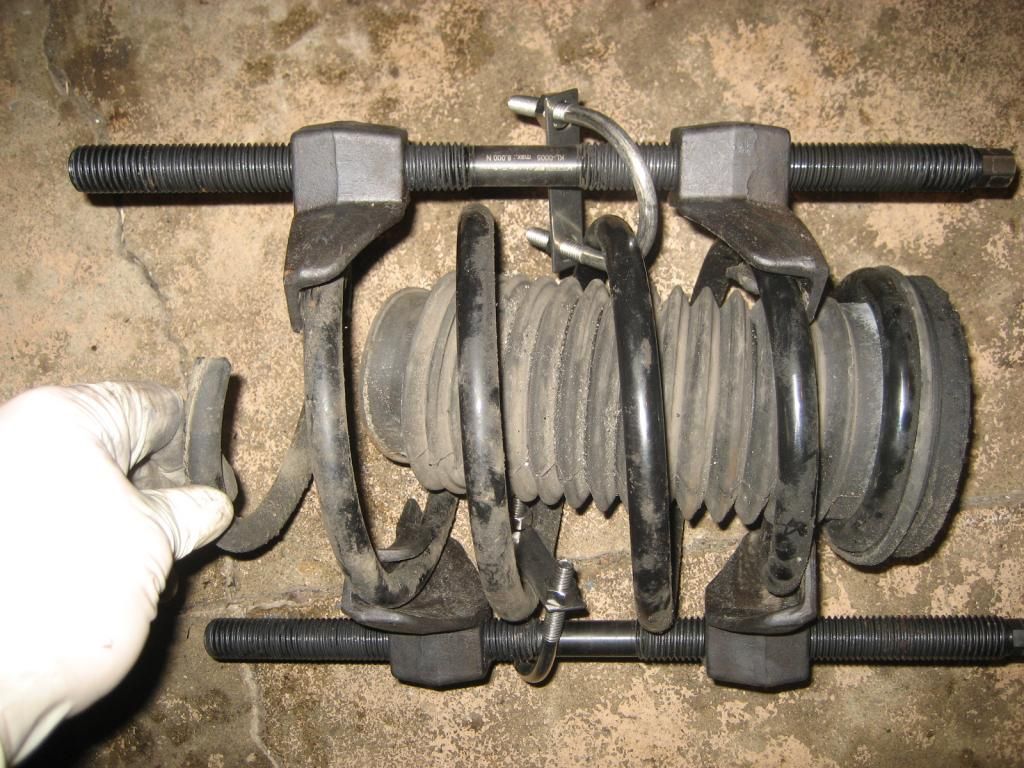
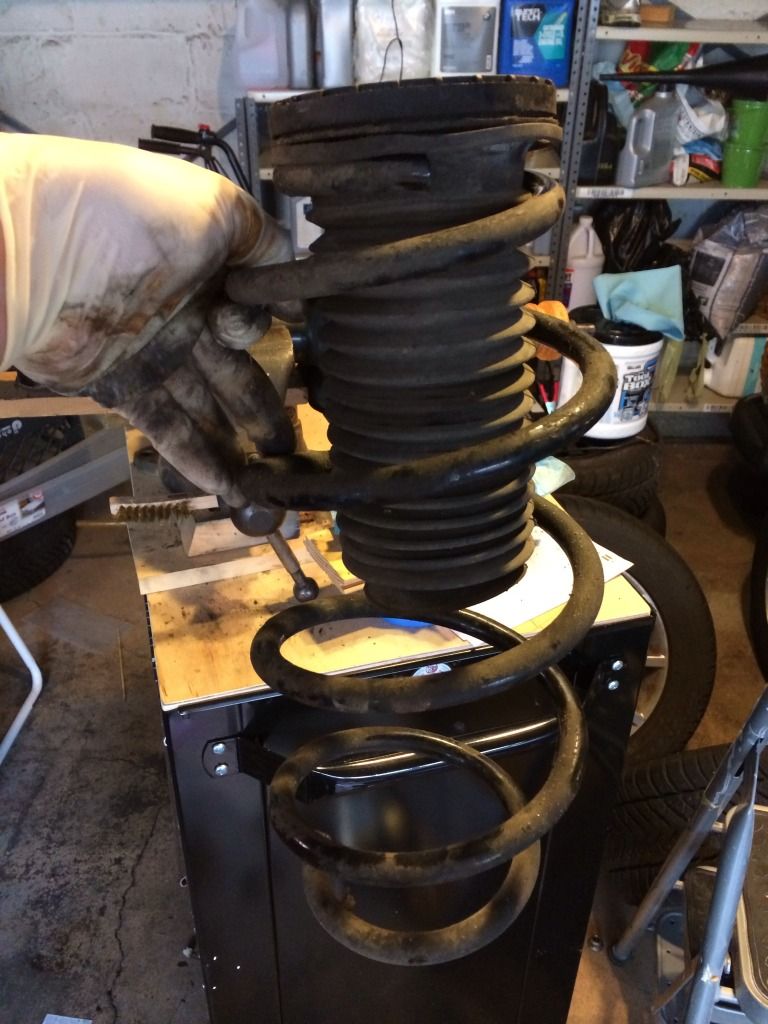
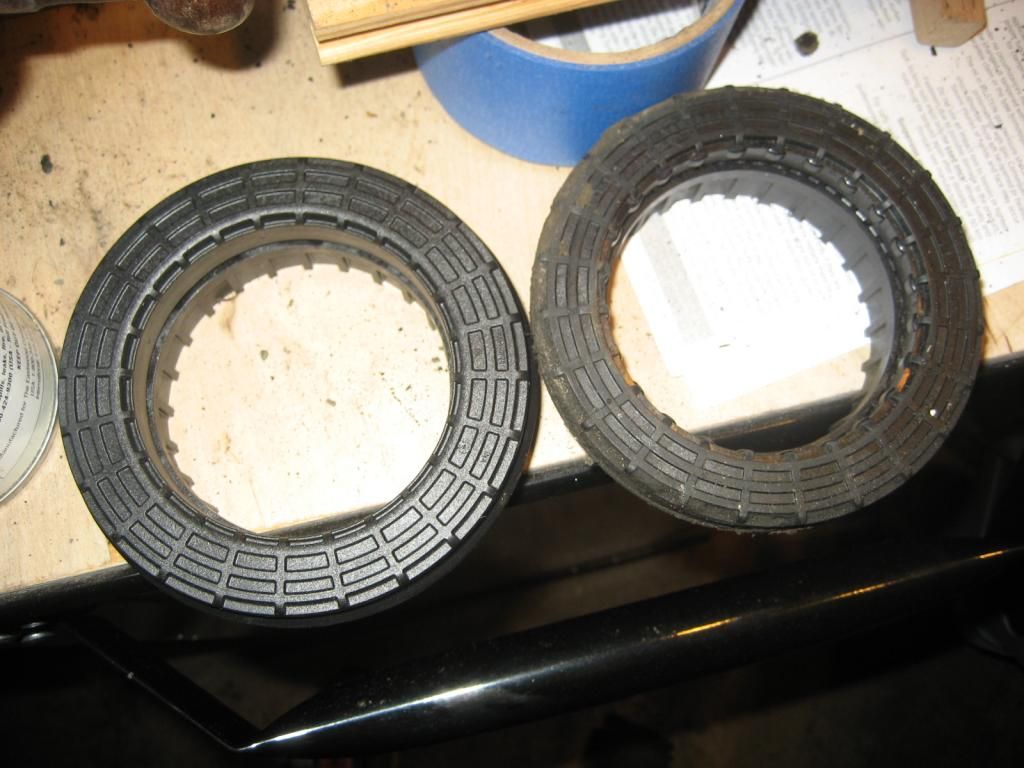
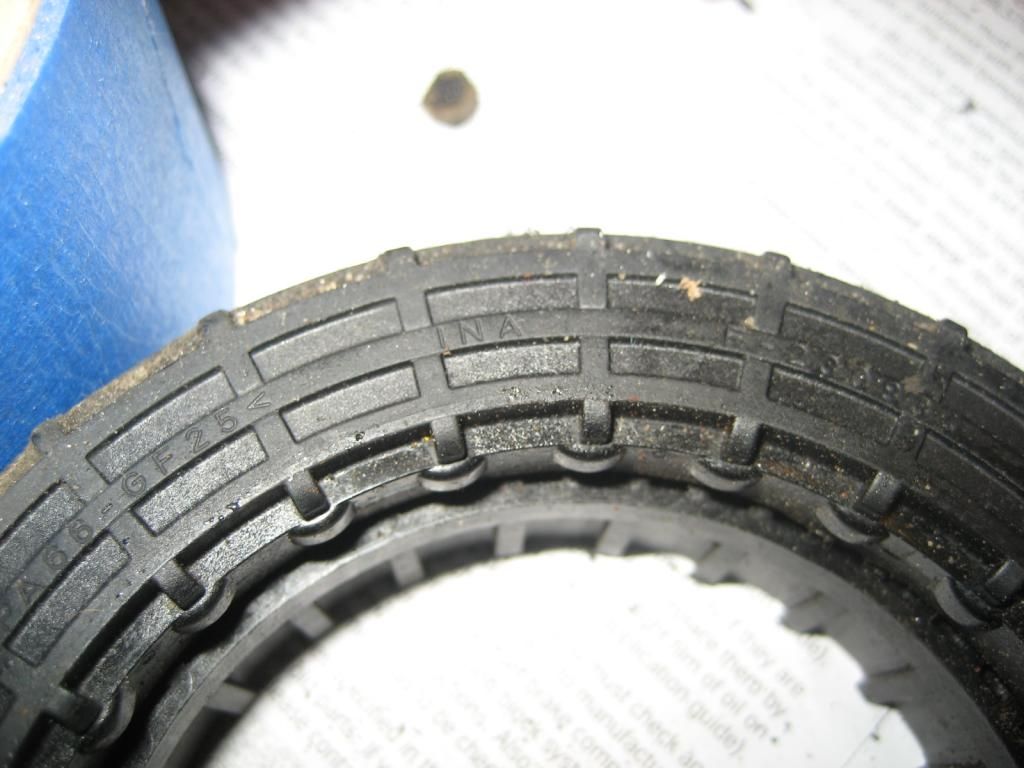
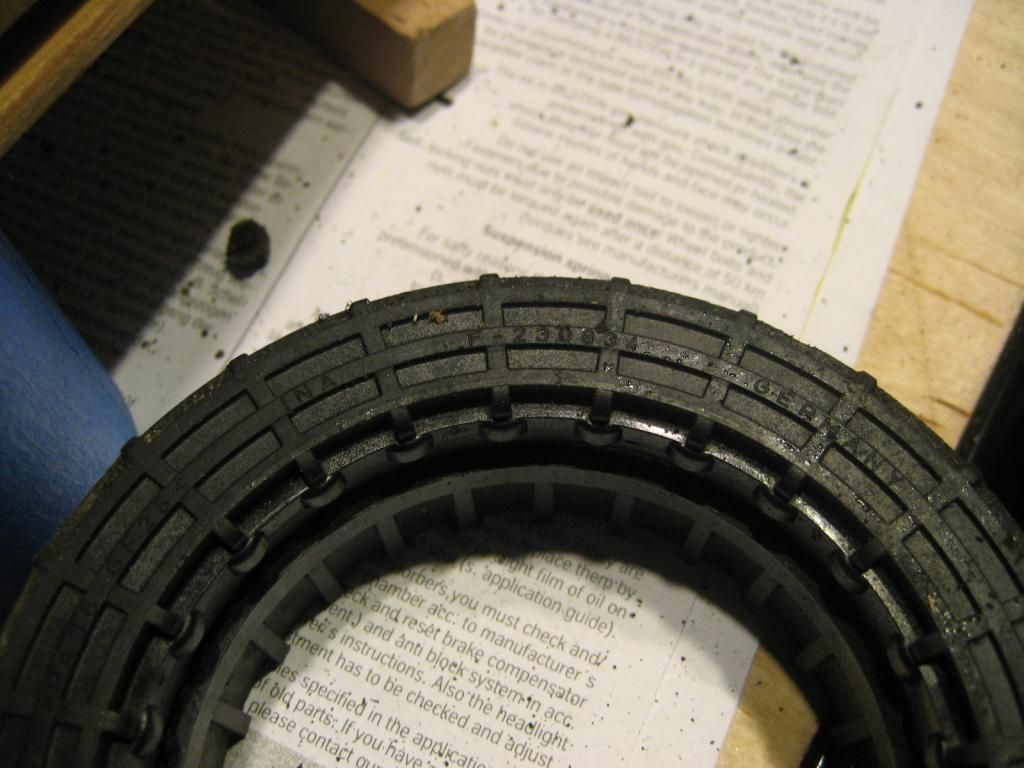
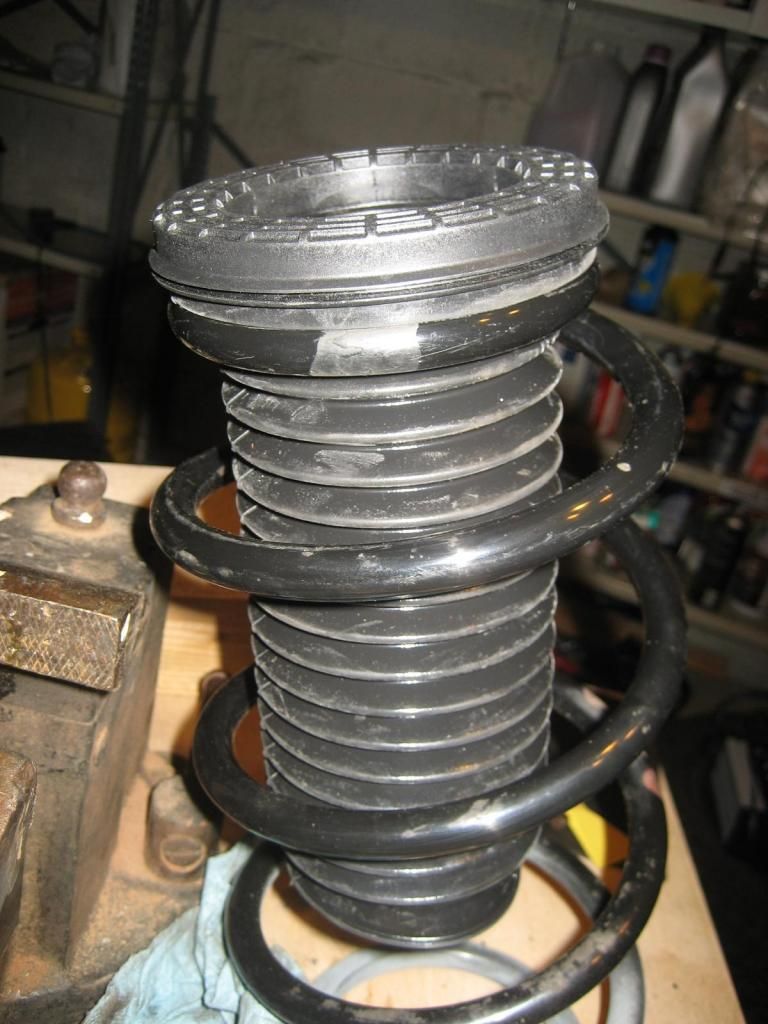
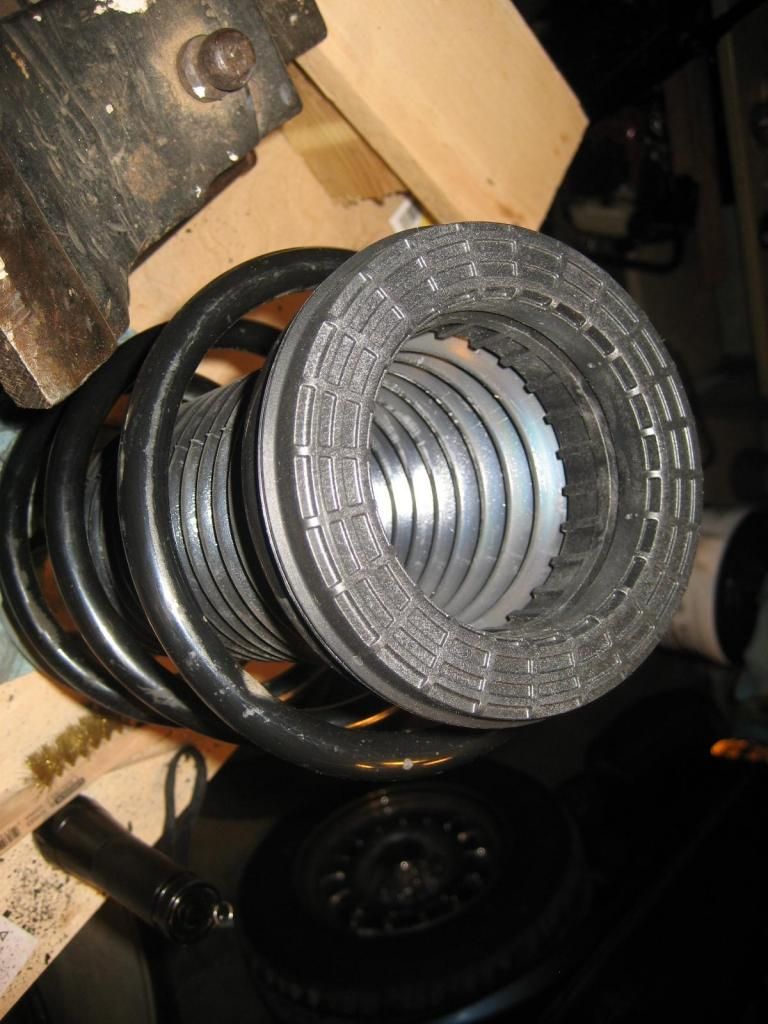
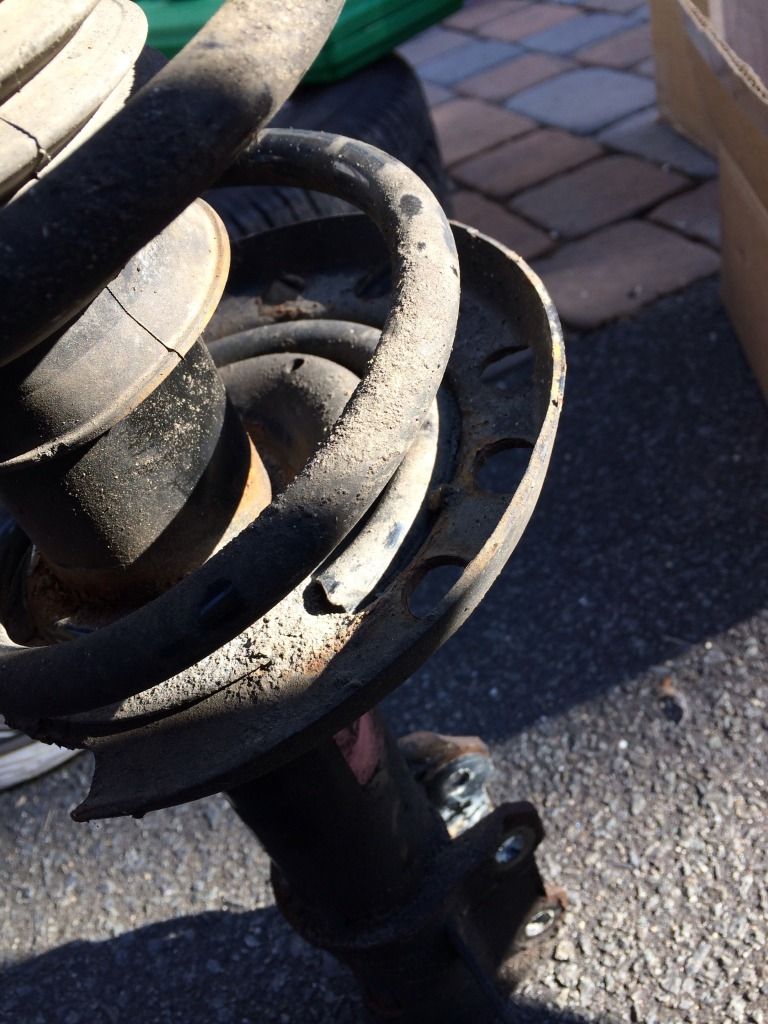
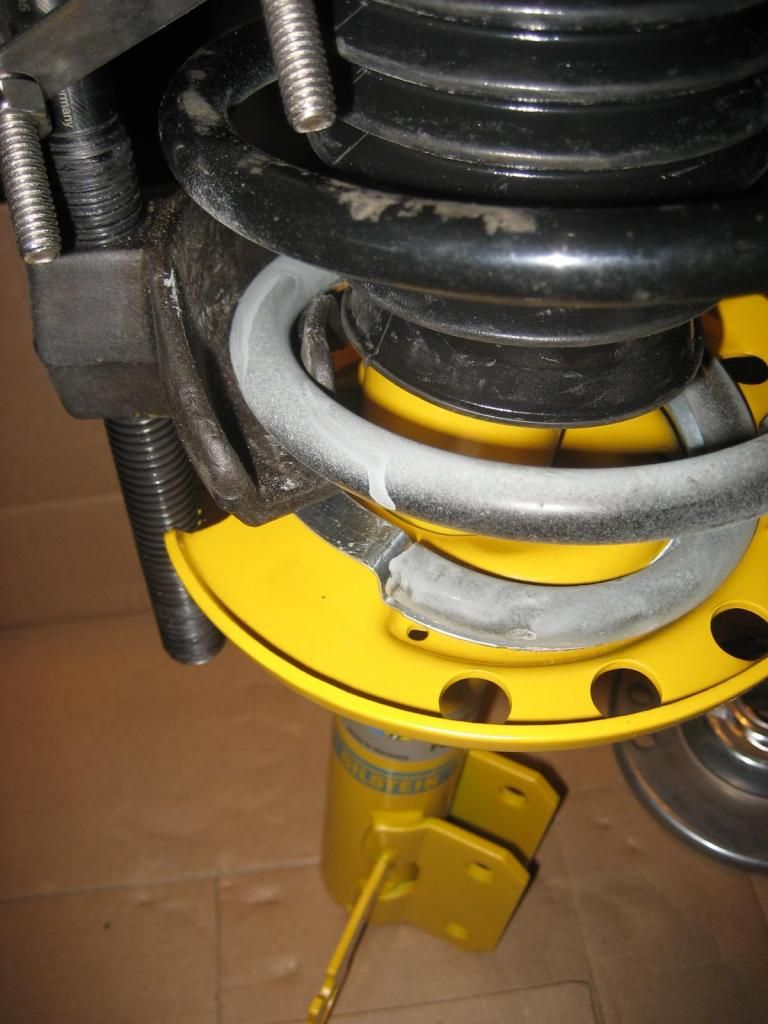
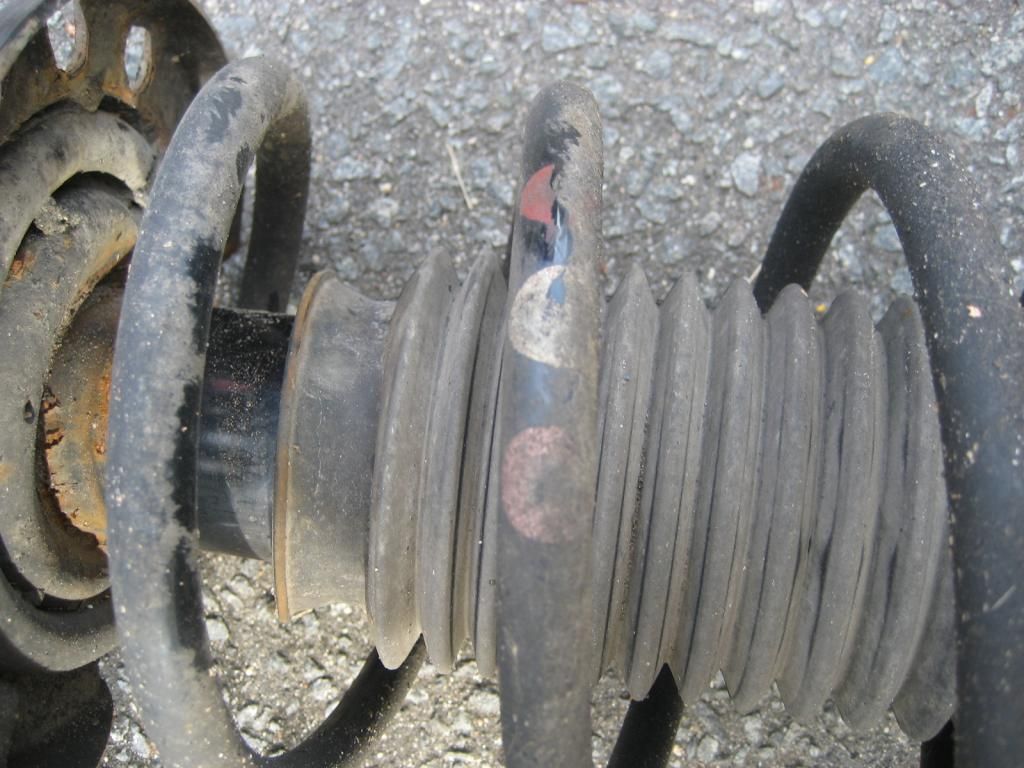
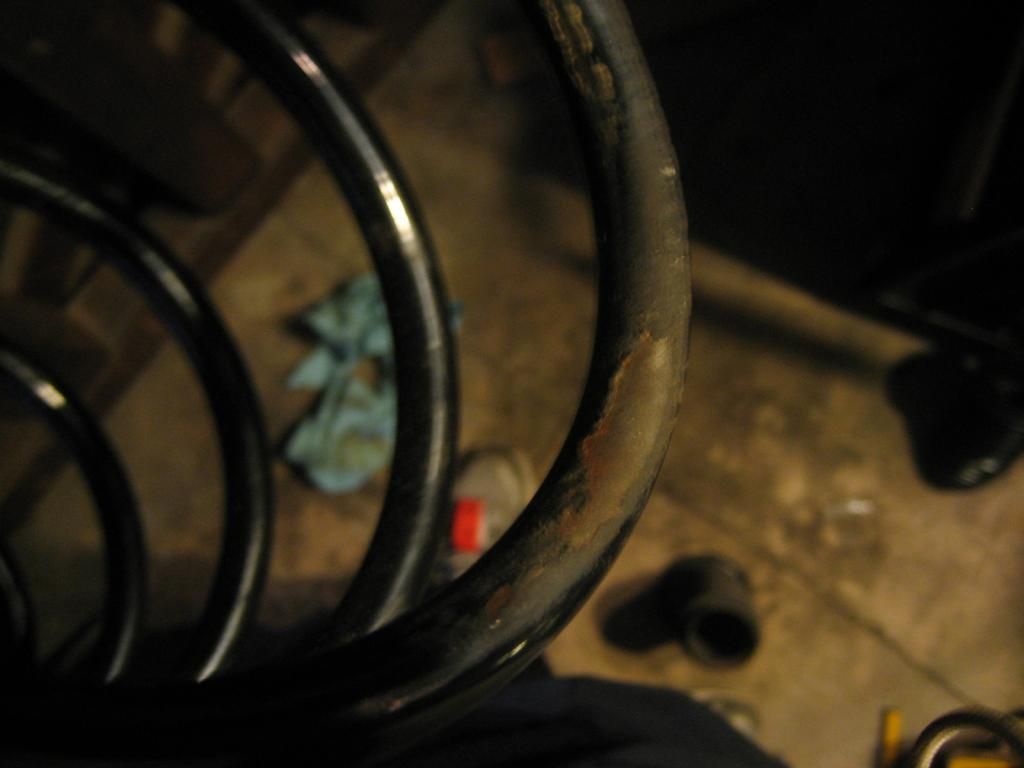
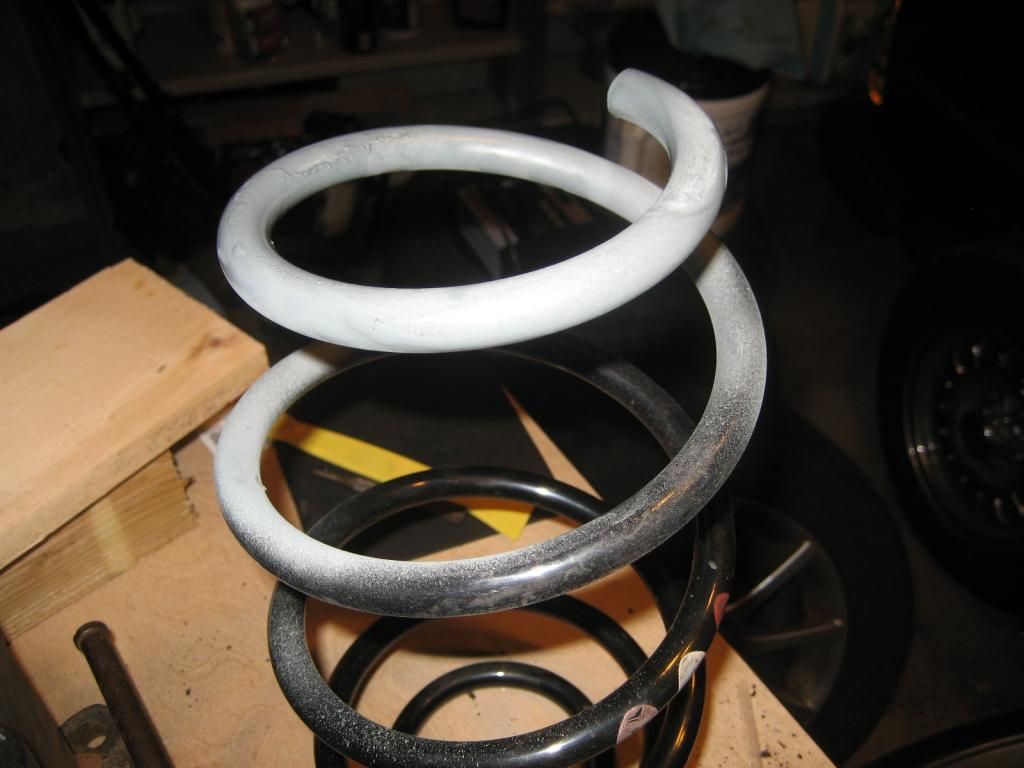
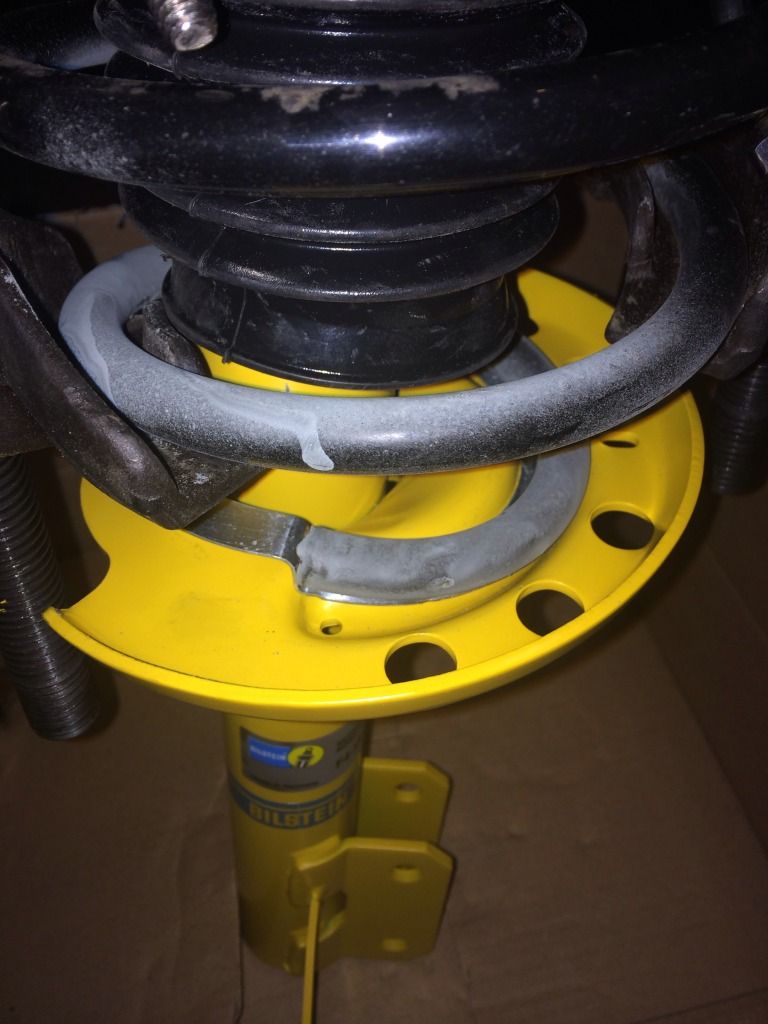
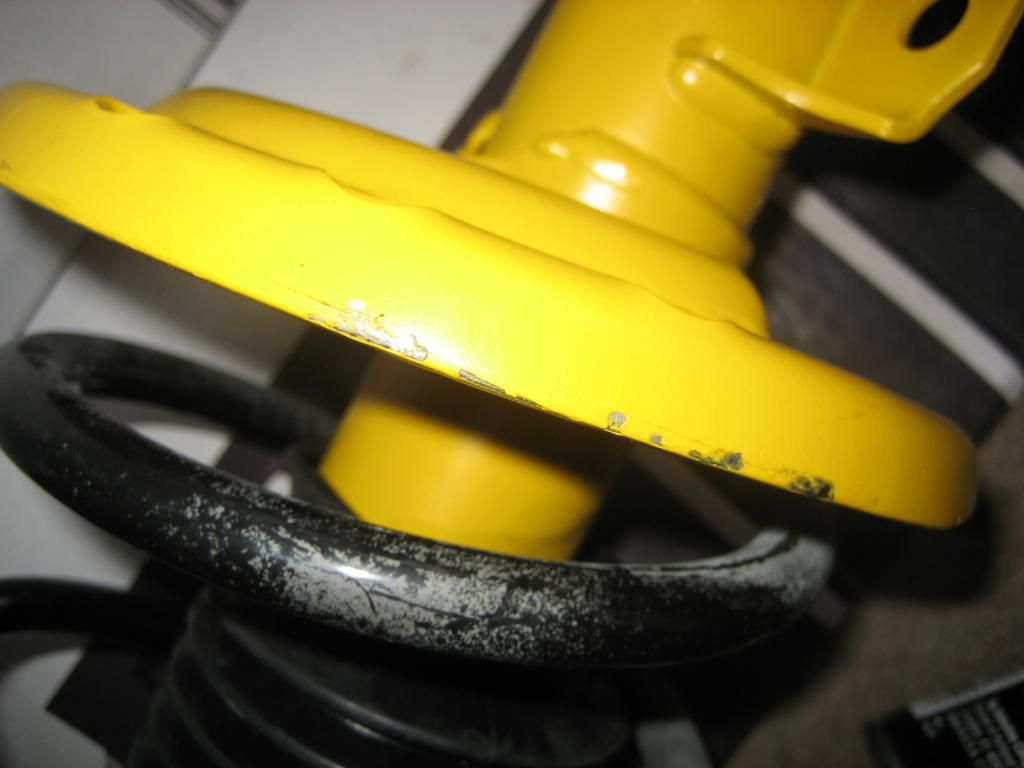
The spring rate is indicated by the color marks on the springs.

IMG_3082_zpsfc032b4b.jpg
 
To remove the spring, you must compress it. I used the Klann KL-0005 German-made, forged compressor. It has wider jaws than the OEM and other common brand ones, and they are angled to the spring so they fit and cannot move.

0F48CEC0-A214-4416-8C71-7530DA8C08C5-22721-000011BB7E9D14E2_zpsf2527f36.jpg


IMG_3087_zpsb819ec7a.jpg


IMG_3091_zpsd32af78f.jpg


IMG_3094_zps53ba1fed.jpg


8CAE26E4-7558-4D67-A16F-29D864ACB5B4-22685-000011B29F0F6683_zps11f85cec.jpg


72FBE855-F97E-4EC9-B2AD-72571965562E-22685-000011B298FCC2B3_zpsfa403a93.jpg


F29AE70C-4164-4E14-8F2D-CBE786E73BFD-22685-000011B29372693B_zpsf689a3bb.jpg


35C3F32D-E5EE-48BD-BAAF-7567991F99CB-22685-000011B28DDE1F02_zpsb1ebfc05.jpg


5FEB036F-9F79-4333-96D9-1C7EDDEEFF9B-22685-000011B287F4BFCC_zps2581b9c4.jpg


2735BC10-61E4-4392-BAF1-435F9AD8677D-22685-000011B28194849A_zps655eeade.jpg


85327F3C-395E-40B3-8D7F-5078E953C156-22699-000011B6CA2E3494_zps9a4fdece.jpg


14066057-A48B-4CA2-8D7C-7BE4B5C3D5D3-22699-000011B6BE0BF8AD_zpsa2cf3544.jpg


I used a short-handle ratchet to compress, so I limited the available torque lever-arm and could have better control. Having the compressor at diametrically opposite positions is important.

For added safety, I added some u-bolts just to help hold the spring to the compressor. Eastwood sells a fancier version of this, but I got these for around $5 at HD.

IMG_3121_zps0620bb84.jpg


IMG_3125_zpsba7a4803.jpg


So compress it, and then you can remove the mount. Because I was changing the struts themselves, not just the bearings, I used an impact. If I was keeping the strut (and of course for tightening), an impact shouldnt be used because you dont want to turn the shaft.

After hitting it with the impact, the nut will come off and then you can pull the spring.

IMG_3129_zps661c5bbf.jpg


IMG_3122_zps7a792d98.jpg


IMG_3126_zps01d638d0.jpg


Then the compressor can be released slowly and evenly if desired. I decided to because the spring had some abrasions in the coating, and I wanted to clean them up.

5C6A1E1B-B1DB-4E81-B0A4-1FF897A3C270-22752-000011C084B643B0_zpsd4e432b0.jpg


IMG_3102_zpsc0787584.jpg


I cleaned the spring up and then used CRC cold Zinc galvanizing spray to coat the exposed area.

IMG_3106_zps4d84d1ed.jpg


IMG_3111_zps8d39555d.jpg
 
I chose Febi Bilstein mounts and bearings. The Febi mount is probably relabeled OEM Saab/Sachs/Boge because all markings were scratched off it. The Febi bearings, like the original ones on the car, are made by INA.

0871D6B6-B95C-495E-A8E4-F7606331AB27-16298-00000D03DC7D1DD4_zps1b716fda.jpg


IMG_3112_zpsef9723c3.jpg


IMG_3113_zps022b6871.jpg


IMG_3116_zps01c9acd5.jpg


IMG_3118_zpsf893e213.jpg


Once reasonably clean, you can install the bearing into the bellows, and install onto the spring.

IMG_3119_zps6bac33e8.jpg


IMG_3120_zps3d86fce4.jpg


If the old spring wasn’t decompressed, the job is easy to do, if it was decompressed and cleaned, then it will need to be compressed again, so ensure you know where the compressor should sit.

Here are a few shots of the bilsteins vs the OE Sachs struts. Note that the Bilstein has a far thicker shaft and does not use the OE bump stop. The OE ones could be compressed VERY easily, and were quite slow to return to full extension. The car still rode beautifully, and handled well enough. As mentioned above, the car did crunch over speed bumps in the cold, and I guess the noise was actually the strut, as it hasn’t happened since!

IMG_3095_zpsdecf9cc5.jpg


IMG_3096_zps7408064a.jpg


IMG_3097_zps1f87f4a7.jpg


IMG_3098_zpsf88530a4.jpg


IMG_3100_zpsc06cc57a.jpg


IMG_3101_zpseb618c65.jpg


E1ECF66E-5BBF-4F7F-9A1E-54EC1260B191-22589-000011A3763CD0FD_zps7a2ee8ef.jpg


09F8471D-DA3C-443D-B9F4-85DAAD121DC5-22589-000011A37C71B321_zps0b215d0e.jpg


58E5314B-E189-4D9F-BB42-068CF20AEEA7-22752-000011C06E35F56E_zps958256a4.jpg


The struts use a zinc washer under the spring, at the perch. Some parts sites show that a rubber hose protector is to be used, but my trusted Saab parts expert stated that these caused corrosion on the springs, so the zinc was added as a sacrificial item.

A205D49D-1C4A-4914-8B47-49943E724E44-22721-000011BB47E98503_zps7894481a.jpg


A539D139-DFA6-49D9-ABE5-BEC4EAC5AA6A-22721-000011BB5B6F01F6_zps094d9d09.jpg


58E5314B-E189-4D9F-BB42-068CF20AEEA7-22752-000011C06E35F56E_zps958256a4.jpg


IMG_3130_zps2d4af61f.jpg


IMG_3132_zpsfc18412d.jpg


Note that two different types of locknuts are used. Saab uses an out of round bolt, while Bilstein uses a Nylok. I like the Saab hardware better personally.

BE4ABA15-A31C-4CD8-8CE1-8E912BEA148D-22833-000011D9CAC2D5C9_zps03c93754.jpg


Now, the spring can be put back on and then the bearing/bellows interfaced to the mount, and the mount then torqued down.

IMG_3136_zpsf7835484.jpg


E0CBD80E-0728-4B34-9DAF-4D0F7D0F9748-138-00000000A0F559A6_zps091c1bdd.jpg


Put the socket on it, hold the shaft with a 6mm hex, and tighten.

E61B678F-EC6D-4A31-A164-B8F38ED2792B-138-00000000A721F1AE_zpsf1007d49.jpg
 
It can be exceptionally tough to get the zinc to line up, and keep the spring at the right point on the perch. The issue is that the zinc will move/bend/extrude.

6BCC3456-07DD-4644-8863-5E981CB09C44-138-00000000B0CD2FA6_zpsd48fc8ba.jpg


The bearing spins free via the mount, very nice. But everything is crooked. As the mount is torqued down it will straighten out and be fine. I used a 13/16” spark plug socket, tightened with a crows foot wrench so that I could hold the hex in the strut with a long allen.

E0CBD80E-0728-4B34-9DAF-4D0F7D0F9748-138-00000000A0F559A6_zps091c1bdd.jpg


E61B678F-EC6D-4A31-A164-B8F38ED2792B-138-00000000A721F1AE_zpsf1007d49.jpg


9DD8EE10-6BC0-40F5-9EC1-03B6979BA045-138-00000000BBCFF4D0_zpsa2265c37.jpg


Be careful with manhandling the strut to move the spring into the correct spot. In trying to perfect the zinc’s placement, I bent the metal bracket. Im fairly strong and in shape, but this was a thick piece of metal - but its easy to exert… Also be careful with the compressor, as the threads can scratch the paint on the strut. I ended up touching them up where the paint was removed, and then sealing up with Boeshield T9.

IMG_3137_zps9bb11cfa.jpg


58E022AD-5E32-49A6-B3A2-F510702F8D41-138-0000001AF9FE6F8E_zps3841c479.jpg


267C46C4-AB63-4CC9-8DF0-AEF426232F46-244-0000002667C9AEFD_zpsfbe3a9b7.jpg


4FDA8141-2E2F-49E1-B26D-104F1A59EC65-244-00000026613FF724_zpsd5a86797.jpg


Installation is the reverse of installation. The main steering knuckle bolts and all locknuts must be replaced. The old knuckle bolts had some white substance on them, I assume to prevent seizure. I added a little anti seize to the base, but not the end, so that the torque setting would not be effected. Torque the main bolts to 59 ft-lb + 135 degrees of rotation. The sway bar link gets 47 ft-lb.

IMG_3143_zps4e0c8c27.jpg


IMG_3150_zpsc5e82d6c.jpg


One issue I encountered with the Bilsteins is that I couldn’t get the metal ring on the brake line to fit the bracket on the strut. I had to file it out and then it fit fine…

IMG_3145_zpsc63a7a26.jpg


IMG_3147_zps7b327d19.jpg


IMG_3148_zpsb82e0fb6.jpg


Sprayed down with some anti-rust protectant (used Boeshield but ran out so then used Wurth Film), and almost there!

IMG_3154_zps38e8ae1c.jpg


Once the car is back down on the ground, do the final torque for the strut nuts (78 ft-lb), and torque the star bolts holding the mount to the body (14 ft-lb).

Done!

Rear shocks are super easy. Pull the mount and the bottom bolt, then attach the shock to a new mount (or reuse), torque the top nut to 24 ft-lb, then install the mount, align the bottom holes, tighten up. The mount can be torqued with the wheel in the air because it is a metal-to-metal connection, however the bottom bolt is metal to rubber and must be torqued with the car on the ground. The mounts get torqued to the body with 39 ft-lb and the shock to axle carrier gets 111 ft-lb.
 
+1

Did you have someone taking pictures or did you take them yourself?

Taking the pics and posting them was another job itself
smile.gif
 
Nice Job! You used the best quality parts, good tools and did the job with care, it doesn't get any better.
thumbsup2.gif

How do you like the ride?
 
Great job. I did the same job on my Toyota Tundra. Pretty straight-forward. Just took a little extra time since I wanted to be careful, especially messing with spring compressors. Felt very rewarding once the job was done, and a whole lot cheaper than paying someone to do it.
 
Nice write-up! We assume you had a 4 wheel alignment performed afterwards. Since this was the first time you have done struts, tell us, would you do it again?
 
Very nice
smile.gif
I've done this job before, once you do it once, it's pretty straightforward, but as you've noted safety is key. Good observations on the Bilsteins, I was curious about them.
 
Originally Posted By: spasm3
Nice write-up! We assume you had a 4 wheel alignment performed afterwards


There are those that will disagree, but I have never needed to have alignment after replacing struts. That doesn't mean that alignment didn't change, but it never changed enough to notice when driving nor did it cause uneven tire wear. I usually don't even get an alignment done until the vehicle has 100K miles, or more. After that, I get an alignment done when I buy new tires - about every two years.
 
If sway bar end links give you grief, and your thin wrench doesn't work...

You can grind down the outside end of the stud. Put a flat on it and you can stick a vise grips on. Then spin the nut off.

Also, price them out. Sometimes they're only about $12 and worth it to cut off and replace.

With the ball joint of the end link seated in the back, once it's cracked loose, trouble worsens. If you're a lucky chap the nut will spin right off, but corrosion tends to prevent this.

Sometimes the nut will come loose a couple turns then stick due to rust. Do your typical wire brushing and penetrating lube first. This is the same with tie rod ends or ball joints with through-studs.

On my cars I haven't had to support the knuckles when they're free from the struts. Usually there's enough stiction in the LCA bushings to keep them from drooping. The danger of course is in over stretching a rubber brake hose or abs wire. Some designs have the front sway bar meet the knuckle and not the strut; on those, the other side will hold things level if doing struts one-at-a-time.
 
Originally Posted By: Char Baby


Did you have someone taking pictures or did you take them yourself?


I did it myself. Have an old canon digital cam which works well enough for doing this… But I did use my iPhone on the fly. I must admit, my impact gun and iPhone didn’t get along… $269 lesson.

Originally Posted By: Trav

How do you like the ride?


GREAT! As you and Steve said, firm but not harsh. The car rode really well, believe it or not, with the old struts, though they didn’t dampen well per my test with them off the car. The sachs shocks and struts compressed VERY easily and came back out really slow. The new ones I could barely compress!


Originally Posted By: sayjac
Very nice! Is an alignment needed after the strut replacement?


The bolts that go from the strut to the steering knuckle are hammered in with a wider neck.

IMG_3143_zps4e0c8c27.jpg


There is no smaller or different bolt in there to self-adjust camber. I didn’t touch the tie rods, camber is set, don’t know about caster. I have a firestone lifetime alignment fwiw… My test drives indicated that it drove straight and well, but I may take it in for a look in the next week.

Originally Posted By: eljefino
If sway bar end links give you grief, and your thin wrench doesn't work...


I found a thin 17mm wrench from some power tool that worked well. Made it easy. I fixed the boot first…

IMG_3139_zpsa4ec028d.jpg


IMG_3140_zps1f6b2db5.jpg


IMG_3141_zpsba548b77.jpg
 
Originally Posted By: JHZR2
As the mount is torqued down it will straighten out and be fine. I used a 13/16” spark plug socket, tightened with a crows foot wrench so that I could hold the hex in the strut with a long allen.


That's the way to do it!
smile.gif
There are aftermarket tools available for this but I've found they sometimes don't fit down into the opening on the top of the mount. A spark plug socket, though, should pretty much fit all cars. And if there's room, sometimes you can fit a 1/4"-drive Allen socket and an extension inside the socket so you can hold it with a ratchet if you'd prefer.
 
The swaybar endlinks can be a real pain sometimes. My Cobalt uses ones which are identical, and they come with thread-deformed nuts which resist removal. They seem to get tighter and tighter and eventually the flats on the stud start to spin and at some point you're stuck having to get vise-grips on them. Replacement endlinks are available from Moog (and probably others) which have a good, robust and beefy hex on them so there are no problems when the time comes to remove them.

Mine has developed a rattle which I think is the endlinks. If not, perhaps the struts are going out. They're KYB but have a lot of miles on them already.
 
Status
Not open for further replies.
Back
Top