96 Saturn SL-2, water pump??

Status
Not open for further replies.
Joined
Aug 22, 2004
Messages
1,675
Location
San Antonio, Texas
I have a 96 Saturn SL-2 and it's leaking big-time from the water pump. Car only has 76k on it.

I haven't a clue how to replace it, never worked on these engines before. I have done one on a diesel bug and numerous American flavor engines.

How hard of a job is it? Should I do other things at the same time? Any other recommendations?
 
Light-medium job. Replace the thermostat with a Stant 195F & radiator hoses while you're at it if it hasn't been done in a while. Flush & put in new coolant too.
 
Its a pretty easy job. You'll have plenty of room to work if you remove the passengers side wheel and plastic guards. Hardest part is getting the pulley off. I used an impact with an extension and swivel, but it can be done with hand tools. All the bolts are 10mm. If your replacement pump comes with the thin spaghetti gasket, you'll want to tack it in place with a light coating of Permatex (on the pump, not the block) to keep it in place while you mount the new pump. I also changed the thermostat, replaced the radiator hoses, and put in a new ECTS. Car runs great, other than burning oil in typical Saturn fashion.

Also, plan on replacing the radiator soon if its original. The OEM one is only good for about 10 years or so before it cracks below the drivers side radiator hose inlet.
 
Last edited:
X2 on the radiator... I replaced the WP and T-stat in my past 94 SL2, within a week, I blew the upper rad hose twice!, (same one, cut and fit back then blew again) after a new hose, it then cracked the radiator.... Below the drivers side radiator hose inlet.. and you could only see it when HOT.. the crack was a long vertical one, a few inches long..

Good luck, it is a nice Saturday morning job if all goes well..
 
Last edited:
It's more likely an age related thing on a car with only 76K.
Mine lasted about 140K miles before it started leaking (on my 1996 SL2)

I agree with the others about replacing the thermostat at the same time. That is a VERY easy job especially when you're already in there replacing the pump.
Honestly the only hard part about replacing the pump is getting the stupid pulley bolts off.

Use acetone on the mating surface of the engine block where the water pump seal sits, and make sure its free of any residual gunk.

The S-series has a self burping cooling system so just fill it up and run it til it gets warm, let it cool, and add coolant as required. 50/50 mix is fine. The easiest to do is use the same type of coolant that's already in there, otherwise you need to clean the whole system out well before you change coolant types (IE if dexcool is in it, just put that in again)
 
Edit time ran out..

Saturnfans.com is great, I have been a memeber for many years, and my its a huge help if you own a saturn S.

from http://www.saturnfans.com/forums/showthread.php?t=149588

2001 SL2 with 89,565

This was an inexpensive fix and fairly easy if you remove the wheel:

Tools:
-Jack
-Jackstand
-Tire iron
-13/16 Socket
-10mm deep
-10mm shallow
-3" extension
-14mm open-end
-Hammer
-Flathead
-Blue RTV


Apply E-brake, block the rear wheels, Raise the front passenger side, and set the framerail on a jackstand like so:
P1160028.jpg


Remove the wheel and 2 inner splash sheilds. (3 plastic rivets)
P1160024.jpg

(^^This pic was shot after completion)

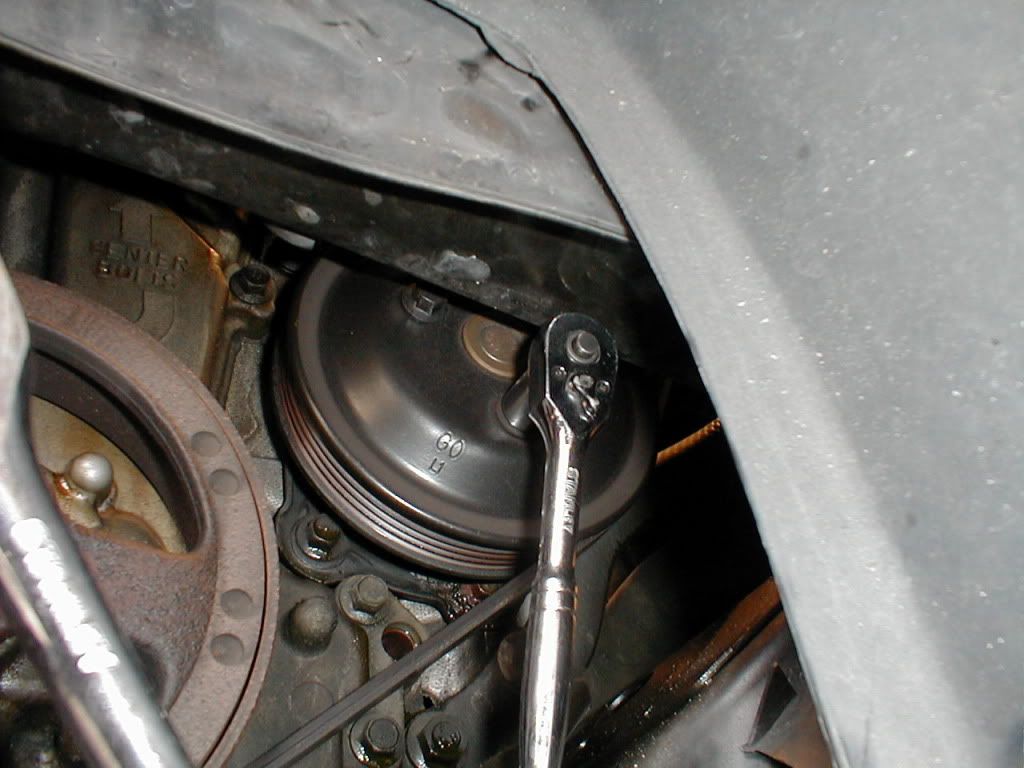
Before removing the belt, crack the water pump pulley bolts loose while the belt tension keeps the pulley from moving. Use the 13/16 to rotate the crankshaft to get to all 3 bolts(10mm). If there's not enough tension on the belt you will need to find a way to hold the pulley such a strap-wrench.
P1160008.jpg


After breaking the bolts loose, use 14mm box wrench to release the tensioner. From the bottom, pull the wrech toward the from of the car. Tensioner shown here:
P1160023.jpg


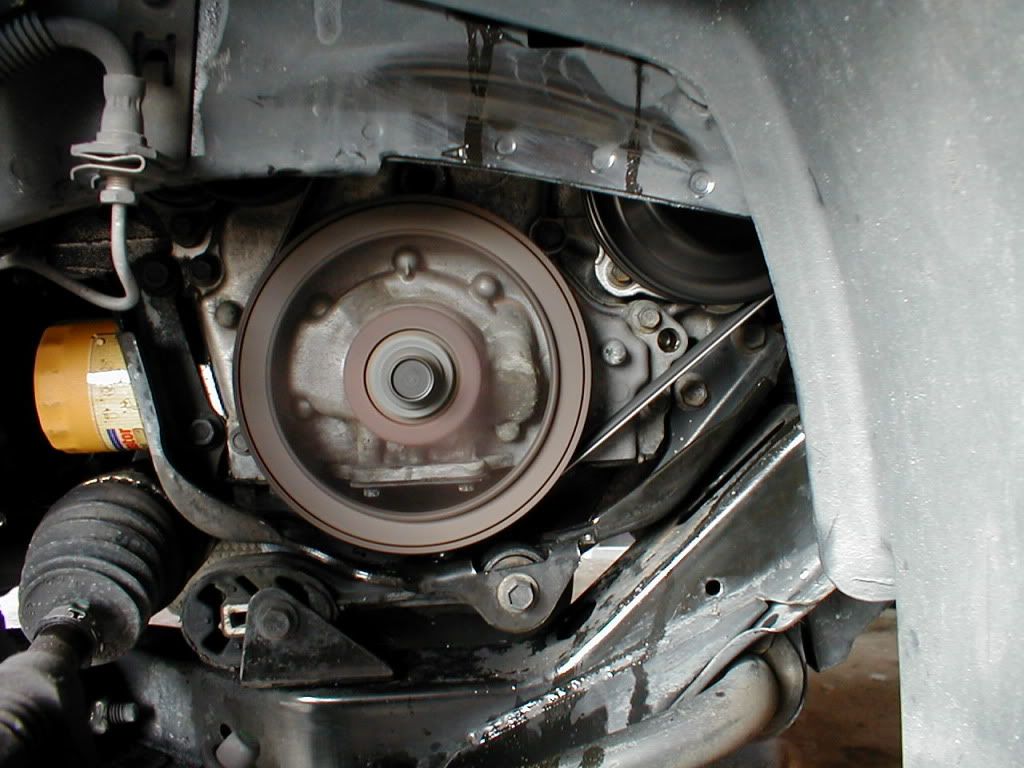
With the belt removed, take the 3 10mm bolts out to remove the pulley and set it on the frame rail in front of the engine:
P1160009.jpg

^^That's a 89k mile oem stamped steel pump. Nasty.

Time to drain the coolant if you havent already. Place a bucket under the draincock and unscrew. You wont get quite enough out but it helps. Not sure if this model has a block drain.. I forgot to even look for it.:rolleyes:
P1160012.jpg


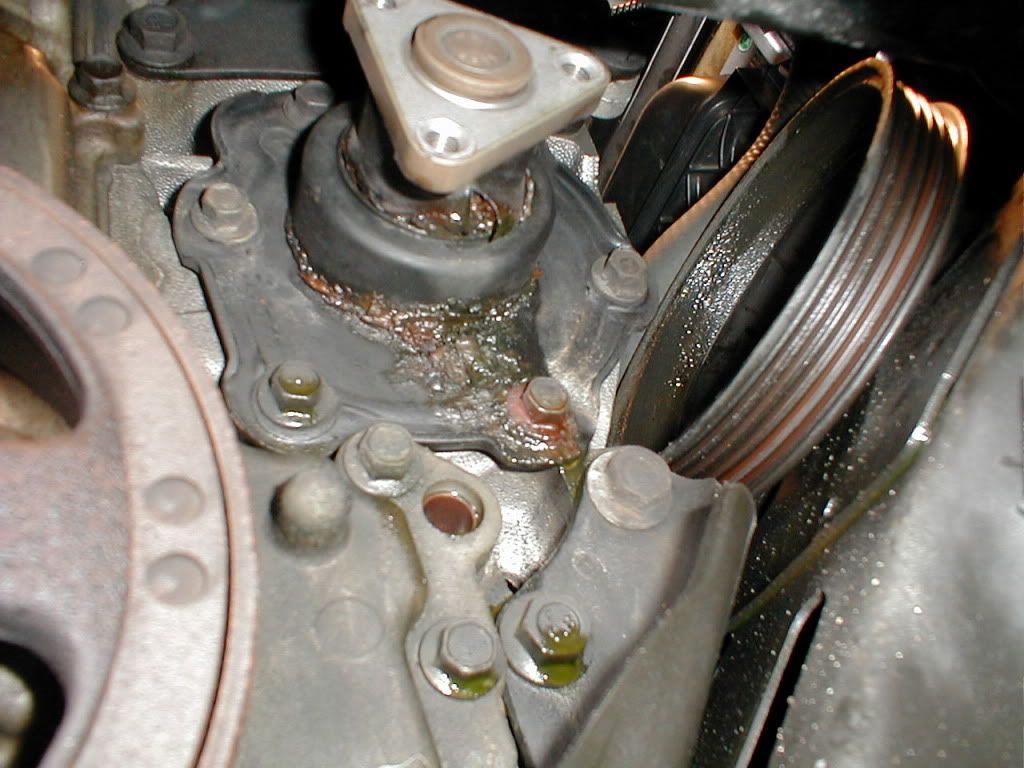
Use a combination of deep 10mm, shallow 10mm, and the 3" extension to remove the water pump bolts. I accessed 2 from the top and the rest from the bottom. Punch holes in a box in the same pattern as the bolts so they go back in their original holes:
P1160014.jpg


Pry the pump off the block with a screwdriver and be ready for antifreeze to dump out. I used some 320 grid wet sandpaper to clean the mating surface:
P1160018.jpg


Apply a thin layer of blue RTV to the pump mating surface, set the paper gasket in place, then apply another thin layer to the gasket. Put the pump in place and thread the bolts snugly into their original positions, then tighten them in a crossing pattern. They are spec'd for 22lb/ft but good luck getting a standard torque wrench in there. Remember, the block threads are aluminum and will strip before the bolts do. I'd rather do this job 10 times than have to lift the motor and tap the block...
P1160020.jpg


Next, replace the water pump pulley. This was the hardest part because I didnt have a strap-wrench to hold the pulley while tightening the bolts. I used an old serpentine belt wrapped around the pulley and tied to one of the engine lift points - it was barely enough. I'll pick up a strap wrench for next time..
P1160025.jpg


Let the RTV set for an hour or so, replace the belt, then close the radiator draincock and refill with a 50/50 mix of your favorite antifreeze. I prefer to mix it with distilled water in a clean bucket to get the mix perfect. Start the engine and run the heater on high, keeping an eye on the gauge. It will take a few heating / cooling cycles to get all the air out of the system.

Replace the splash shields and wheel AFTER running the engine to operating temp and checking for leaks.

Total cost was about $53 for pump, gasket, and a new belt.

banana2.gif


Just curious: What would a shop charge for this?
 
Last edited:
Depending on the angle of your wrench you can break those three pulley bolts loose.

If you can get it mostly perpindicular to the axis of rotation (I'm describing the geometry poorly-- try different positions) you'll get the max bolt breakfree torque with the least attempting-to-rotate torque.

This job also goes well if you have a big bonking screwdriver with a square shank to prop against the other two bolt heads. It has to be a square shank. Or use a ruler/straightedge or tool of your choice.
 
You should have no problem if you've changed other water pumps. It's more involved than the old-style RWD Chevy small block with four bolts, but not bad.

The block drain is a bolt just under the thermostat housing, with the head facing straight down and a metal sealing washer.

I remember buying a long 10mm wrench and a 3/8" drive flex handle to reach the pulley bolts on a '94. I suggest buying the pump based on warranty. When I shopped around, all the pumps had the same markings and impeller. The lifetime warranty replacement from Advance was black stamped steel, like the nasty stock one shown above. Its replacement, 20,000 miles later, was aluminum with a paper gasket like the second one above.
 
1" block of wood will keep the pulley from spinning.

Easiest way to do the job, IMO, is to remove the upper motor mount and the lower dog bone mount by the crank pulley. Keep the engine supported with a floor jack + block of wood under the oil pan. This way you can raise and lower the engine as needed to better access the bolts IIRC. The gasket may also squeeze out just a hair, so don't panic.
 
1. What was GM Thinking, putting the oil filters behind the engine, above the axleshafts, on pretty much every small car? I mean jeez, it's not an easy access point, especially if the engine is hot.

2. If it was anything like the cavalier, shouldn't be a difficult job. Granted with that I had the engine mount disconnected, and the engine tilted backwards, with the alternator removed. But these cars are pretty easy to do imo. Listen to Critic, he had an SL.
 
Originally Posted By: Nick R
1. What was GM Thinking, putting the oil filters behind the engine, above the axleshafts, on pretty much every small car? I mean jeez, it's not an easy access point, especially if the engine is hot.


Removing the passenger side tire and going through the fender was my preferred way of changing the filter on a Saturn SL. (Yet another tip from Saturnfans) Even with an oversized filter, it was a lot easier than lying underneath and trying to juggle the filter around. The CV boot still got a pretty good soaking, though.
 
Originally Posted By: SL2
Just curious: What would a shop charge for this?


It was about $240.00 on my 99 SL2. That was with a leak down test, water pump, and coolant. Alldata lists 2 hours labor.

I do a lot of short trips and transporting. Unfortunately, I was working when the water pump gave way.

This site and saturnfans is great. All the great info makes me a appreciate having an S-Series.
 
Critic you made it more difficult than needed.

I did too, the first time. I pulled the AC compressor for better access.


Just use a deep well 10mm for three bolts and a shallow for the other three.

Breaking the pulley wasn't easy. We had to get a crowbar to pry to hold it enough to break the three free.

It has been recommended to use a 6pt wrench on the pulley bolts.
 
Status
Not open for further replies.
Back
Top Bottom