You are using an out of date browser. It may not display this or other websites correctly.
You should upgrade or use an alternative browser.
You should upgrade or use an alternative browser.
What are you working on today?
- Thread starter Amkeer
- Start date
I was able to repair the problem with my headlights. It was actually a bad end on the aftermarket clip that fit's on the bulb. A $7.99 fix and I have an extra female end. I returned the new headlights to Amazon. Those H1 bulbs are so small and delicate and difficult to replace with the wire clips etc. Anyway I got lucky. This Honda has been amazing as far as low maintenance $$$$ are concerned.I ordered a set of TYC headlights to do the same as well - I was shocked it came with Chinese-made Philips(inked stamp marks, not the nice laser etching as the German-made ones now sold as Vosla or Narva) but the rest of the bulbs were Chinese.
I’ll swap those out with Vosla HIR2s and Sylvania/Osram side marker/turn signal bulbs.
Completed the walnut blast of the intake valves on the Mini Cooper S.
I did a spray Seafoam treatment before, but it wasn’t enough. I pulled the intake and cleaned it out, replaced the throttle body gasket and cleaned that up as well. All new intake gaskets went on, as the ones on it were flattened.
Someone else has been in there, given the evidence of missing push fit plastic connectors, etc. I have a set of intake to shop vacuum attachments that allow for the insertion of the blast wand, the blaster from the local Harbor Freight and a load of fine walnut shells.
I set the cylinders to top dead when working on them to close the valves, did a quick view with my bore scope to see how bad it was in each. They weren’t too horrible but they were crusted up with sooty black carbon. I started in on the two cylinders with closed valves, and in about 20 or 30 seconds of walnut blasting, the crusty black valves were clean. I did them all, inspected each, and did additional blasting if I missed any.
Reassembly, cleaning and making sure the walnut shell dust and residue was gone, especially from the engine, and it started up and idled evenly. I drove it up the road and back over 4 miles without issue. Except…
I got a misfire, but I can pinpoint that to one coil that had a bad boot, and the heavily carboned up spark plugs that I didn’t get totally cleaned. They were heavily sooted up and I wasn’t going to scrub on them with a wire brush since they are platinum.
Ordered in replacements and a replacement coil since the others are fine. Almost there with this one…
How much of a difference could you perceive after the walnut cleaning?Completed the walnut blast of the intake valves on the Mini Cooper S.
I did a spray Seafoam treatment before, but it wasn’t enough. I pulled the intake and cleaned it out, replaced the throttle body gasket and cleaned that up as well. All new intake gaskets went on, as the ones on it were flattened.
Someone else has been in there, given the evidence of missing push fit plastic connectors, etc. I have a set of intake to shop vacuum attachments that allow for the insertion of the blast wand, the blaster from the local Harbor Freight and a load of fine walnut shells.
I set the cylinders to top dead when working on them to close the valves, did a quick view with my bore scope to see how bad it was in each. They weren’t too horrible but they were crusted up with sooty black carbon. I started in on the two cylinders with closed valves, and in about 20 or 30 seconds of walnut blasting, the crusty black valves were clean. I did them all, inspected each, and did additional blasting if I missed any.
Reassembly, cleaning and making sure the walnut shell dust and residue was gone, especially from the engine, and it started up and idled evenly. I drove it up the road and back over 4 miles without issue. Except…
I got a misfire, but I can pinpoint that to one coil that had a bad boot, and the heavily carboned up spark plugs that I didn’t get totally cleaned. They were heavily sooted up and I wasn’t going to scrub on them with a wire brush since they are platinum.
Ordered in replacements and a replacement coil since the others are fine. Almost there with this one…
It is much better.How much of a difference could you perceive after the walnut cleaning?
I scanned for codes and only got a couple related to my unplugging connectors when I did the work. I cleared them and they did not return.
Before, even after the Seafoam spray treatment, I could detect a slightly rough idle, stumbling during the idling, and hesitating on acceleration.
With the newly cleaned valves, none of that is present. But with the sooted up plugs, I can’t fully declare it serviced until I install the replacements. At speed, there is no hesitation, and I do not detect the misfire. I did clean off as much of the carbon on those plugs as I could with Seafoam and shop towels but that can only go so far.
I know the issue because that coil had a damaged boot and wouldn’t go back on cleanly. Combined with the dirty plugs, it still performs better than before, with the heavy black carbon deposits all over the valves.
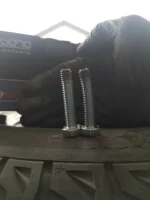
I had to fix a burned socket for an old co-worker. Instead of getting a Dorman 9006/9005 pigtail, I found a website that sells Delphi(Aptiv) Packard pigtails. Goofed the AWG - Toyota used 16/14ga, I got 12ga and my soldering job looked a bit rough but it’s the same connector as factory(Matrix/Corolla).I was able to repair the problem with my headlights. It was actually a bad end on the aftermarket clip that fit's on the bulb. A $7.99 fix and I have an extra female end. I returned the new headlights to Amazon. Those H1 bulbs are so small and delicate and difficult to replace with the wire clips etc. Anyway I got lucky. This Honda has been amazing as far as low maintenance $$$$ are concerned.
New fuel lines and new purge bulb on the Hitachi blower. Replaced the stop button cover. Gave it some fresh paint.
Krylon Fusion really does well on plastic.


Krylon Fusion really does well on plastic.
Valve cover gasket and plugs on the Fusion
Vapor canister 2012 Kia Sedona, rhino ramps-front and rear left side, easy up to the re-assembly where the bolt for the rear bracket broke under force from cordless ratchet, couldn't vise grip it out. Part of the thought behind owning this vehicle is for experience/practice, other part is to keep the Toyota's out of the salt/sand/snow/brine...
So I used the opportunity to practice drilling it out, which I ended up using a self tapping screw to secure it. To keep my lesson short, never remove the bracket mount bolt if there is 2 bolts that hold it to the canister, when dealing with rust belt auto.
The photo I took of that is blurry as I also need tablet/camera practice, so let me go on about the snow tires, 215/70/16, eBay $70 each as date code was 2017, but I wanted more narrow than the stock size 225/70/16 because of the torque steer experienced from last years set which will stay on the rear, and the new set could be used for my Sienna if it has snow duty due to tailgater ruining the Sedona before it's time. Total $250, which is about $140 + $50 mount and balance/disposal + tax + $50 for the wheels, bought a set of 4 snow tires and rims only the people didn't realize the tires where not snow tires but their old worn Michelin's, me being polite and not disputing any discrepancy because it is hard to find 6 bolt wheels. The 2014 and earlier Sedona uses a 6 bolt wheel.
I checked the ATF with a DIPSTICK , which was how it was done in the old days

And I'm fairly certain I checked it correctly, I added a few ounces more to be safe, my street isn't exactly level
Checked one of the rear brake on the Escape that was squeaking. No idea except maybe the heat cracks in the pad. Plenty of pad left so made sure everything was free and clean and put it back together. Might if fixed it.
The Focus had a terrible creak on the passenger side. Clean everything and sprayed it down with silicon spray and regreased the end link. Seems better but I think it's the strut.
Installed a ceramic Dometic 310 toilet in the RV.. if the boys can't hit that their going outside. Also power washed the house and bleached the gutters. A lot done today!
So the Focus was running a little rough at idle and had a stumble on acceleration onto the freeway. On Wednesday I went out to diagnose the issue. Had a feeling it was a COP. Well while sitting in the running car the check engine light popped on and there were six codes. P0300, P0301 pending, P301, P0316, P0351, and P0352. Ok then I guess I have my answer at 187,500 miles. So I ordered four (to be safe) Denso COPs made in USA and with a label over the actual numbers under it. Soon as #1 was changed the car started without dragging it out. Then replaced all the others, threw one away, and stored the other three away today after they arrived yesterday. Just got back from a quick high speed run and no burps.
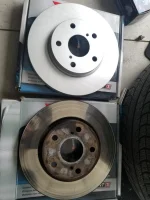
Changed front and rear pads and rotors on the rav4. Used akebono pads and element3 rotors.
Changed cabin air filter and engine air filter as well.
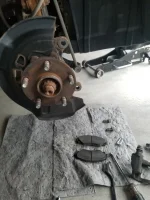
Used a m8x1.25 bolt to remove the rotors. Fronts were stuck, bent one bolt. Rear rotors came off easy as soon as I removed the caliper bracket. Cleaned up the hub, looks better than the pic now.
Didn't have time to do a brake flush which is due. That will be done on the weekend.
Changed cabin air filter and engine air filter as well.
Used a m8x1.25 bolt to remove the rotors. Fronts were stuck, bent one bolt. Rear rotors came off easy as soon as I removed the caliper bracket. Cleaned up the hub, looks better than the pic now.
Didn't have time to do a brake flush which is due. That will be done on the weekend.
Attachments
Looks very similar to the dipstick on my 6R140. I find I really like this style over the all-metalView attachment 123819
I checked the ATF with a DIPSTICK , which was how it was done in the old days
And I'm fairly certain I checked it correctly, I added a few ounces more to be safe, my street isn't exactly level
Today
2019 Dodge Charger 56k
Rear rotors and pads
Easy job.
2019 Dodge Charger 56k
Rear rotors and pads
Easy job.
It was mild, so I inspected the rear brakes on my '19 QX60. I did the rears with Raybestos Element rotors and pads April '21 at 58k km.
The rear driver side inboard pad was pretty tight in caliper bracket, took the pads out and the clips, cleaned all and got the rust off the surfaces of the bracket. Copper anti-sieze on all critical surfaces, just like I did when these rears were done 17 months and 32k km ago.
The pads still have lots of material and these coated rotors are standing up quite well.
Starting the annual oil changes...

Similar threads
- Replies
- 8
- Views
- 5K