I've never done that, and don't think I will. It looks a lot like work.
You are using an out of date browser. It may not display this or other websites correctly.
You should upgrade or use an alternative browser.
You should upgrade or use an alternative browser.
What are you working on today?
- Thread starter Amkeer
- Start date
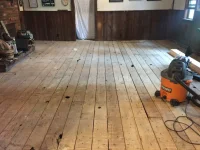
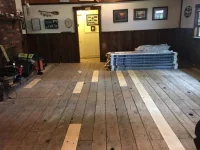
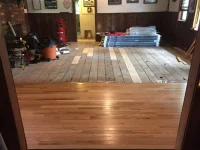
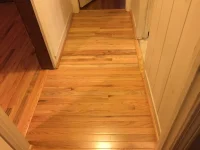
It’actually quite easy. I put 600 sq feet down of 2.25x3/4 oak last year. This room easy wall to wall carpet with 3/4” particle board subfloors over plank. Pulled carpet and PB up and put down the hardwoodI've never done that, and don't think I will. It looks a lot like work.
Attachments
-
 35F79FA5-B20C-4B4F-9A5E-4C6DB915BCCD.webp107.5 KB · Views: 18
 -
 0CD9D52A-CA0F-4587-B955-F4CB11DCEBC0.webp95.9 KB · Views: 18
 -
 FEBE2A50-75DF-4801-A01B-8911B5F0B36B.webp89.3 KB · Views: 16
 -
 EFD66B3D-C664-4456-BD12-CBBB016F7DD9.webp50 KB · Views: 16
 -
 FD3B5DBE-3703-412D-B2F7-B12644F45FC3.webp57.4 KB · Views: 17
 -
 B199BF3D-7B8A-4D05-9E41-48C9118DA509.webp78.4 KB · Views: 18
It’actually quite easy. I put 600 sq feet down of 2.25x3/4 oak last year
Looks very nice. Lemme know if you ever plan on an extended stay in Central Indiana. Got some flooring that could use your touch.
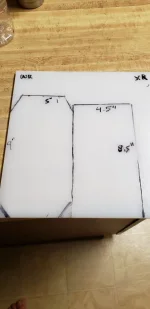
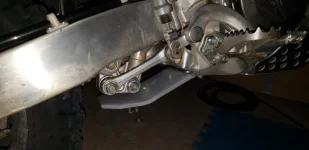
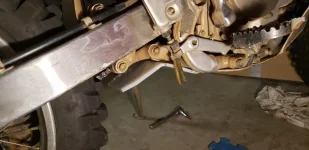
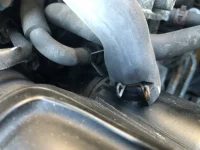
I recently bought a sheet of 1/4 inch UHMW and crafted 2 linkage guards for my 2 dirt bikes. They aren't perfect but certainly good enough for the intended purpose. Saved a ton of cash vs. purchasing aftermarket pieces. And wow, this UHMW material is super tough, perfect for the application.
Now I'm using the leftover scraps to craft another little guard to protect the exposed and vulnerable coolant hose below the right radiator on the Yamaha. Sorry I don't have any pics of that, yet.
Now I'm using the leftover scraps to craft another little guard to protect the exposed and vulnerable coolant hose below the right radiator on the Yamaha. Sorry I don't have any pics of that, yet.
Attachments
Dropped my 3500 off at the dealer for some warranty work. Had noticed a leak between the transmission and transfer case.
Helping my friend button up a bearing replacement on one of his 350 Chevrolet race engines. Didn't need it, but they get a yearly tear down and inspection to check things out.
Also put new wheel hubs on his daughter's 1996 Buick Regal over the weekend.
Also put new wheel hubs on his daughter's 1996 Buick Regal over the weekend.
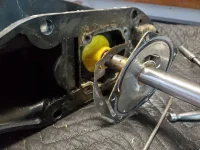
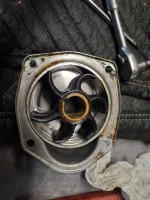
Resealing a friends lower unit (2004 Mercury 225XL Opt).
New impeller, too.
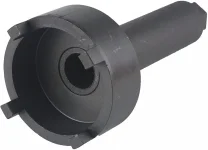
Waiting on the carrier retainer nut tool to arrive.
I will improvise a means of pulling the carrier out of the drive.
New impeller, too.
Waiting on the carrier retainer nut tool to arrive.
I will improvise a means of pulling the carrier out of the drive.
Attachments
Installing an ODA at a customer site.
https://www.oracle.com/database/technologies/database-appliance.html
Just finished relocating and re-installing some Oracle Cloud at Customer (gen1) devices for another customer last week.
No pictures, most customers don't want photos of their data centers published.
https://www.oracle.com/database/technologies/database-appliance.html
Just finished relocating and re-installing some Oracle Cloud at Customer (gen1) devices for another customer last week.
No pictures, most customers don't want photos of their data centers published.
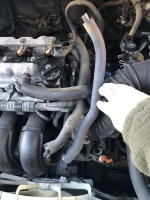
Today I changed the PCV valve and PCV hose on my 2006 Toyota Corolla LE with 95,433 miles. It took about 25 minutes.
Here are the parts:


After taking off the engine cover I oriented the new hose for fitment:

The original PCV valve was shot. It did not rattle at all. Here are the new and old:

For the end that attaches to the intake and is exposed to the elements I bought a new clamp too. Here it is just before I reattached the plastic engine cover.


It needed a box end wrench to replace the valve, because I did not have a 22mm deep socket.
Here are the parts:
After taking off the engine cover I oriented the new hose for fitment:
The original PCV valve was shot. It did not rattle at all. Here are the new and old:
For the end that attaches to the intake and is exposed to the elements I bought a new clamp too. Here it is just before I reattached the plastic engine cover.
It needed a box end wrench to replace the valve, because I did not have a 22mm deep socket.
Attachments

AutoMechanic
Site Donor 2026
Great. Never seen anyone use a factory PCV valve most of the people I know get the aftermarket ones because they are cheap.Today I changed the PCV valve and PCV hose on my 2006 Toyota Corolla LE with 95,433 miles. It took about 25 minutes.
Here are the parts:
View attachment 37004
View attachment 37005
After taking off the engine cover I oriented the new hose for fitment:
View attachment 37014
The original PCV valve was shot. It did not rattle at all. Here are the new and old:
View attachment 37011
For the end that attaches to the intake and is exposed to the elements I bought a new clamp too. Here it is just before I reattached the plastic engine cover.
View attachment 37012
View attachment 37013
It needed a box end wrench to replace the valve, because I did not have a 22mm deep socket.
New battery in a bird, ready for cold Winter starts. 10 years on the last AGM Concorde, cannot complain.
Good view through the fuselage too; control cables, static plumbing, emergency transmitter, frames and a bulkhead, etc.
![IMG_4163[16222] (2).JPG](https://bobistheoilguy.com/forums/attachments/img_4163-16222-2-webp.37096/ "IMG_4163[16222] (2).JPG")
Good view through the fuselage too; control cables, static plumbing, emergency transmitter, frames and a bulkhead, etc.
Today I added a seat belt extender to my Kubota diesel tractor. Tonight a blizzard is expected to dump 10”-14” of snow. I have a new Polar King two piece set of insulated bib overalls and insulated coat but wearing it over regular clothes it is very bulky, and the seat belt is no longer long enough.
I bought this for $10 :

The seat belt attaches underneath the tractor seat. Tractors are easier to work on than cars.


It’s a 17mm socket. Once removed and the extender installed in its place, it looks like this.


Then I used a 17mm box end wrench and the included hardware to attach the other end of the extender to the original seat belt receptacle

I covered it with a piece of duct tape to cover the hardware.

Done. Took about 10 minutes.

I bought this for $10 :
The seat belt attaches underneath the tractor seat. Tractors are easier to work on than cars.
It’s a 17mm socket. Once removed and the extender installed in its place, it looks like this.
Then I used a 17mm box end wrench and the included hardware to attach the other end of the extender to the original seat belt receptacle
I covered it with a piece of duct tape to cover the hardware.
Done. Took about 10 minutes.
All done, complete with shameless ad for Motomaster Mercon V.Today is new power steering pump day on my 2005 Ford Taurus. I have a rebuilt Ford Motorcraft pump from Rock Auto ready to go in.


Multi-layer staining quarter round moulding for the new floor In my wife's craft room.
Second stain.


Third layer of stain.
I think it's a good match.
That kinda looks 'distressing'. Great job!
Similar threads
- Replies
- 8
- Views
- 5K