This past weekend, I did a front brake job on a co-worker's 2003 Accord.
I decided to take some pictures of the process to share my process with y'all.
First of all, the reason for this brake job is pedal pulsation. As you will see below, the pads have plenty of life left. For those of you who have done your homework, you will remember that lateral runout is the primary cause of most pedal pulsation issues - so this will be a focus during this brake job.
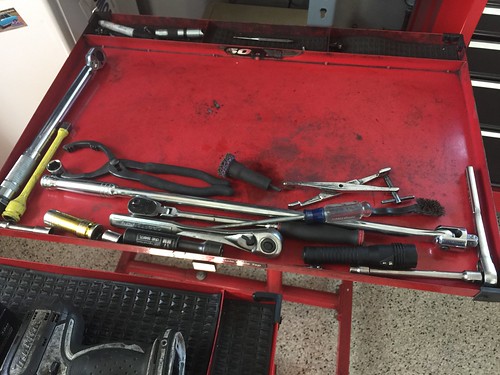
Before we get started, let's make sure that we have all of our tools ready:
 Untitled by thecritic89, on Flickr
Just your typical tools - pad spreader, breaker bar, 3M hub cleaning attachment, torque wrench, 12/17/19mm sockets, torque stick, ratchets and extensions. I will also be doing an oil change on this car, which supports the need for the filter pliers.
 Untitled by thecritic89, on Flickr
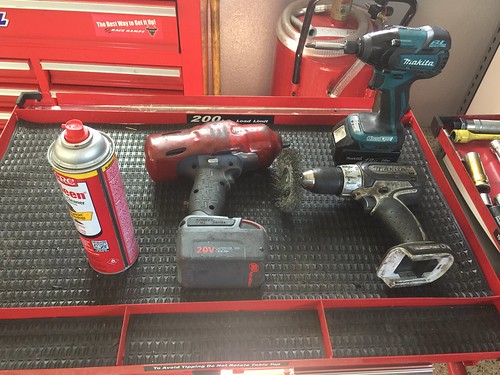
Impact gun, impact driver (for removing those infamous rotor hat screws), brake clean and drill (for cleaning the hub flange).
Now let's check our parts:
 Untitled by thecritic89, on Flickr
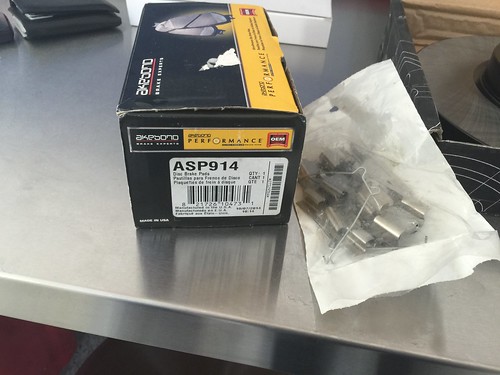
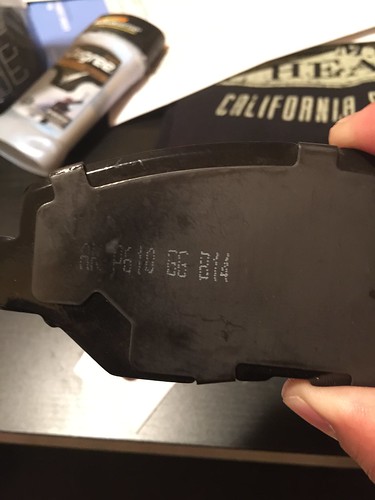
Here are the new pads and the new caliper hardware. For this job, we are using Akebono's Performance Ceramic Pads and a hardware kit by Centric.
 Untitled by thecritic89, on Flickr
 Untitled by thecritic89, on Flickr
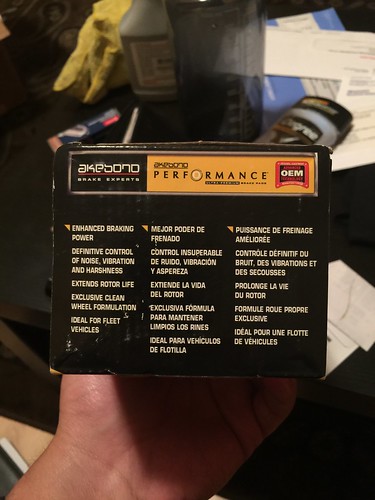
These are marketed as "performance" pads that carry a GG rating. From my experience, they offer a bit more bite than the typical factory pad, but the difference is not significant.
 by thecritic89, on Flickr
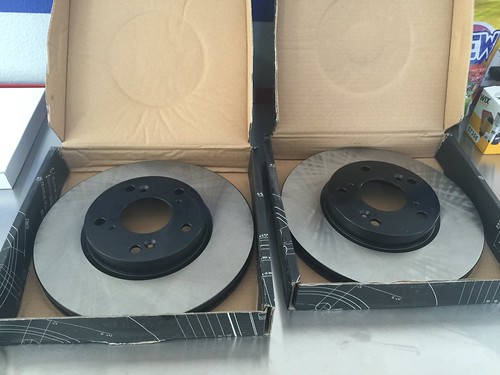
We will be using Centric 125-series high carbon rotors. The material on these rotors are a bit softer and are intended to be used with semi-metallic pads; according to Centric, the service life will be a bit shorter. However, I like these rotors over the 120-series since they are usually machined a bit better and have less runout.
 by thecritic89, on Flickr
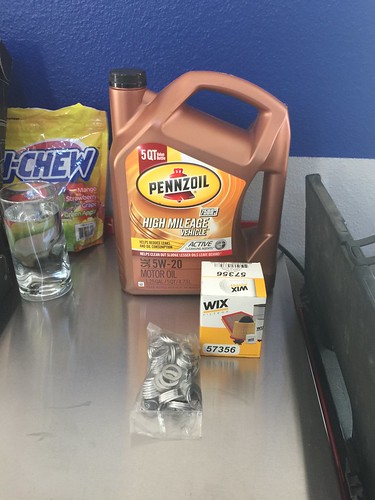
Of course, this is BITOG - so what repair job would be complete without a quality oil service? For this car, we are going with Pennzoil High Mileage 5w-20, a Wix filter and a new crush washer.
 by thecritic89, on Flickr
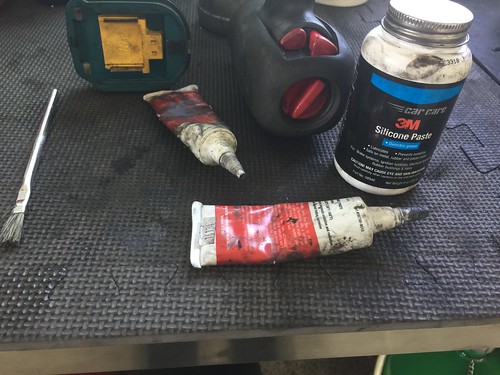
For this brake job, we will also be needing the proper greases - 3M Silicone Paste for the slide pins and Molykote-77 for the shims and pad ears.
Time to get started...
 Untitled by thecritic89, on Flickr
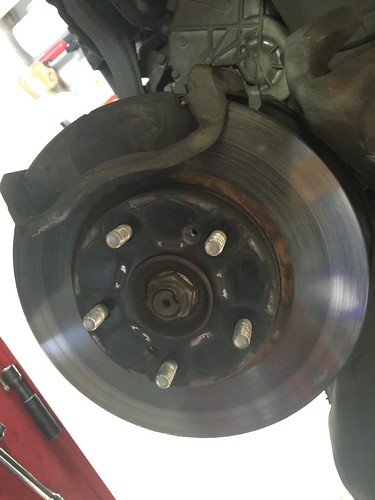
Here is the old setup with the caliper and rotor hat screws removed. Note the strange wear pattern on the rotors...
 Untitled by thecritic89, on Flickr
As previously mentioned, these brakes were recently done, but the owner was experiencing a pulsation issue. Note the available holes for the pad springs - some applications using this FMSI number (914) require the pad springs (08-12 Accords), but not this particularly vehicle. I tried to use one of the springs that came with the hardware kit, but the springs were too big.
 by thecritic89, on Flickr
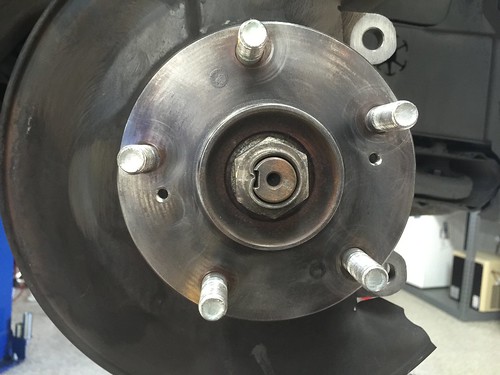
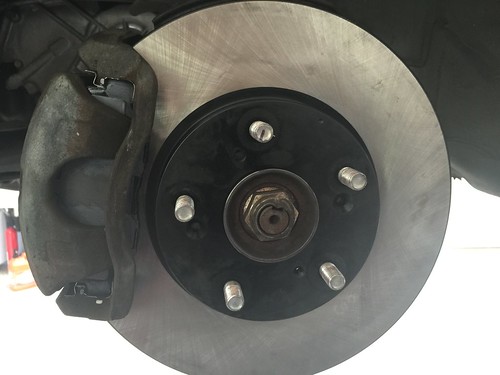
Okay, our rotor is now removed. But look at this rust - this needs to be taken care of. If the issue is left unaddressed, the rotor will not sit flat and this will contribute to excessive lateral runout. So, let's go clean it up...
 by thecritic89, on Flickr
Much better. To accomplish this, I used a 3m hub cleaning tool and an el-cheapo wire wheel from Harbor Freight. As mentioned before, this step is absolutely critical to a proper brake job.
Left-front:
https://www.flickr.com/photos/117853022@N04/16748202813/
Right-front:
https://www.flickr.com/photos/117853022@N04/17342521966/
Please pardon the rushed commentary. Here, I have cleaned the hub flange and have installed the rotor back onto the vehicle using five conical washers and an 80 ft-lbs torque limiting extension.
Honda's spec for this vehicle allows up to 0.004" of lateral runout. This is a ridiculously generous spec, which is probably why pulsation issues are not uncommon with this generation of Accords. On later models (08-12), they tightened up the spec to only allow 0.002", which is much more realistic. Some vehicles now only allow for 0.0014". Generally, the less runout you have, the longer that it will take to develop disc thickness variation. I always try to aim for 0.001" or less.
In this situation, prior to indexing the rotor, I was getting runout readings of nearly 0.004"! While the reading was technically within spec, that was not acceptable to me.
Despite indexing the rotors (trying different mounting positions), the best that I could get on the right-side was just under 0.002". The left side was a bit better at just over 0.001". Ideally, I should have either resurfaced the new right-front rotor using an on-car-lathe or I should have used a runout correction shim. But at this point, we were well within Honda's spec for runout and I did not want to go back to the owner to convince her to buy more parts.

However, it should be noted that the pulsation will probably return much sooner on this car, than if we had gotten the runout down to under 0.001".
 by thecritic89, on Flickr
Prior to installing the new hardware, I manually cleaned up the caliper brackets using a wire brush. The brackets stay pretty clean out here, so I didn't put a lot of time into them. But in areas with a lot of snow/salt, it is critical to clean these areas - rust can build-up and cause the pads to get stuck.
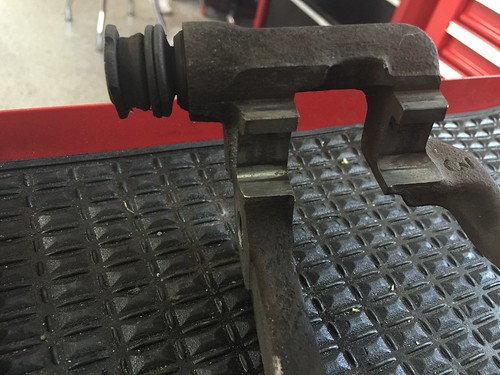
After cleaning, I installed new clips - which is an important part of the brake job on Hondas (IMO). The old ones seem to bend easily when they get old, and won't fit correctly once you try to re-install them after removal. At this time, I also lube the caliper slide pins with 3M silicone brake grease and "burp" the boots.
 by thecritic89, on Flickr
All done. Reassembly was simple - installed the bracket and torqued to 80 ft-lbs. The caliper piston was retracted and the caliper was reinstalled. I could not re-install the rotor hat screws since I did not use the intended mounting position for the rotor, but hey, I will take the lower runout value!
Now, re-install the wheels using a torque-stick and do 10-15 moderate stops in a row from 30-40 mph to properly seat the pads.
Thanks for watching! And IMO, this is what a proper brake job should involve - I read a lot of people saying that pad/rotor replacements are stupid quick and easy...and that is far from the truth IF the job is done properly.
- Critic
I decided to take some pictures of the process to share my process with y'all.
First of all, the reason for this brake job is pedal pulsation. As you will see below, the pads have plenty of life left. For those of you who have done your homework, you will remember that lateral runout is the primary cause of most pedal pulsation issues - so this will be a focus during this brake job.
Before we get started, let's make sure that we have all of our tools ready:
Untitled by thecritic89, on FlickrJust your typical tools - pad spreader, breaker bar, 3M hub cleaning attachment, torque wrench, 12/17/19mm sockets, torque stick, ratchets and extensions. I will also be doing an oil change on this car, which supports the need for the filter pliers.
Untitled by thecritic89, on FlickrImpact gun, impact driver (for removing those infamous rotor hat screws), brake clean and drill (for cleaning the hub flange).
Now let's check our parts:
Untitled by thecritic89, on FlickrHere are the new pads and the new caliper hardware. For this job, we are using Akebono's Performance Ceramic Pads and a hardware kit by Centric.
Untitled by thecritic89, on FlickrUntitled by thecritic89, on FlickrThese are marketed as "performance" pads that carry a GG rating. From my experience, they offer a bit more bite than the typical factory pad, but the difference is not significant.
by thecritic89, on FlickrWe will be using Centric 125-series high carbon rotors. The material on these rotors are a bit softer and are intended to be used with semi-metallic pads; according to Centric, the service life will be a bit shorter. However, I like these rotors over the 120-series since they are usually machined a bit better and have less runout.
by thecritic89, on FlickrOf course, this is BITOG - so what repair job would be complete without a quality oil service? For this car, we are going with Pennzoil High Mileage 5w-20, a Wix filter and a new crush washer.
by thecritic89, on FlickrFor this brake job, we will also be needing the proper greases - 3M Silicone Paste for the slide pins and Molykote-77 for the shims and pad ears.
Time to get started...
Untitled by thecritic89, on FlickrHere is the old setup with the caliper and rotor hat screws removed. Note the strange wear pattern on the rotors...
Untitled by thecritic89, on FlickrAs previously mentioned, these brakes were recently done, but the owner was experiencing a pulsation issue. Note the available holes for the pad springs - some applications using this FMSI number (914) require the pad springs (08-12 Accords), but not this particularly vehicle. I tried to use one of the springs that came with the hardware kit, but the springs were too big.
by thecritic89, on FlickrOkay, our rotor is now removed. But look at this rust - this needs to be taken care of. If the issue is left unaddressed, the rotor will not sit flat and this will contribute to excessive lateral runout. So, let's go clean it up...
by thecritic89, on FlickrMuch better. To accomplish this, I used a 3m hub cleaning tool and an el-cheapo wire wheel from Harbor Freight. As mentioned before, this step is absolutely critical to a proper brake job.
Left-front:
https://www.flickr.com/photos/117853022@N04/16748202813/
Right-front:
https://www.flickr.com/photos/117853022@N04/17342521966/
Please pardon the rushed commentary. Here, I have cleaned the hub flange and have installed the rotor back onto the vehicle using five conical washers and an 80 ft-lbs torque limiting extension.
Honda's spec for this vehicle allows up to 0.004" of lateral runout. This is a ridiculously generous spec, which is probably why pulsation issues are not uncommon with this generation of Accords. On later models (08-12), they tightened up the spec to only allow 0.002", which is much more realistic. Some vehicles now only allow for 0.0014". Generally, the less runout you have, the longer that it will take to develop disc thickness variation. I always try to aim for 0.001" or less.
In this situation, prior to indexing the rotor, I was getting runout readings of nearly 0.004"! While the reading was technically within spec, that was not acceptable to me.
Despite indexing the rotors (trying different mounting positions), the best that I could get on the right-side was just under 0.002". The left side was a bit better at just over 0.001". Ideally, I should have either resurfaced the new right-front rotor using an on-car-lathe or I should have used a runout correction shim. But at this point, we were well within Honda's spec for runout and I did not want to go back to the owner to convince her to buy more parts.
However, it should be noted that the pulsation will probably return much sooner on this car, than if we had gotten the runout down to under 0.001".
by thecritic89, on FlickrPrior to installing the new hardware, I manually cleaned up the caliper brackets using a wire brush. The brackets stay pretty clean out here, so I didn't put a lot of time into them. But in areas with a lot of snow/salt, it is critical to clean these areas - rust can build-up and cause the pads to get stuck.
After cleaning, I installed new clips - which is an important part of the brake job on Hondas (IMO). The old ones seem to bend easily when they get old, and won't fit correctly once you try to re-install them after removal. At this time, I also lube the caliper slide pins with 3M silicone brake grease and "burp" the boots.
by thecritic89, on FlickrAll done. Reassembly was simple - installed the bracket and torqued to 80 ft-lbs. The caliper piston was retracted and the caliper was reinstalled. I could not re-install the rotor hat screws since I did not use the intended mounting position for the rotor, but hey, I will take the lower runout value!
Now, re-install the wheels using a torque-stick and do 10-15 moderate stops in a row from 30-40 mph to properly seat the pads.
Thanks for watching! And IMO, this is what a proper brake job should involve - I read a lot of people saying that pad/rotor replacements are stupid quick and easy...and that is far from the truth IF the job is done properly.
- Critic
