In photos I think it goes from 5 foot to 5 stars. I just bought a new car today, in my avatar, and in photos I don't know that one looks any better than the other. I'm sure a good bit of that is your hard work to make it look that good. Anyway, it is sharp looking.The paint is still a 5 foot paint job, or a 3 beer paint job, if you will. However, it does clean up pretty nicely! Thanks for the compliment!
You are using an out of date browser. It may not display this or other websites correctly.
You should upgrade or use an alternative browser.
You should upgrade or use an alternative browser.
What are you working on today?
- Thread starter Amkeer
- Start date
1969 Chevelle (Originally a SS396/TH400 car). Been working on it off & on for a couple months.
Car belonged to a good friend/colleague, He passed a few months ago after a long battle with Brain Cancer. His widow sold me the car with the promise I'd finish it & not just flip it for profit.....That's exactly what I'm going to do!
**Body work is done & has a nice Satin Black paint job, Glass is new, Weather-stripping is done, Window regulators all rebuilt or replaced. Interior is gutted though I do have the original seats & door panels that need redone.
I built the engine that's in it now @23 years ago. It's a Gen II LT1 with a GM Performance LT4 top end & LT4 Hot Cam kit, ARP head bolts, & Ford Performance 30# Injectors. Backed by a T-56 6 speed. Pretty hot combination back in the day. It runs good & all.....But I'm a LSx guy!
Tried to sell the engine but there's no interest in it, Gave it to my brother for his '69 Chevy C10 project. Broke down a L96 6.0L core I had.....It's trashed pretty good. It MIGHT clean up at .030" overbore.....Some of the cylinders had .018" of taper! The worst LS engine I've ever seen, Must have lived it's life in the West Texas oil field with no air filter??
Decided to hold off on the powertrain for now & concentrate on finishing the chassis. It had factory disc brake up front but I'm not a fan of the Moraine D52 set-up. Installed Wilwood Dynalite 4-Piston brake kits Front & Rear.
Resealed the 12-Bolt differential....Needed new Axles & Axle Bearings as well.
Got a American Autowire classic update body harness (Needs installed). Was going to start on the harness before the following event happened that will drastically change the direction of this build!....
Friend called saying he had a '70 Chevelle Rolling Chassis with a LSx engine & a T-56 his neighbor was trying to sell. I'm apprehensive of situations/deals like this. Too good to be true is usually just that!!!
Went over there to check it out, Turns out it's a Female selling it because her boyfriend got locked-up on some pretty serious charges.
I asked....How do I know it's not stolen? She said....I have the title to the car in my name. Then I asked where's the body?
It's at a Body Shop & we owe money on it.
Told her I'll give her asking price if she signs the title over to me & signs a bill of sale.
Paid $1,500 for the Chassis & Powertrain. Has 6-Piston "Big Brake" Wilwood's on the front, Same 4-Piston Wilwood Dynalite kit on the rear that I already installed on the 12 Bolt in the car .
.
Frame is Boxed & Reinforced, Has Ridetech Coil-Overs on all 4 corners, Tubular Control Arms all around. 3" Pypes Stainless Exhaust system, 2" Primary Stainless long tube header, Stainless brake lines, AGR Steering Gearbox, -6AN fuel lines ran with a Aeromotive fuel pressure regulator. Griffin Radiator with Dual Spal Fans.
Figured it has a used Gen III 6.0L with L92/LY6/L96/LS3 "823" casting heads slapped on judging it purely by what I saw.
Pulled it, Tore the Covers off the engine, Found it's a Texas Speed & Performance built 408 Short Block (K1 Technologies' 4" Stroke Forged Crank, K1 H-Beam Rods)
TSP LS3 Stage 2 Cam (229/244 .629"/615” 112 LSA, 109 ICL)
TSP Dual Valve Springs with Titanium Retainers
TSP Hardened Pushrods
Melling high volume oil pump
Plan is to clean the new frame up, Seal the engine back up (Paint it black) along with the T-56 as the red is too much in my opinion.
Needs the Rocker Arm Trunnions upgraded.
Clean up a L96/L92 Intake
Buy a Nick Williams 90mm Throttle Body
Buy some Injectors (Around 60 pound per hour)
Had a weird aftermarket FEAD installed (No A/C)....Going to installed some factory Truck Brackets & Accessories.
ATI Super Damper, Had a stock GM Balancer
Swap the unpainted aluminum diff cover over along with the new brakes I just bought.
Have a Aluminum driveshaft built.
New body bushings.
Get the Body on the Frame, Dynamat the inside, Wire the Body & Powertrain.
Need to get a Vintage Air direct fit A/C system
Probably going with a Dakota Digital gauge cluster, Dial/Needle Type.....Don't care for digital displays.
Send it to the Upholstery Shop.
Then do all the body trim, Bumpers, & Grill.
Went to Summit after work & scored some stuff out of the "Scratch & Dent" store.....
Wilwood Master Cylinder, $75, Retail for $195
McLeod Flywheel, $95, Retails for $195
Flaming River polished stainless Tilt Steering Column, $300, Retails for $1200
FiTech Fuel Tank with a 340LPH Pump, $270, Retails for $670
I'll keep you guys updated.....


Car belonged to a good friend/colleague, He passed a few months ago after a long battle with Brain Cancer. His widow sold me the car with the promise I'd finish it & not just flip it for profit.....That's exactly what I'm going to do!
**Body work is done & has a nice Satin Black paint job, Glass is new, Weather-stripping is done, Window regulators all rebuilt or replaced. Interior is gutted though I do have the original seats & door panels that need redone.
I built the engine that's in it now @23 years ago. It's a Gen II LT1 with a GM Performance LT4 top end & LT4 Hot Cam kit, ARP head bolts, & Ford Performance 30# Injectors. Backed by a T-56 6 speed. Pretty hot combination back in the day. It runs good & all.....But I'm a LSx guy!
Tried to sell the engine but there's no interest in it, Gave it to my brother for his '69 Chevy C10 project. Broke down a L96 6.0L core I had.....It's trashed pretty good. It MIGHT clean up at .030" overbore.....Some of the cylinders had .018" of taper! The worst LS engine I've ever seen, Must have lived it's life in the West Texas oil field with no air filter??
Decided to hold off on the powertrain for now & concentrate on finishing the chassis. It had factory disc brake up front but I'm not a fan of the Moraine D52 set-up. Installed Wilwood Dynalite 4-Piston brake kits Front & Rear.
Resealed the 12-Bolt differential....Needed new Axles & Axle Bearings as well.
Got a American Autowire classic update body harness (Needs installed). Was going to start on the harness before the following event happened that will drastically change the direction of this build!....
Friend called saying he had a '70 Chevelle Rolling Chassis with a LSx engine & a T-56 his neighbor was trying to sell. I'm apprehensive of situations/deals like this. Too good to be true is usually just that!!!
Went over there to check it out, Turns out it's a Female selling it because her boyfriend got locked-up on some pretty serious charges.
I asked....How do I know it's not stolen? She said....I have the title to the car in my name. Then I asked where's the body?
It's at a Body Shop & we owe money on it.
Told her I'll give her asking price if she signs the title over to me & signs a bill of sale.
Paid $1,500 for the Chassis & Powertrain. Has 6-Piston "Big Brake" Wilwood's on the front, Same 4-Piston Wilwood Dynalite kit on the rear that I already installed on the 12 Bolt in the car
.Frame is Boxed & Reinforced, Has Ridetech Coil-Overs on all 4 corners, Tubular Control Arms all around. 3" Pypes Stainless Exhaust system, 2" Primary Stainless long tube header, Stainless brake lines, AGR Steering Gearbox, -6AN fuel lines ran with a Aeromotive fuel pressure regulator. Griffin Radiator with Dual Spal Fans.
Figured it has a used Gen III 6.0L with L92/LY6/L96/LS3 "823" casting heads slapped on judging it purely by what I saw.
Pulled it, Tore the Covers off the engine, Found it's a Texas Speed & Performance built 408 Short Block (K1 Technologies' 4" Stroke Forged Crank, K1 H-Beam Rods)
TSP LS3 Stage 2 Cam (229/244 .629"/615” 112 LSA, 109 ICL)
TSP Dual Valve Springs with Titanium Retainers
TSP Hardened Pushrods
Melling high volume oil pump
Plan is to clean the new frame up, Seal the engine back up (Paint it black) along with the T-56 as the red is too much in my opinion.
Needs the Rocker Arm Trunnions upgraded.
Clean up a L96/L92 Intake
Buy a Nick Williams 90mm Throttle Body
Buy some Injectors (Around 60 pound per hour)
Had a weird aftermarket FEAD installed (No A/C)....Going to installed some factory Truck Brackets & Accessories.
ATI Super Damper, Had a stock GM Balancer
Swap the unpainted aluminum diff cover over along with the new brakes I just bought.
Have a Aluminum driveshaft built.
New body bushings.
Get the Body on the Frame, Dynamat the inside, Wire the Body & Powertrain.
Need to get a Vintage Air direct fit A/C system
Probably going with a Dakota Digital gauge cluster, Dial/Needle Type.....Don't care for digital displays.
Send it to the Upholstery Shop.
Then do all the body trim, Bumpers, & Grill.
Went to Summit after work & scored some stuff out of the "Scratch & Dent" store.....
Wilwood Master Cylinder, $75, Retail for $195
McLeod Flywheel, $95, Retails for $195
Flaming River polished stainless Tilt Steering Column, $300, Retails for $1200
FiTech Fuel Tank with a 340LPH Pump, $270, Retails for $670
I'll keep you guys updated.....
- Joined
- Nov 29, 2021
- Messages
- 5,383
Added RMI-25 to radiator.
Car seems to put coolant INTO the expansion tank.. doesn't seem to suck it back in when it cools down, as per normal. Not sure why. Repaced cap about 3 days ago or so.
And, I think I discovered another problem.
Let's see if I can find my green one, dip it in oil and put it on.

And I fixed it.
Car seems to put coolant INTO the expansion tank.. doesn't seem to suck it back in when it cools down, as per normal. Not sure why. Repaced cap about 3 days ago or so.
And, I think I discovered another problem.
Let's see if I can find my green one, dip it in oil and put it on.
And I fixed it.
Last edited:
Working on this 2021 Jetta while it's owner is away on vacation
Removed the tire to diag the slow leak

Nope

Closer

Bingo

It'll do

Cowl clean out was in order (she parks under a lot of trees)

Deep exhale

Now it's off to the local VW dealer for an OCI, Airbag controller recall, NYS inspection, and I'm gonna ask for a PCM reflash to improve engine warm up
I printed the TSB, let's see if they do it
Cabin filter should arrive soon
2021 Jetta SE, 1.4T/8 Speed, ~9,700 on the odometer
That whole family just doesn't take the best of care of the vehicles, whether it was the Elantra, the Rebel 300, the RAV4
I really gotta start charging more for my time...
Removed the tire to diag the slow leak
Nope
Closer
Bingo
It'll do
Cowl clean out was in order (she parks under a lot of trees)
Deep exhale
Now it's off to the local VW dealer for an OCI, Airbag controller recall, NYS inspection, and I'm gonna ask for a PCM reflash to improve engine warm up
I printed the TSB, let's see if they do it
Cabin filter should arrive soon
2021 Jetta SE, 1.4T/8 Speed, ~9,700 on the odometer
That whole family just doesn't take the best of care of the vehicles, whether it was the Elantra, the Rebel 300, the RAV4
I really gotta start charging more for my time...
Cleaning up my Stihl SH56c and MS 171.
Blower is getting a little too dusty around air intake, primer bulb and all the crevasses. A little compressed air and some simple green.
Chainsaw needs some sharpening and compressed air.
Blower is getting a little too dusty around air intake, primer bulb and all the crevasses. A little compressed air and some simple green.
Chainsaw needs some sharpening and compressed air.
Playing w my AP hot staple gun.

Before. And yeah, that's Bambi fur

After. I fully understand many would consider this atrocious but it's good enough for the project at hand (which will be an eventual thread unto itself). Plus once installed with no light passing through it it is far less noticeable.
The plastic not only cracked but stretched a bit upon contact with Bambi, so a seamless fix with this method alone is virtually impossible.

Rear view with staples trimmed. Frankenstein anyone?
Before. And yeah, that's Bambi fur
After. I fully understand many would consider this atrocious but it's good enough for the project at hand (which will be an eventual thread unto itself). Plus once installed with no light passing through it it is far less noticeable.
The plastic not only cracked but stretched a bit upon contact with Bambi, so a seamless fix with this method alone is virtually impossible.
Rear view with staples trimmed. Frankenstein anyone?
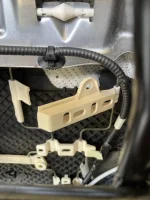
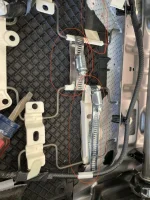
Continuing minor maintenance on this Jetta

Remember to clean the drains in the fuel filler pocket

Out with the OE cabin filter


I recommend Continental branded CAF, it's made in Germany and fits quite nice
Took it for a wash and vacuum, Monday it goes for it's airbag module recall
I thought I'd be kind to the poor tech who's gotta do the job
The console, wheel, cluster, dash, dash bracket, pedals, and HVAC box have to come out
All for 7.something hrs
Remember to clean the drains in the fuel filler pocket
Out with the OE cabin filter
I recommend Continental branded CAF, it's made in Germany and fits quite nice
Took it for a wash and vacuum, Monday it goes for it's airbag module recall
I thought I'd be kind to the poor tech who's gotta do the job
The console, wheel, cluster, dash, dash bracket, pedals, and HVAC box have to come out
All for 7.something hrs
So the house we bought has some fancy ceiling fan that… is entirely controlled by a remote… which died. New receiver assembly is $120. Not sure if the fan motor was ac or dc (newer ones are dc) but it looked to be ac. Quick test and it was. Bought a fan dimmer switch for 120v and put that in the wall switch, and then simply bypassed the remote module and buttoned it back up. I lost forward/reverse but for a fraction of the price it’s working without some delicate electronic assembly in the middle. old man yells at cloud - I am not in favor of this trend towards electronic fan remotes; I’ve put in a couple and electronic motor controls just never seem good when left to the lowest bidder.
I’ll take the win.
Foam seat cushion (oem) came in for my f150. Hope to install it Monday. have debated all the things - adding seat heat pads, reinstalling with leather… got overwhelmed and plan to just do it stock for stock.
I’ll take the win.
Foam seat cushion (oem) came in for my f150. Hope to install it Monday. have debated all the things - adding seat heat pads, reinstalling with leather… got overwhelmed and plan to just do it stock for stock.
I think next is just make everything BT? Then you control with your phone. Don't shoot the messenger, I'm not saying it's good or badSo the house we bought has some fancy ceiling fan that… is entirely controlled by a remote… which died. New receiver assembly is $120. Not sure if the fan motor was ac or dc (newer ones are dc) but it looked to be ac. Quick test and it was. Bought a fan dimmer switch for 120v and put that in the wall switch, and then simply bypassed the remote module and buttoned it back up. I lost forward/reverse but for a fraction of the price it’s working without some delicate electronic assembly in the middle. old man yells at cloud - I am not in favor of this trend towards electronic fan remotes; I’ve put in a couple and electronic motor controls just never seem good when left to the lowest bidder.
I’ll take the win.
Foam seat cushion (oem) came in for my f150. Hope to install it Monday. have debated all the things - adding seat heat pads, reinstalling with leather… got overwhelmed and plan to just do it stock for stock.
PSA: Check your flywheel shear key esp on push lawn mowers.. ( I didn't)

This is on my "main" push mower with a B&S 7.25 190cc "Flat" head engine. I was "sure" It had a dirty carburetor as the symptoms kinda pointed that way even after I cleaned the carburetor multiple times, it was 1) Hard to start as I would have to pull the rope up to 4 times to get it to run, but I might catch on third pull. 2) After I did get it started, but still when cold the throttle would "surge" up and down for about 90 seconds, and then it was smooth out and the rpms would then be steady. 3) Power delivery seemed acceptable, until the engine would get under a certain RPM because of tall grass ect, then it would just stall sometimes kinda abruptly and again would take 3-4 pulls to restart it with a couple puffs of blue/black smoke.. 4) slight tick/knock sound from engine at certain rpms.
I recently picked up this guy on the side of road for metal pick up (one pull start) with the same B&S engine and decided to start swapping parts to the toro and see what the bad part was.

Since I was SO sure it was the carburetor that is where I started. I swapped over the known good carb from the Craftsman to Toro reassembled and started it. to my absolute disbelief there was zero change, so from there my thought process was "air leak? thus the smoke when trying to start it. Okay It "must" be that plastic intake is cracked causing an air leak. swapped that part over with same results. huh... maybe its the coil acting up when cold....? swapped that over with a brand new NGK V power plug and again same results. Maybe temperature control thermostat???? swap over and you guessed it... NO CHANGE.
So now I am thinking the engine has low compression/worn or broken valve/ blown head gasket or warped head? Remove the head and there is carbon for days on the head / piston top and valves, plus scoring on the cylinder wall that you can see but not feel. So I thought for sure I am on to something. Spent the better part of two hours meticulously cleaning everything on the head, valves, piston ect and since now I am sure the engine is worn out or wearing out, I google how to fix scoring, and "google" says 4 or 500 grit sand paper and some oil, so that's exactly what I did and sanded whole cylinder wall. After some time cleaning and sanding, I reassemble and start it... and you guessed it again. ZERO CHANGE..
Now I am getting frustrated with the toro... I let a day or two pass, research, and go over everything I did to "try" and fix this toro. Somehow over that couple day pause "timing" comes into the equation.. "well what do I have to lose" take the toro all apart for about the 10th time, remove the fly wheel nut and the flywheel cup, instantly I see the issue.

I removed the "good" flywheel key from the parts craftsman mower and install it in the toro line up, reassemble, and gave it a start.
The toro started within 3 revolutions of the pull string and that was pulling lightly... no smoke, no sounds, no surging...
turn it off and try to restart it. this time it starts by the 2nd revolution of the engine, even when warm and it catches instantly..
This was a first for me, I don't ever remember replacing a flywheel shear key on a push mower... but, you can be sure that will now be one of the first places I will check.
This is on my "main" push mower with a B&S 7.25 190cc "Flat" head engine. I was "sure" It had a dirty carburetor as the symptoms kinda pointed that way even after I cleaned the carburetor multiple times, it was 1) Hard to start as I would have to pull the rope up to 4 times to get it to run, but I might catch on third pull. 2) After I did get it started, but still when cold the throttle would "surge" up and down for about 90 seconds, and then it was smooth out and the rpms would then be steady. 3) Power delivery seemed acceptable, until the engine would get under a certain RPM because of tall grass ect, then it would just stall sometimes kinda abruptly and again would take 3-4 pulls to restart it with a couple puffs of blue/black smoke.. 4) slight tick/knock sound from engine at certain rpms.
I recently picked up this guy on the side of road for metal pick up (one pull start) with the same B&S engine and decided to start swapping parts to the toro and see what the bad part was.
Since I was SO sure it was the carburetor that is where I started. I swapped over the known good carb from the Craftsman to Toro reassembled and started it. to my absolute disbelief there was zero change, so from there my thought process was "air leak? thus the smoke when trying to start it. Okay It "must" be that plastic intake is cracked causing an air leak. swapped that part over with same results. huh... maybe its the coil acting up when cold....? swapped that over with a brand new NGK V power plug and again same results. Maybe temperature control thermostat???? swap over and you guessed it... NO CHANGE.
So now I am thinking the engine has low compression/worn or broken valve/ blown head gasket or warped head? Remove the head and there is carbon for days on the head / piston top and valves, plus scoring on the cylinder wall that you can see but not feel. So I thought for sure I am on to something. Spent the better part of two hours meticulously cleaning everything on the head, valves, piston ect and since now I am sure the engine is worn out or wearing out, I google how to fix scoring, and "google" says 4 or 500 grit sand paper and some oil, so that's exactly what I did and sanded whole cylinder wall. After some time cleaning and sanding, I reassemble and start it... and you guessed it again. ZERO CHANGE..
Now I am getting frustrated with the toro... I let a day or two pass, research, and go over everything I did to "try" and fix this toro. Somehow over that couple day pause "timing" comes into the equation.. "well what do I have to lose" take the toro all apart for about the 10th time, remove the fly wheel nut and the flywheel cup, instantly I see the issue.
I removed the "good" flywheel key from the parts craftsman mower and install it in the toro line up, reassemble, and gave it a start.
The toro started within 3 revolutions of the pull string and that was pulling lightly... no smoke, no sounds, no surging...
turn it off and try to restart it. this time it starts by the 2nd revolution of the engine, even when warm and it catches instantly..
This was a first for me, I don't ever remember replacing a flywheel shear key on a push mower... but, you can be sure that will now be one of the first places I will check.
Washed the LeSabre and then decided I had it with the swirl marks on the hood. Was repaired and painted in 2016 while it was my father's car. So I pulled out my Flex dual action orbital polisher and went to work on the hood. All in all the total time involved was 3 hours. Now in the process of assembling another new rocker shaft assembly for my Mercury 410. New shaft, NOS stands, NOS springs, and NORS rockers


Oiled a fresh set.


- Joined
- Nov 29, 2021
- Messages
- 5,383
Verifying idle smoothed out. It wasn't the IACV, though that now has two O-rings on it due to variation in where experts say it should be...
And it wasn't coolant level, apparently, though Hondas low coolant can screw with idle, this I know...
Might have actually got it.
I moved the airbox to achieve desired result...
Taurus has P0538 and a leak somewhere in the AC lines so. That could be the death knell for my use of that car, at least in the summer. Will revisit in time, maybe the components get replaced. P0538 thermistor is a real bear to get to.........
Rolled out four more roles of fiberglass in tight spots over 2 hours. Wife gave me knee pads for Father’s Day which were WORTH IT WHY DIDNT I GET SOME SOONER??
but then decided to tackle the collapsing seat cushion in the 2018 f150. Got the old one out in 45 minutes and started wrestling the new one in. Got it 90% in and test-sat it. very little difference? Whaaaat? put it back on the work table and realized that ford uses plastic ties between the seat springs to keep them working together in high weight places, and half of mine were broken. I’m 195 lbs, not featherweight but also not a big guy. The truck is 5 years old. The best I had to replace them was threaded stainless steel hose clamps, so I used those to replace the broken ones as well as the next ones I figured would snap.
reinstalled it all.. it’s not perfect. im too close to it and can’t tell. I am indeed 1.5“ taller in the seat, but the cushioning doesn’t seem even.
somebody in the budget department at ford should be slapped; I can’t see any engineer recommending this as their solution. I can see engineers quitting over this and going to GM or Dodge or John Deere.
pictures are part-way thru the repair. I think I used 7 clamps in total.
Attachments
Keeping a post plumb whilst concreting it

Serviced the Mini Cooper S cooling system.
Coolant was filthy and green. Wrong stuff in there so I used my fluid vac to vacuum it out as much as I could. Didn’t seem like much in there. Then I used my OEM Tools 24444 vacuum filler and put a vacuum of -25 psi for several minutes. The vacuum held constant so I have no leaks. Used the tool to refill with the proper Euro Blue coolant. Took it on a test run and it seemed to run smoother. Scan tool told me the temperature was the same or lower depending on coasting, acceleration, etc.
But I detected the fuel odor again and figured I’d better check the gasket on the fuel filter housing. Sure enough, though it has seemed like it had fit correctly, it hadn’t. The corner of the gasket/seal o-ring had folded down into the tank creating a slow leak, and the gasoline smell. Tried refitting it but studied it and the extra o-ring seals I have. One was a tiny bit smaller and that fit in there better. The one I used before was probably a BMW seal and thus caused the failure.
No more raw fuel smell, and the car is running well with no codes.
A Fall project on this car will involve the water pump replacement, coolant pipe, thermostat and another coolant fill. The partial service will do for now, and at least rids it of the green stuff.
New project tomorrow or Wednesday. I’ll relate that story later on.
I like to keep a pale of fresh apples nearby when setting concrete too!Keeping a post plumb whilst concreting itView attachment 162279
Similar threads
- Replies
- 8
- Views
- 5K