What are you working on today?

So yesterday was a day to get off track brakes and tires off. I am upgrading brakes to Brembo in the spring, but still had one set of front brakes and new rear pads.
The old ATE rotors I took off yesterday had bit over 35,000 miles. Of those, probably 2,000+ were track miles. I obliterated two sets of track pads on them (StopTech Sport and EBC YellowStuff) and yesterday I took off Jurid (OEM) pads I used last week on track (just to try. Better performance on track than that StopTech junk that is supposedly made for track):
D6F5E0BC-F3EC-4BE2-876D-36220D107027.jpeg


New set, ATE pads (semi metallic, of course, GG rated) and Zimmerman rotors:
268C92CC-111C-4B8E-BF2A-2AF486E927D8.jpeg


Rear pads: ATE, semi metallic, GG rated.

Now the real work.
Some two years back I gave a car to friend who owned independent shop. Super capable guy. I didn’t have time to deal with oil cooler installation, so gave it to him. He drops right headlight, breaks it. He installs new ZKW (OE). My headlights were foggy, and cleared it once but damage was bad already. Anyway, one light was new another foggy and getting worse. Really bothered me. Took several months to find used clear light that is also adaptive.
All in all, took three hours of work. Never did this on BMW, but it could be done in an 1-1 1/2hrs after knowing what needs to be unbuttoned.
Old light assembly:
8EE23AAA-E93D-45D1-B168-EFAE324BD356.jpeg
C3EF53BD-8CFE-40DB-9306-C915C3EFC49C.jpeg

New (used) light assembly:
8F741B17-4491-42B0-BC01-A2187FB0A2D3.jpeg


Installed also new D1S bulbs, Osram Xenarc. Big improvement from regular D1S, though OE bulbs were really good.
 
Wife's 2013 Equinox. Still battling with the secondary air injection code. Ordered a new check valve after confirming the pump works, turns out there are two of them. There's a TSB detailing that the injection ports tend to get clogged with carbon, so thought I would take the exhaust manifold off to clean them out. Nope, not feeling that adventurous today, that looks like a nightmare. On the other hand, took one of the valves apart and found it was clogged up with soot. Replaced that with the new check valve, and ran some lacquer thinner through the other check valve, got lots of carbon out of it. Putting it back together, the scan tool is reporting the pressure is below the 1.9 PSI threshold that triggers the P0411 code that I've been having. Hmm.... Might have fixed it after all.
 
  • Like
Reactions: D60
63077A2F-5B3E-4CEE-8F27-D0A6EED57B03.jpeg
BE307E41-702B-48AD-BD0F-C7E3B17720D3.jpeg
3D16B020-AD44-436F-A0F7-88F8E8EA2212.jpeg
4128AE59-3B7E-4484-A462-D5C3721E399B.jpeg
C39D1C75-326F-4415-997E-ECD7A0D879E3.jpeg

Replaced the water pump and serpentine belt on dads 2004 Toyota Camry with the 2.4. Told him he owes me a new 10mm socket since I lost mine 😆. That bottom bolt on the water pump took it somewhere into a deep dark place lol. Forgot to take pictures when I was done but oh well. I had a hard time using RTV because they don’t sell the water pump kind in the big tubes so I had to carefully do it without a nozzle. These water pumps don’t take a gasket you just have to make one. I’m fighting with the serpentine belt trying to get it on. I’m not sure why I can’t but I’m sure I’ll get it. Sometimes you just have to take a break for a minute. I ended up using way more tools than pictured though lol. And bought new ones too. Dad got a Dayco belt so hopefully it will do well I’m not too familiar with them but I wasn’t going to say anything he didn’t ask me lol.
 
Saturday: replaced right side control arm bushings on my niece’s 2004 Jaguar X-type. The large bushing at the rear of the control arm was ripped and allowed movement, giving the car a shuddering on braking and on bumps. My pry bar check confirmed it a week back and parts arrived Friday.

Front bush went in easily, and the rear took some effort. I didn’t have a large enough press cup for it so I had to use some iron and ball joint press caps but it went in where it should. Control arm rebuilt in an hour. Ball joint was fine so it went back in.

The fun began with getting the control arm back in, but another hour’s fiddling got it in and torqued. I had to replace a subframe bolt and nut (nut is captive in a body pocket so that was NOT fun. But it all finally went together and no more shuddering; car feels nice and tight again. But I was dead beat after that (and the electric rework we completed for the garage earlier that morning to restore power thanks to gophers chewing up the original cables), but I have a pad replacement planned on the Mini. That should go faster… 😎
 
Been trying to get that serpentine belt on all day from where we done the water pump. We matched the belt up and have it in the right pattern according to every diagram but we can’t budge it to get it on. The tensioner releases but me and my dad just aren’t strong enough to get it on. I don’t know what to do. I have tried using a pry bar too nothing. Belts definitely aren’t a strong point for me and never have been it’s really the only thing I get nervous about doing lol.
 
2013 Nissan Altima 6 codes.
P0300, P0301, P0302, P0138, P117A, P17F1-00.
Swapped cyl.1 and cyl 2 in Cyls 3 and 4. Cyl 2 coil was melted where wire was connected to coil shorting on tube. Got 2 coils as all customer could afford then when it came in cylinder 2 and 4 misfire. Pulled number 2 coil and cable stayed in and fuse internal along with cable was apart so new coil in number 2 as well as 4.
Replaced CV boot internal passenger side as well as front and rear brakes with rotors. Last brake job was pad slap all the way around. I use a product called caliper lube which held up great allowing brakes to go 70000 miles even with Door Dash.
She is saving up for oxygen sensor next. Can't believe Denso coils are made in China now.
165130 miles.
 
Been trying to get that serpentine belt on all day from where we done the water pump. We matched the belt up and have it in the right pattern according to every diagram but we can’t budge it to get it on. The tensioner releases but me and my dad just aren’t strong enough to get it on. I don’t know what to do. I have tried using a pry bar too nothing. Belts definitely aren’t a strong point for me and never have been it’s really the only thing I get nervous about doing lol.
Get belt started then bump starter.
 
Been trying to get that serpentine belt on all day from where we done the water pump. We matched the belt up and have it in the right pattern according to every diagram but we can’t budge it to get it on. The tensioner releases but me and my dad just aren’t strong enough to get it on. I don’t know what to do. I have tried using a pry bar too nothing. Belts definitely aren’t a strong point for me and never have been it’s really the only thing I get nervous about doing lol.

I would think that you have the wrong belt or that you’re not routing it correctly. It shouldn’t be that hard. 🤔
Always draw out the routing before removing it if there isn’t a sticker under the hood showing the routing. 🍻
 
Trying to learn some autobody skills. I've got a hood and fender to paint and am about ready to spray some 2k Urethane primer (whatever that means) as my first coats of real automotive paint. Two coats with 15 minutes "flash" time between coats. Then 18 hours before sanding and the first coat of base.
 
Wrapped up the weekend BMW project with an oil change with 7qts of Castrol 5W30 Euro A3/B4 syn oil and Mann+Hummel oil & cabin air filters.

Also fetched the two 10mm sockets that I dropped tightening the valve cover. One fell on the skid plate and one wedged between the transmission and trans tunnel. Didn't want to become an internet meme.
 
Man your telling me. This is my first Honda and catastrophic compressor failure was not on my list of expected issues plus it almost stalled out the car when it happened. It runs r1234yf too so $45 a can for refrigerant. My SIL's 2009 CRV actually lost it's compressor the other day too so it's kinda being a thing it seems.

Local dealer and other service here sucked. Wife brought it in cause I was out of town when it happened. Dealer wanted 2k just for the compressor and also suggested several other services for 100k miles while it was there.
700 for a valve adjustment
900 for the water pump
200 for brake fluid.
200 for transmission fluid
They also lost the caps for the ac ports and forgot to screw the air filter box shut after inspecting it.
Wife’s 2013 Juke A/C compressor almost locked up last week. 145k miles and she has it on probably every day of the year. $1300 for the new compressor, drier, and 4 wheel alignment since she also hit a curb pretty hard a little while back. First problem we have ever had with the car. I hope it’s not the start of more. I do all the regular maintenance but I don’t have the tools to do the ac work correctly.
 
1.8hr for an alignment? That’s what $250 or more? Ouch.
I might call him and have it postponed
He's only just started ordering parts, State Farm has a check in the mail for me
Salvage fees are up, so if you choose to owner retain, you aren't getting what you thought you should've
As this car needs at least one control arm, which requires subframe lowering, which would probably call for another alignment
My usual shop is getting $170~ now, for vehicles that require SAS reset
I got into such an argument with them when they tried to add that to my Camry, which doesn't have VSC

Just this week I came across a 2010 Fusion SEL with 38k on it, they wanted $5500

I'm starting to think I should've just totaled the Milan, and bought something else to start over

But I didn't know, and I don't know, and I'd lose all my new parts and mods/upgrades

The call was made, the check was written, it's done now

But this is my sister's problem now, once it's back together and back on the road. I've bailed her out twice 😒
Not familiar with the Milan but subframe lowering is sometimes in the service manual but not necessary, like the Camry you mentioned. The motor mount can be removed and engine raised slightly and save a ton of time and $$. They can’t align it before replacing it anyway.
 
Saturday: replaced right side control arm bushings on my niece’s 2004 Jaguar X-type. The large bushing at the rear of the control arm was ripped and allowed movement, giving the car a shuddering on braking and on bumps. My pry bar check confirmed it a week back and parts arrived Friday.

Front bush went in easily, and the rear took some effort. I didn’t have a large enough press cup for it so I had to use some iron and ball joint press caps but it went in where it should. Control arm rebuilt in an hour. Ball joint was fine so it went back in.

The fun began with getting the control arm back in, but another hour’s fiddling got it in and torqued. I had to replace a subframe bolt and nut (nut is captive in a body pocket so that was NOT fun. But it all finally went together and no more shuddering; car feels nice and tight again. But I was dead beat after that (and the electric rework we completed for the garage earlier that morning to restore power thanks to gophers chewing up the original cables), but I have a pad replacement planned on the Mini. That should go faster… 😎
Mini Update:

🫤

No, it did not go faster.

The rear calipers are original, and 15 years of use have seized them up. That explains why the pads wore out faster than expected, since the fronts are about 50%. They were all done at the same time. All the hardware and things that could rust.. rusted.

Last time I put drilled and slotted rotors on it, but this time around I’ll skip the showy brake rotors and go with the coated standard rotors instead. New calipers as well. New OE brake wear sensors, and likely new brake hoses. The car doesn’t have a lot of miles yet, and it’s worth doing.

I’ll order that stuff today. Fronts can wait until Spring.

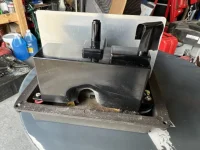
As for the rest of Sunday, I replaced a burned out wall mount LED garage light. It used to light up the garage area and the driveway for my mom, but didn’t work after the rewire. Found out why…

The electronics burned out and melted the housing. Fortunately I had another similar wall light, also LED, that I fixed (replaced the light sensor eye) that bolted up and is working fine.
 

Attachments

  • 5B5E901A-78ED-464F-B15B-AFDC0D67AEA7.jpeg
    5B5E901A-78ED-464F-B15B-AFDC0D67AEA7.jpeg
    137.5 KB · Views: 6
Axle seal at rear diff on '07 CX9
20221010_120421.jpg


I get oddly superstitious about driving in new seals. I want to do it right with minimal chance of damage to the new unit.

I found for this seal (National 710218) a drop of 2" pipe fits great. However I didn't trust saw cuts to be perfectly flat so I faced a drop in the lathe and chamfered both ID and OD to remove any sharp edges.

20221010_114712.jpg
20221010_120239.jpg


Ideally one would have the proper specialty driver with male end to reside in the seal and keep the spring from (maybe) popping out, but I didn't feel like machining that today!
 
Axle seal at rear diff on '07 CX9
View attachment 120526

I get oddly superstitious about driving in new seals. I want to do it right with minimal chance of damage to the new unit.

I found for this seal (National 710218) a drop of 2" pipe fits great. However I didn't trust saw cuts to be perfectly flat so I faced a drop in the lathe and chamfered both ID and OD to remove any sharp edges.

View attachment 120527View attachment 120528

Ideally one would have the proper specialty driver with male end to reside in the seal and keep the spring from (maybe) popping out, but I didn't feel like machining that today!
Nice work as always. I follow you, Creekside and Trav and clinebarger. Off topic: I spy a barrel stove; grandpa had one of those, burned old oil filters, etc in his 🍻🍻👍🇺🇸🇨🇦
 
Back
Top