GMFan, following up with you on rear sub-frame rust issue.I will take to the dealer I've had recall work for the front sub-frame and see if they are willing to work with me. I will request they send pictures to Mazda corporate for their review. I'll keep you all updated on what happens...
I spent yesterday applying POR15 to the rear areas of the car frame and underside body panels. I left the rear-subframe alone for now so the dealer can visually inspect. The POR15 dried to a black piano like hard finish. Really neat stuff. I will post pictures when I have a change of how it came out.
Thanks everyone for help/suggestions. Happy 4th of July!
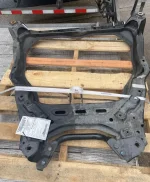
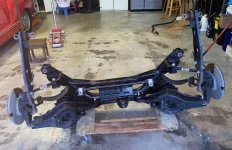
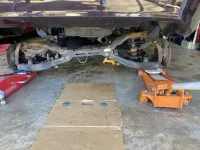
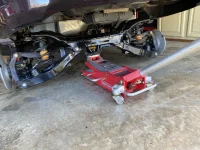
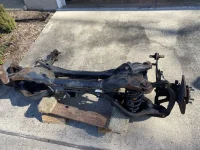
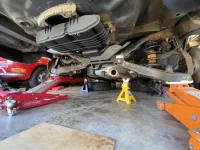
I see in your maintenance thread that you ended up replacing the rear sub-frame. I'm looking to do same with a 2011 Mazda 6. Once I get the second-hand subframe in hand, I'm going to attempt to DIY it.
Looking to see if you had any issues or recommendations for me to consider.
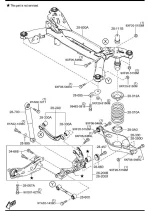
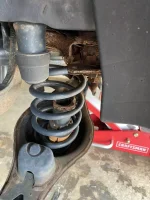
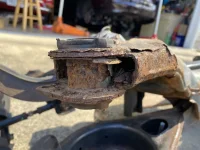
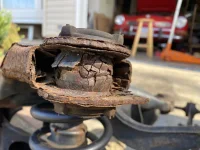
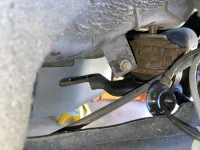
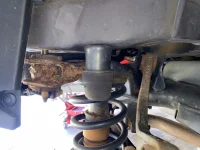
In addition to replacing rear subframe, I will have to replace the left side "stopper" (top half metal, bottom half rubber, refer to 28-111B in attached diagram) that sits inside the left rear coil spring, since the stopper completely detached from its top mount due to rust. Also looking to replace both left and right rear coil springs while I'm at it, since the car is at 117,000 miles. In addition to diagram, also attaching photo of left coil spring with separated stopper, and the inside top of the coil spring where stopper attaches.


 check out Eastwood's internal anti-rust coating.. very cool and it comes with a spray hose..