What are you working on today?

This was yesterday, but hey better late than never!

Needed to adjust the radiator in the Talon. It wasn't in the bottom inserts and kinda cocked funny. There are supposed to be two bolts on each bracket on the top, but one was snapped off and one missing. This wasn't promising. Sprayed my favorite penetrate on the bolts and wished for the best. Drivers side came out, a little sketchy, but came out. The passenger side, well...

lkIl5Ub.jpg


Even with the least amount of pressure it snapped. Well shoot. Luckily there was an open threaded hole to use. Went to my trusty bolt collection and found the same size thread bolt. It'll work for now till I can extract the snapped off ones. I slathered enough Anti-Seize on there to drown a household cat to hopefully avoid this in the future. I was covered and everything else as well :LOL:

hlwplj3.jpg


Also got the dome light working again. Cleaned the door switch with some contact cleaner and sanded down the mounting point (uses it as a ground) and all is good!
 
Over the last few Sundays I changed out and upgraded the rear suspension of my 67 Parklane besides adding a larger sway bar in the front a few months ago. Rear got lateral control arms, an upper control arm and panyard arm. The lower bushings were replaced a year ago but in the end decided to replace everything with stronger resistance to flex and polyurethane bushings.
Sway_bar_006.webp
Parklane_RR_lateral_02.webp
Parklane_Upper_05.webp
Parklane_RR_lateral_03.webp
Parklane_Upper_04.webp
 
I'm in the process of replacing the door handle reinforcement on the driver's side door of a 2008 Ford Focus. I have the door handle and door latch mechanism out of the door and just waiting for the new part to come in tomorrow so that I can put it all back together.
 
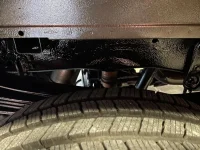
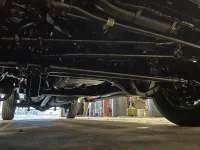
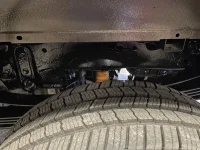
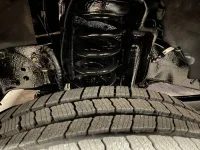
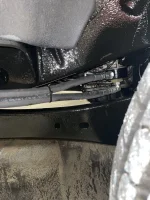
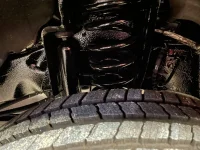
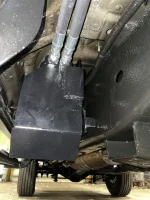
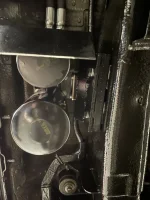
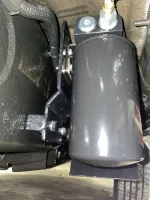
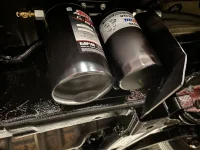
Undercoated my truck with NH oil, also installed amsoil dual bypass with a fresh fill of HPL cold climate 5w40, and changed the fuel filters. I made the mounting bracket for the filters out of 3/16” and 1/8” plate steel and a small section of 1” square stock. I also fabricated the hoses.
 

Attachments

  • 9AA2E111-3B24-4FDF-80E3-D24842F9CAE3.webp
    9AA2E111-3B24-4FDF-80E3-D24842F9CAE3.webp
    154.8 KB · Views: 32
  • B886A003-1E5B-442C-9DD6-D8B974EB35C1.webp
    B886A003-1E5B-442C-9DD6-D8B974EB35C1.webp
    93.9 KB · Views: 34
  • F0232AC2-1020-4B9A-987D-A58C96F5AD6C.webp
    F0232AC2-1020-4B9A-987D-A58C96F5AD6C.webp
    149.5 KB · Views: 33
  • 0FFF4DC6-7423-4698-89AC-D5A65BD6E08E.webp
    0FFF4DC6-7423-4698-89AC-D5A65BD6E08E.webp
    156.9 KB · Views: 31
  • 29C5E5EA-9B9F-49ED-8A61-89489731FF34.webp
    29C5E5EA-9B9F-49ED-8A61-89489731FF34.webp
    145.5 KB · Views: 29
  • D4CF030C-DF9D-4BC8-B983-2E9862C108E9.webp
    D4CF030C-DF9D-4BC8-B983-2E9862C108E9.webp
    118.6 KB · Views: 28
  • 52F81947-2458-4A66-BE9F-0897450DC1E5.webp
    52F81947-2458-4A66-BE9F-0897450DC1E5.webp
    121.6 KB · Views: 26
  • 3130EDB2-3AF5-4087-B8D3-775846B67EB3.webp
    3130EDB2-3AF5-4087-B8D3-775846B67EB3.webp
    88.9 KB · Views: 29
  • 1582A583-1F7F-4D7D-A922-99D45A0E785A.webp
    1582A583-1F7F-4D7D-A922-99D45A0E785A.webp
    103.1 KB · Views: 31
  • D81D040A-335D-4C4A-A95A-0C21D7B73D85.webp
    D81D040A-335D-4C4A-A95A-0C21D7B73D85.webp
    90.5 KB · Views: 34
Last edited:
I got the new door latch reinforcement installed on the 2008 Ford Focus so that you can now open the driver's door. It wasn't too bad of a job and Youtube helped me know what I was getting myself into.
 
The exhaust flex pipe on the Trax has cracked off towards the front. It gave me a P0420 code. I guess because not all gas is reaching the O2 sensor. So I bought the pipe off Amazon for about 115.00 plus two gaskets. Should be easy.
 
My trusty '06 Camry got some overdue TLC

Oil change, trans fluid change, power steering fluid change, positive battery terminal replacement, degrease engine bay from top and bottom

@ 8200 miles, it was time for a change, it got a mid tier Valvoline synthetic 5w30 and a 910s

Transmission was T-IV out, Type 4 in

Power steering called for Dex3, I was out of the Maxlife I'd usually use, but I found a quart of rogue Dex6, so that went in

Tomorrow Project Milan will hopefully get a front end clunk diagnosed as a inner tie rod end repaired, via new inner and outer tie rod ends on both sides, as well as new front pads and rotors
 
Last night changed out the blend door actuator on my Grand Marquis.

Then a busy day today

This morning I grabbed some junkyard Explorer Sport trac wheels for the Grand marquis. Was going to use them for winter wheels but like them quite a bit so they'll end up as next year's summers.

Changed out the plugs and ignition on the grand marquis. 7 of both were original. Dropped the pan and changed the trans fluid and filter. Drain / refill on the radiator , changed thermostat, installed a trailer hitch.

Tomorrow will be trailer hitch wiring and hopefully the car will be ready for DD duty!
 
Changed the rear brake pads and rotors on the wife’s Volvo. Went with Napa Premium rotors and Napa Adaptive One Euro pads. Easier than I thought it would be. It did have a few quirky Euro differences, but overall pretty much like other cars I’ve done.
 
Changed over 14 tires and wheels from summer tires to studded snows on my Trax, Blazer, and my 02 GMC. It's going to be a heating pad night.
 
Changed out the vapor canister vent valve on my son's 06 Infiniti M45. He was pulling a P0447 code for months. We'd reset it and it'd come back. Symptoms: the gas pump would click shut when we were nowhere near filling the tank. Took forever to fill the tank this way. Obviously, the tank was full of vapor as the vent valve wasn't doing its job. It was way easier to remove than it was to put the new one on. It takes a lot of force to push it into place before turning it into locking position. I ended up taking the entire charcoal canister off, blowing it out with the air compressor (tons of dust came out!), then installing the new valve on the canister while off the car. It took a lot of force, but eventually, it pushed in completely and I was able to turn/click it into locked position. If I knew how hard it was to put the new one on, I'd have taken the canister off from the start. Son is taking it for a test drive right now, he texted me that so far the check engine light has not come back on. Fingers crossed!
 
So I figured today would be an easy one.

It wasn't...

sM68bjD.jpg


So this bulb has been out for a while, but I just now remembered it. Went to the local Carquest and got the $0.50 1156 bulb and a tube of dielectric grease. Popped the trim cover off and the socket out. That's where it went downhill. The bulb was corroded in there bad! The bulb had already shattered when it originally blew out, so I took a towel and crushed the rest of it. Used some Free-All penetrant and let it sit for a while. Still had to fight with it for a while and eventually it came out. This bugger was rusted!

dmL7nx5.jpg


Cleaned up the socket with a scotch pad and contact cleaner. Put a nice daub of grease in there and popped the new bulb in. Turned the ignition back on and still, nothing. The heck... Had to squeeze the socket in, after that, it worked!

so8LFsX.jpg


(yes, that's vice grips holding the hatch up... heh)

Kind of a stupid post, but I know alot have gone through something that should have been simple and turn into a disaster instead.
 
Bushings on lower control arm and lower ball joints on Tiguan. Bushings were better then expected. Kudos to VW having these big rear bushing designed so one can take them out with hands.
Rear bushings: 2X $27 Lamfoerder
Small bushings: 2X$6 Lamfoerder.
Ball joint: 2X $25 Lamfoerder.

Ball joints were stuck, but after negotiations with 4lbs steel mallet and pickle fork, they decided to surrender.
3C2AF46A-3647-4935-88D3-315818D3333E.webp
E1EE817A-0A29-484B-A955-4F74D8767709.webp
759E4BEF-C6D5-4451-B4A1-81E56DEBC865.webp
7943BEB6-A32F-4DEC-855E-B61C66361B04.webp
737A5E00-1A3B-4DAF-B3E6-C76CC8A55217.webp
389885F7-4550-4AB2-89F7-42574F7D8649.webp
 
Back
Top Bottom