What are you working on today?

My secret to doing J-Series mounts(Front and rear, side is easy as it is). Take your step drill and drill out the 4 bottom holes and single top hole on the new mounts to ~1/2". The bolts are big enough that properly torqued nothing moves, and the install will go many thousands of times easier.
Trying to visualize how that would make the job easier. The most difficult part of the job is fishing the mount in/out of its location. Once the mount is sitting on the subframe, it is usually cake.
 
Trying to visualize how that would make the job easier. The most difficult part of the job is fishing the mount in/out of its location. Once the mount is sitting on the subframe, it is usually cake.
Never has been for me. Getting them lined up to get all the bolts in is usually a bear. Either the mount is twisted just slightly and you cant get the 4 mounting bolts in....or its twisted just slightly and you can't get the 15mm one in that holds it to the engine. Drilling them out gives you just a smidgen of wiggle room so they don't have to be perfect. Once you get everything started, snug up the one lone horizontal bolt and then the 4 lower ones.

I suppose if you're doing it on a lift with something to properly support the engine, it would be easier. Doing it on jack stands with a jack under the oil pan I have always fought with getting them to line up. Especially when you're doing it yourself and don't have anyone available to wiggle the engine this way or that.

Oddly, I have less of a problem getting the mounts to and from, it's like playing the hokey pokey, wiggle it around enough and it will get down there.
Interesting.

I usually leave the side mount out when I r/r the front or rear mounts. Not sure if that makes the difference.
 
Interesting.

I usually leave the side mount out when I r/r the front or rear mounts. Not sure if that makes the difference.
I usually have it loose, but not out. Might be the difference, could pull it one way or the other being in there, even if loose. Mostly just zip the lower two bolts almost out.
 
Not today but yesterday. Put a new outside mirror on my Buick LaCrosse along with a new latch for the center console. Next week I'll be calling a mobile mechanic out to remove the driver seat and pry off the door panel on a door that is stuck shut then I'll be installing a new door lock actuator.
 
I re-painted the undercarriage of my Gen 1 Toyota Tundra with Corroseal rust converter paint. It was just a touch up job since the truck was already painted with Corroseal before. A treatment is good for quite a few years but you do need to inspect it and stay on top of it. After scraping off the scale and then cleaning up with a wire brush I painted the areas that needed a redo. It only took a pint of Corroseal this time.
 
Today at work it was pretty slow. They said as the winter arrives in it will only get worse. So in my down time I brought in my Escape to see why you have to slam the passenger door to shut it. It appears the latch itself isn’t functioning correctly and the striker looks worn too so I’ll probably go ahead and do both. The latch is about $99 not sure on the price of the striker I haven’t asked about it yet. It’s always had the issue since we got it just I’m just now getting a chance to look at it. It also needs a upstream oxygen sensor which I’ll probably get done too provided it comes out with no issues as how rusty it is.
 
Engine code P0135 has been hitting my avalanche more often so decided to replace the o2 sensor, bank 1 sensor 1, with a new denso ($55 from autozone).
 
19 wheel studs on a Subaru Forester.

A9F51B4F-FFD4-4F9C-8BF4-032491C28A68.webp
 
Nothing much boys. Was pssing around with the settings on the BD tuner for a bit, no reason other than thats the most mechanical thing I have done in weeks.
 
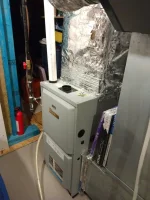
Tearing my hair out working on an Atwood furnace in my RV. So far,just about EVERYTHING has been bad. The blower motor had completely shot bearings causing the squirrel cage fan to scrape and scream until the over power switch tripped. Replaced that. Then I realized that the thing was only lighting intermittently. First I found the sail switch was only closing intermittently when tested by hand with an ohm meter. Eureka! Nope. Not the whole problem. I pulled the burner assembly out to find the burner was rusting away like a worn out BBQ burner. I figured that was likely the reason it wasn't staying lit. Nope. Put in a new ignitor/thermistor thingy 'cause the old one put out zero volts when heated with a torch. The new one makes it stay lit for 10 seconds instead of 2 when it decides to light. I temporarily swapped in a known good regulator and switched tanks . No difference. I finally broke down and ordered a new control board as I've exhausted all the other possibilities.

I bet the Amazon guy is getting tired of my coming down my driveway.
 
Replacing the voltage regulator on an old Massey garden tractor.

But frustrating; OE is almost unavailable, few places that listed them were out of stock. I bought what appeared to be a decent an aftermarket one and, while it appears well made (smooth casting, very well finished, potting looked good) the male blade terminals were so thin to the point where I had to close down the mating female terminals and I was concerned about bending them when I completed the connections. Thinning the terminals seems like an odd way to save on materials considering how well the rest of the piece was made. Maybe the sae to metric conversion when the part was copied and offshored....who knows. Works fine though.

I remade some of the terminals after this pic. This tractor was a rescue that I did a quick rehab on and use it for moving boat trailers in a tight driveway.

MF R 10 21.jpg

MF n 10 21.jpg
 
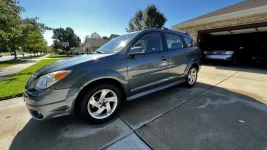
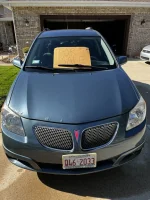
Cleaned up son’s GF car to sell. Nice way to start my vacation.😐
 

Attachments

  • 75458056-0002-48D3-9CA1-23708883580F.webp
    75458056-0002-48D3-9CA1-23708883580F.webp
    128.7 KB · Views: 20
  • AFA50F1D-7CA5-46A5-9EC8-2A4677F0C7EC.webp
    AFA50F1D-7CA5-46A5-9EC8-2A4677F0C7EC.webp
    151.9 KB · Views: 20
B2BF713B-685C-468D-A126-ED78F825B08C.webp
7857295E-8D62-4137-B1B5-B76BD4C7E543.webp

1B9B62D7-F5BE-46C8-9BC2-8E259BFAB077.webp

B2BF713B-685C-468D-A126-ED78F825B08C.webp


Resealed the valve covers, half moons and cam
plugs on my neighbor’s 01 4Runner. Also replaced the overdue plugs and spark plug wires that crumbled during removal.

The valve covers have probably been leaking for a decade.

I did not have access to the parts washer today so this was the cleanest I was able to get them. Plus the job was done for free, so it is what it is.
 
Back
Top Bottom