You are using an out of date browser. It may not display this or other websites correctly.
You should upgrade or use an alternative browser.
You should upgrade or use an alternative browser.
Im trying to inspect a bushing but
- Thread starter Carnoobie
- Start date
- Status
- Not open for further replies.
Ok i got the car up on the hoist but i was told the car needs to be on the ground to check cause the suspension has tobe loaded, true?
Anyways i took pics, this is as close as i could get, very tight space and i had to put a light right next to it.
Didnt see any rubber touching against the metal but it has rust.
Rust on bushing instantly means replacement right?
Im wondering if itll be easier to replace just the bushing or buy another knuckle, put new bushings on and bolt on. Mech said would be quicker to get new knuckle cause it bolts right on.
He said i could just leave it and live with it. The thing is, im worried itll be a safety issue down the road or i dont know what damage it could do if i left it.
http://desmond.imageshack.us/Himg265/scaled.php?server=265&filename=bushing1.jpg&res=landing
http://desmond.imageshack.us/Himg152/scaled.php?server=152&filename=bushing2.jpg&res=landing
Last edited:
Originally Posted By: Carnoobie
Looking at the pic, when it says collar what is the collar exactly? The sides of the bushing or the ends (where it sits flush against the metal car bracket)?
Hello?
I'm starting to feel a bit sorry for you. This whole issue really seems to be way over your head, but you're persisting in trying to make sense of it.
Go to the PDF you referenced earlier. On the first page, below the title, "INSPECTION PROCEDURE", see point #2 of item #2, and the diagram immediately under that point. The text and diagram of point #2 are directly related; the collar is identified there, in the inset diagram (that's the one in the circle).
On pages 2 and 3 the suspension is shown with the bushing having been exploded out of the control arm. You can see the bushing in gray, with the collar looking like the brim of a top-hat.
By the way, the last two photos you took, in addition to being nearly incomprehensible, are of the wrong bushing. Again you are nosing around the drum. The bushing in question is nowhere near the drum.
....what is he even taking pictures of? and why does it look like they were photographed using a potato?
The bushing i took a pic of is the one you said. Its the front knuckle bushing. I looked at the rear knuckle and saw two bushings, front and back.
#2 is the bushing i took the pic of
http://i.imgur.com/uUp6s.jpg
Originally Posted By: Tegger
Originally Posted By: Carnoobie
Looking at the pic, when it says collar what is the collar exactly? The sides of the bushing or the ends (where it sits flush against the metal car bracket)?
Hello?
I'm starting to feel a bit sorry for you. This whole issue really seems to be way over your head, but you're persisting in trying to make sense of it.
Go to the PDF you referenced earlier. On the first page, below the title, "INSPECTION PROCEDURE", see point #2 of item #2, and the diagram immediately under that point. The text and diagram of point #2 are directly related; the collar is identified there, in the inset diagram (that's the one in the circle).
On pages 2 and 3 the suspension is shown with the bushing having been exploded out of the control arm. You can see the bushing in gray, with the collar looking like the brim of a top-hat.
By the way, the last two photos you took, in addition to being nearly incomprehensible, are of the wrong bushing. Again you are nosing around the drum. The bushing in question is nowhere near the drum.
Last edited:
Originally Posted By: ComfyShorts
....what is he even taking pictures of? and why does it look like they were photographed using a potato?
This is a great idea! If you need to clandestinely take pictures in a public place, why not hide a camera inside a potato? It might work. Think about it. Who's really going to get bent out of shape over you pointing a potato at them?
back on topic plz.
Mech says it would be best to pull the bushing to inspect it but i told him i only want to if i know absolutely forsure 100% that its the bushing causing the noise. Cause i WOULD BE SUPER [censored] IF I SPENT MORE MONEY ON LABOUR FOR NOTHING.
3 months ago I had my rear knuckle back bushing pulled and inspected, bushing was still good! waste of time and money!
2 weeks ago I had my sway bar bushings and endlinks replaced. Again, waste of time and money!
Im very upset that im wasting my money paying for this work done when its not even the cause of the problem! Pulling this front bushing is a 3hr job! So its not a small job.
So i hope you understand where im currently sitting and why im only going to pull the bushing if i know forsure its that.
Last edited:
Originally Posted By: Carnoobie
The bushing i took a pic of is the one you said. Its the front knuckle bushing. I looked at the rear knuckle and saw two bushings, front and back.
#2 is the bushing i took the pic of
Ah, NOW I think I see what you've taken a picture of. That IS the correct bushing.
It's just unfortunate that the picture is so blurry, otherwise I might be able to tell from here if your bushing meets the replacement criterion of the TSB. It sort-of looks like the rubber is protruding past the control arm's ends. But then again, it also sort-of looks like you've got steel collars.
You need a WAY better photo than that. Does your camera not have a "macro" setting? That's usually indicated by a picture of a flower. Close-ups are more likely to be in focus when using Macro than when not.
Originally Posted By: Tegger
Originally Posted By: Carnoobie
The bushing i took a pic of is the one you said. Its the front knuckle bushing. I looked at the rear knuckle and saw two bushings, front and back.
#2 is the bushing i took the pic of
Ah, NOW I think I see what you've taken a picture of. That IS the correct bushing.
It's just unfortunate that the picture is so blurry, otherwise I might be able to tell from here if your bushing meets the replacement criterion of the TSB. It sort-of looks like the rubber is protruding past the control arm's ends. But then again, it also sort-of looks like you've got steel collars.
You need a WAY better photo than that. Does your camera not have a "macro" setting? That's usually indicated by a picture of a flower. Close-ups are more likely to be in focus when using Macro than when not.
The reason why it was so hard to take a good pic of the bushing is cause of the god awful location of it. Unless you have your car on a drive on ramp youre not gonna be able to get in a good enough view so i had to fight for an angle. Even having the wheel off it wasnt any better.
From what i see, using a prybar, there was no play in the bushing at all.
ALmost certain the collar is rubber, wanted to tap it but didnt have a thin enough metal object.
From what i notice, the rubber sits flush like in that service bulletin with the chasis metal bracket.
like i said already, I NEED TO KNOW 100% FORSURE THIS IS THE PROBLEM. Cause im still ****** very upset that i wasted my money and time getting already my back knuckle bushing inspected and pulled and endlinks replaced, for nothing!!!! Thats right time, gas and money down the ***** toilet!!!! AS YOU CAN TELL IM VERY UPSET ABOUT THIS!!!
I cant afford to waste another $150-200 or whatever labour itll cost for 3hrs to have this bushing pulled and then find out, oh it didnt fix the noise!!!!!!
Last edited:
Originally Posted By: ComfyShorts
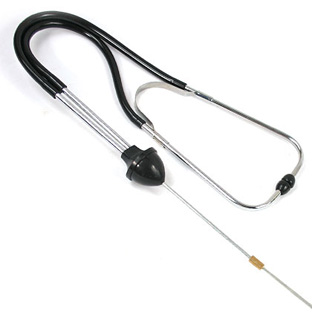
+ somebody jouncing the vehicle...why do you need to remove the bushing to find source of the noise? A mechanics stethoscope is under $15 from Amazon, probably better idea than pressing the bushing out, which by the way will probably damage and you'll need to put new ones in regardless.
Well i happen to have a brand new OEM bushing on hand. A pair actually.
I will be doing that again (yet again!) but with a mech who can actually manage to get his head under within sight of this bushing with car on ground. The previous 3 mechs didnt bother going very far and only stuck their head as far as the back knuckle bushing goes.
So the first said noise is coming from the back knuckle bushing and can feel bit of vibration when he felt it. I waste my time and money getting him to pull and inspect the bushing!
The second said noise is coming from the endlinks and theyre rusted and most likely seized. So i waste my time and money yet again getting him to replace my swaybar bushings and endlinks!
Neither did Jack ****!!!!!!!
IM VERY VERY UPSET TO SAY THE LEAST!
Last edited:
One suggestion to consider: There is a commonly availably grease gun adaptor available which is made for piercing dust boots to grease non-greasable ball joints for purposes of noise diagnosis. Perhaps you could use a sturdy sewing needle or similar implement to pierce the bushing and then use this adaptor to pump in a grease that is unlikely to harm the rubber. If this clears up the noise (even temporarily) you would know that's the problem.
Another suggestion: You already have replacement bushings, right? Why waste them if you can install them and try to keep the cost down? The original ones may or may not be causing your noise, but they probably aren't performing optimally either. You could remove the knuckle and bring the knuckle and bushing to either a front end shop (will have a good press and someone who knows how to use it) or a Honda dealership where they'll have the special tool. This would cost less than if you have them do the whole job and they won't insist on doing a wheel alignment afterwards. To try and keep the cost lower, you could talk to a mechanic at such a shop (before removing the knuckle) about doing the press work on the side at a reduced price. He might have to okay it with management to do that sort of thing, but it's likely that management will allow it because it keeps them from getting involved with a problematic noise issue.
Another suggestion: You already have replacement bushings, right? Why waste them if you can install them and try to keep the cost down? The original ones may or may not be causing your noise, but they probably aren't performing optimally either. You could remove the knuckle and bring the knuckle and bushing to either a front end shop (will have a good press and someone who knows how to use it) or a Honda dealership where they'll have the special tool. This would cost less than if you have them do the whole job and they won't insist on doing a wheel alignment afterwards. To try and keep the cost lower, you could talk to a mechanic at such a shop (before removing the knuckle) about doing the press work on the side at a reduced price. He might have to okay it with management to do that sort of thing, but it's likely that management will allow it because it keeps them from getting involved with a problematic noise issue.
Originally Posted By: yonyon
One suggestion to consider: There is a commonly availably grease gun adaptor available which is made for piercing dust boots to grease non-greasable ball joints for purposes of noise diagnosis. Perhaps you could use a sturdy sewing needle or similar implement to pierce the bushing and then use this adaptor to pump in a grease that is unlikely to harm the rubber. If this clears up the noise (even temporarily) you would know that's the problem.
What would this be called exactly? And how do you apply it? I was considering spraying that bushing with silicon lube but its not good for the rubber and was told not to.
Quote:
Another suggestion: You already have replacement bushings, right? Why waste them if you can install them and try to keep the cost down? The original ones may or may not be causing your noise, but they probably aren't performing optimally either. You could remove the knuckle and bring the knuckle and bushing to either a front end shop (will have a good press and someone who knows how to use it) or a Honda dealership where they'll have the special tool. This would cost less than if you have them do the whole job and they won't insist on doing a wheel alignment afterwards. To try and keep the cost lower, you could talk to a mechanic at such a shop (before removing the knuckle) about doing the press work on the side at a reduced price. He might have to okay it with management to do that sort of thing, but it's likely that management will allow it because it keeps them from getting involved with a problematic noise issue.
Yes I have pair new ones on me but if the ones now are still good I dont want to replace if not needed. Im really sick and tired of replacing stuff and parts that dont need to be replaced. For instance, 3 months ago the rear knuckle bushing looked bad from the outside but after we had it pulled, the bushing was still in perfect shape. Didnt bother replacing and refunded bushing.
I wouldnt do any of this no way. I have name carnoobie for a reason. I wouldnt get this done at a shop but at one of my mechs garage where he works from. He has the c-clamp tool to press the new bushing in and old one out. He said its about a 3hr job per side even though it says 1hr book time in the service bulletin from Honda. Im guessing hes saying 3 in case he has trouble with the bolts and has to cut them off.
If I replaced the bushing and paid however much $180 or so for 3hrs labour and it didnt fix it, words cant even explain how furious i would be.
Last edited:
Originally Posted By: Carnoobie
The reason why it was so hard to take a good pic of the bushing is cause of the god awful location of it
No.
The reason is that you either have an inadequate camera, or you're a lousy photographer.
Please give make and model of camera. Some of us may be able to help you set the machine so as to be able to take a decent photograph.
Originally Posted By: Carnoobie
What would this be called exactly? And how do you apply it? I was considering spraying that bushing with silicon lube but its not good for the rubber and was told not to.
I'm really not sure what the tool is called but almost any tool store or auto parts store will have one. Find someone who's been working there for more than a year and isn't too busy texting to talk to you. Explain what the tool is as I explained it.
Originally Posted By: Carnoobie
He said its about a 3hr job per side even though it says 1hr book time in the service bulletin from Honda. Im guessing hes saying 3 in case he has trouble with the bolts and has to cut them off.
If I replaced the bushing and paid however much $180 or so for 3hrs labour and it didnt fix it, words cant even explain how furious i would be.
If it's 1 hr. book time you could probably get it done for that price at a Honda dealer or (for a lower labor rate) at a tire store. They'd probably charge more per hour but if it's one hour instead of three, would that make it a worthwhile gamble?
Originally Posted By: Tegger
Originally Posted By: Carnoobie
The reason why it was so hard to take a good pic of the bushing is cause of the god awful location of it
No.
The reason is that you either have an inadequate camera, or you're a lousy photographer.
Please give make and model of camera. Some of us may be able to help you set the machine so as to be able to take a decent photograph.
I was using my iphone, i dont have a camera. let me borrow my sisters and see if its any better.
But i was told to hit that bushing with silicone spray to see if it does anything. Ive done this to all my bushings previously and didnt make a difference. Was about to do this to the front bushing yesterday but mech really advised against it saying it will ruin the rubber.
But cant you just wash it off after?
Another thing is, will the spray even do anything if it cant get inbetween the cracks?
Originally Posted By: yonyon
What would this be called exactly? And how do you apply it? I was considering spraying that bushing with silicon lube but its not good for the rubber and was told not to.
I'm really not sure what the tool is called but almost any tool store or auto parts store will have one. Find someone who's been working there for more than a year and isn't too busy texting to talk to you. Explain what the tool is as I explained it.
[/quote]
Im wondering if you think I should try hitting with silicon spray first? See above.
Quote:
If it's 1 hr. book time you could probably get it done for that price at a Honda dealer or (for a lower labor rate) at a tire store. They'd probably charge more per hour but if it's one hour instead of three, would that make it a worthwhile gamble?
Well I dont like dealers (had too many bad experiences with them) but one of my mechs is a red seal Honda mech and he charges almost dealer rate but hes a very good mech. He hasnt quoted me yet but he said if i wanted he can see me this Wed morning. He said would need to take bushing out to fully inspect it, it may look ok from outside but inside could be bad. He charges $110/hr. But the thing is, ill be paying (and probably wasting) yet again more money on something that is not forsure gonna fix it.
Thats why I need to find the cause first. Im really sick of wasting my time and money on replacing stuff and useless labour that doesnt need to be done.
Last edited:
Originally Posted By: Carnoobie
I was using my iphone
So how come my wife's iPhone takes excellent close-up photographs? She likes flowers, and takes pictures of them as close as she can so as to capture the detail.
I just tried taking a close-up photo with my BlackBerry, in the dark, 6" away from my target, with flash activated. Came out dead-sharp.
Here's a tip: Take another photo, this time bracing your arm against something really solid. While bracing, take a deep breath, let it out, then keep as still as you can. Now press the shutter "button" while in the "still" phase.
Originally Posted By: Carnoobie
with a mech who can actually manage to get his head under within sight of this bushing with car on ground. The previous 3 mechs didnt bother going very far and only stuck their head as far as the back knuckle bushing goes.
There's your problem: You're not using actual professionals, but driveway grease-monkeys who lack a proper hoist and proper technique (which will correct for lack of a hoist).
Have you ever heard the phrase "false economy"?
- Status
- Not open for further replies.
Similar threads
- Replies
- 7
- Views
- 560
- Replies
- 9
- Views
- 404
- Replies
- 12
- Views
- 873
- Replies
- 0
- Views
- 449