How much should I thin spar urethane?

Status
Not open for further replies.
It'll stink curing in your house! Trust me on this....

Doesn't need to absolute cure before the next coat. However, it needs to absolutely cure before you ever put anything on top or flatten the finish, if you chose to do so. I allowed my telescope to cure for several weeks indoors since it was so warm and muggy outside at the time.

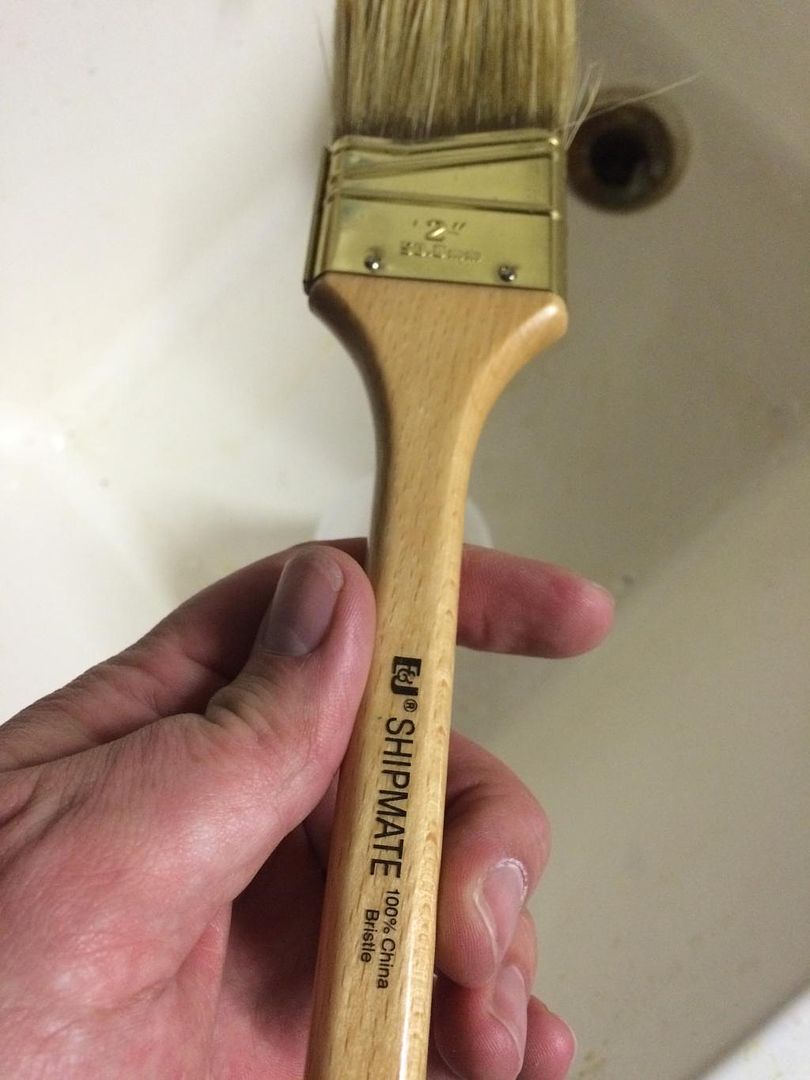
I like a foam brush with poly. Never shake the can. Instead stir gently. If the can is 55°, then you should sit it in a pot of warm water before brushing it on. I pour enough mineral spirits into a clean, glass jar to just cover the foam on the brush. No need to toss it every time. Just squeeze out the excess poly with your fingers and stick it in the jar. Put the lid on if it's deep enough or put a small hole in a piece of Saran wrap and push it down over the brush handle to seal off the top. The foam should be safe in mineral spirits. (Don't count on this with denatured alcohol however!).

Bob Flexner's book on finishing is my bible! I've learned all from him. Good luck.
 
" I still used a spar urethane which seems to go down thicker."

Perhaps Demarpaint will chime in here, But I would not aim to getting it on Thick.

As the varnish film shrinks down as it drys, you will get an un-even finish.

Multiple thin coats (light sanding between) is just as quick (ultimately) and will give a much nicer and more durable finish.

Just because it's Hard on the surface does not mean it isn't soft underneath, sometimes for many weeks.

If you want a Quick, thick, durable surface. a clear Epoxy like the 'West system' would be much better.
 
Also, a Spar varnish/urethane might not be the best product for interior work.

Exterior finishes tend to have a good measure of UV inhibitors, they may also offer a degree of flexibility, softness (in order to better tolerate extreme temperature changes)

Interior Urethane's can forgo these requirements, and focus more on clarity or wear resistance.
 
Last edited:
Ugg, no bubbles, no brush marks, actually really smooth and reflective, but no matter how well I clean, what I wear, I've still got dust nibs.

559170F6-9F2D-4FBD-B169-841C4D66415D_zpsgpueqpl2.jpg


98582CF9-B094-463B-A32D-ED49EBAA22E4_zpsehltqepy.jpg


FWIW, this is my brush. Carefully cleaned in mineral spirits wash time.

5E574FC1-75CC-4039-B776-50DFCBB70719_zpszgoqfldi.jpg
 
Airborne dust, [censored]!!!!!! That's tough to work around with a surface that big laying flat. If you re-coat it again, you can try this. If possible sand and prep it somewhere else and carry it into the work area. Cover or remove the project. Get an empty Windex bottle or similar bottle fill it with water and mist the area. Wait for all the mist to fall out, and uncover the project or bring it back into the area. Apply the finish coat. The misting of the air will knock any airborne dust out of the area. Pros, it will get the airborne dust out of the area. Cons, if you accidentally wet the surface you plan coating you're screwed. If you remove the project mist the area, then bring it back in you run the risk of stirring up dust and bringing it in. Tough call just be careful. If possible I would prep it elsewhere, close to the work area, and carry it in after I misted the area. Just be sure not to wet the horses you're using to support the top.

Prefect brush for the project!

Expat- I prefer Marine Spar Varnish as a finish.
 
Last edited:
Thanks, I'll try that next. I was really careful, wore certain clothes, cleaned up all around, even shone some bright lights to see if I could see any dust in the air. None, then I get that.

This does seem to be a common issue,mout the best I've seen is to rub the final ones down with 2000 grit. I'd love to do better.

I know this is just a cheapo workbench top, but I'm liking the learning process here. I've done a lot with shellac on wood, never much with poly. I never had these issues with shellac! Odd thing is, these dust nibs show almost immediately. So I don't think its really because of poly drying slow.
 
Put an exhaust fan on one window that will not fight the wind, and go nuts with a leaf blower and a duster.

Especially on those fluorescent lights.

My uncle used to refinish gun stocks in a bathroom, after taking a steaming shower and waiting for the humidity to dissipate.

I've had luck with the leaf blower and duster, and then misting the floor, then going outside and blowing off my clothes and hair. Then moving in slow motion once back in the room.

I've also found some products are much more resistant to the dust. Like Zar. I prefer foam brushes.
 
Thanks!
Another dumb question - let it sit overnight, looked solid, first touch in inconspicuous space appeared to be firm so then I touched the surface. And wouldn't be my luck that with just the slightest touch a fingerprint developed in the surface of the polyurethane.

It's still is in a pretty outline position where I don't think it will be noticeable but what's the best way to deal? I'm guessing I'm going to have to sand it a bit more aggressively than just the dust nibs. Anything else I should be considered of?
 
Originally Posted By: JHZR2
Thanks!
Another dumb question - let it sit overnight, looked solid, first touch in inconspicuous space appeared to be firm so then I touched the surface. And wouldn't be my luck that with just the slightest touch a fingerprint developed in the surface of the polyurethane.

It's still is in a pretty outline position where I don't think it will be noticeable but what's the best way to deal? I'm guessing I'm going to have to sand it a bit more aggressively than just the dust nibs. Anything else I should be considered of?


Where you planning on another coat? Or do you want to attempt a touch up?

What you ran into unfortunately is a common occurrence, and why I stress waiting until it is 100% dry before handling, sanding or recoating.

If you plan on a touch up the success rate is hit or miss at best. You'd have to sand the defect out, thin your poly, make sure it is nice and clean, and go over the area. Make sure it is 100% dry before attempting, and don't be surprised if it flashes.

If you can get an exhaust fan in the area, make sure after you mist the area that you seal it off so you're not pulling in air from other areas that might have dust in it.

These jobs where a high quality finish is desired take a lot of patience, something you appear to have. I have a feeling you'll be very happy, and learn a lot after this is over.
wink.gif


Foam brushes are OK, I've had them come apart on me while doing a large area and opted for brushes ever since. The poly actually ruined the foam, and I ended up with little bits that looked like lunar craters.
33.gif
It could have been a fluke, but other painters at PDCA meetings had the same problem. Opinions vary on them.

Something else to consider. A great way to tell if a poly or varnished surface is ready for service is to get real close to it and smell it. When there is no smell, it is ready for service. That can take days.........

Edit-To clear things up about misting the area. I shoot the mist up high and let it pull the [censored] out of the air and down to the floor. I used to build fishing rods and the finish on the thread wrappings had to be perfect. The last thing I wanted to see was a fleck of dust in the finish. Misting did the trick, it took me a few do overs to learn that.
 
Last edited:
If this were the new dining room table, I would wait a week and rub out the finish (600 grit, 1200, up to 1500, maybe 2000, then pumice and rotten stone). If you're planning a fine finish, in the future, use a varnish made for it. Spar varnish is flexible for temperature variation in outdoor applications. That makes it too soft to rub out very well.

But this is a workbench, so I would wait several days for it to fully cure and put it in service. It's going to get scratched, so who cares about a few dust nibs?

Temperature makes a huge difference in curing. 50F can take days while 70F takes overnight. If you can warm up your work area with some temporary heat, that will help a lot. Get it up to 70, even 80, for overnight and this will cure. Also, the quicker it cures, the fewer dust nibs in the future and the faster you can recoat.
 
Last edited:
Originally Posted By: Astro14


But this is a workbench, so I would wait several days for it to fully cure and put it in service. It's going to get scratched, so who cares about a few dust nibs?


That's a great point but, some people want perfection so that when it comes time to refinish furniture or fine woodwork they have the experience. I think that's the case here.
 
Originally Posted By: cjcride
JHZR2, it's too nice for a workbench now.


It is!

For anyone who is interested in durability of finishes I did this test some years ago for the makers of Last 'n Last. I tested their Marine & Door Spar varnish against various polyurethane finishes for durability. The Spar Varnish took the prize.

I took several oak dowels and stained them with Min-Wax special walnut stain and coated some with polyurethane and others with the Marine Spar Varnish. They were marked and given to our Jiu-Jitsu students for Arnis stick fighting training. ! They used them for stick on stick defense, and they took a pounding. The Spar Varnish finish would contour to the dents the sticks would take from being hit against each other. The poly would dent slightly but chip in many instances. That sold me on spar varnish for doors, or items that were going to be subject to a lot of handling or abuse. It is a very flexible finish and very forgiving of the stick on stick abuse. Several years later the sticks are still in use and the Spar Varnish is still holding up well.
 
Originally Posted By: demarpaint

Something else to consider. A great way to tell if a poly or varnished surface is ready for service is to get real close to it and smell it. When there is no smell, it is ready for service. That can take days.........

Or several weeks!

+1 on your recommendation. I left my telescope in the garage for several days for most of the stink to dissipate, then brought it indoors as it was so muggy outside. It was 'off-gassing' for several weeks and did stink up the house a bit. Oil-based finishes just take a long time to fully polymerize and cure to be durable.
 
Originally Posted By: sleddriver
Originally Posted By: demarpaint

Something else to consider. A great way to tell if a poly or varnished surface is ready for service is to get real close to it and smell it. When there is no smell, it is ready for service. That can take days.........

Or several weeks!

+1 on your recommendation. I left my telescope in the garage for several days for most of the stink to dissipate, then brought it indoors as it was so muggy outside. It was 'off-gassing' for several weeks and did stink up the house a bit. Oil-based finishes just take a long time to fully polymerize and cure to be durable.


It can take a while no doubt, especially if you layer multiple coats and build a nice thick film. Once someone with a good sense of smell can't smell it anymore, its dry and cured. Usually a finish applied indoors during the winter when the heat is running dries and cures fairly quick. Sadly there are no set time tables for how long it will take.
 
Originally Posted By: demarpaint
Originally Posted By: Astro14


But this is a workbench, so I would wait several days for it to fully cure and put it in service. It's going to get scratched, so who cares about a few dust nibs?


That's a great point but, some people want perfection so that when it comes time to refinish furniture or fine woodwork they have the experience. I think that's the case here.


Exactly. This was a scenario to learn, and so Im going to learn. If I have the thickest, best, smoothest coating on a workbench that I gouge and ding, so be it.

Im really in this for the learning process. As I mentioned before, I did a lot of work with shellac in my home, and it looks spectacular. And there arent any of these dust nibs. So there are elements of technique, processing, finishing, etc. unique to this that I need to understand and build capability on.

I did make that mistake with the fingerprint. I first touched in a spot and thought it was dry - unfortunately not. But Im not going to touch up or re-flow it. Im just going to put another coating on it, so all I need to know is how to best deal with prepping it to be ready for the next coat and transparent to any issue's existence after the next coat. Im happy to do a few more. The chest was an impulse buy since it was a deal. I dont really NEED that workspace, and do I have lots of time to do it right.

I do hope that next time I am able. I think one thing I really need to get the hang of is making a thin enough coating that has good coverage without too much brush work (bubbles and brush marks). Ive put it on fairly thick, which makes a workable situation where I know absolutely there are no bubbles or brush marks. Very smooth. But that thick coating means slower drying and more chance for the nibs...
 
When temps are so low, the time the applied poly it susceptible to dust Nibs is excessive.

I've Used a small heater or 2 under the workpiece to heat it up slowly to the mid 70's or so, then turn off and apply, and 20 minutes later I am sanding the next piece of the project 15 feet away without worry of the dust I am creating. The heat helps self levelling and makes it skin off paster where any dust at that point is of no consequence.

Foam brushes can disintegrate, or break off at the handle. Usually they give plenty of warning. They are kind of painful to get the good ones at home depot ve the cheapos at HF or the 99 cent store, but worth it. I'm just not into cleaning bristle brushes, and find I can get the poly a lot flatter with a foam brush, and the self levelling of the product is more effective before skinning off.

I really only thin the first layer, on bare wood, to penetrate deeply. I've felt thinning in the final coat for better flow caused the surface to be less hard, at least with the products I have used.
 
Originally Posted By: JHZR2
Exactly. This was a scenario to learn, and so Im going to learn. If I have the thickest, best, smoothest coating on a workbench that I gouge and ding, so be it.

Im really in this for the learning process. As I mentioned before, I did a lot of work with shellac in my home, and it looks spectacular. And there arent any of these dust nibs. So there are elements of technique, processing, finishing, etc. unique to this that I need to understand and build capability on.

I did make that mistake with the fingerprint. I first touched in a spot and thought it was dry - unfortunately not. But Im not going to touch up or re-flow it. Im just going to put another coating on it, so all I need to know is how to best deal with prepping it to be ready for the next coat and transparent to any issue's existence after the next coat. Im happy to do a few more. The chest was an impulse buy since it was a deal. I dont really NEED that workspace, and do I have lots of time to do it right.

I do hope that next time I am able. I think one thing I really need to get the hang of is making a thin enough coating that has good coverage without too much brush work (bubbles and brush marks). Ive put it on fairly thick, which makes a workable situation where I know absolutely there are no bubbles or brush marks. Very smooth. But that thick coating means slower drying and more chance for the nibs...

Congrats for wanting to dig in & deep and educate yourself! I recently did the same with my shellac finishing experience on cherry veneer. It's in the photos section

I HIGHLY RECOMMEND Bob Flexner's book on wood finishing. If you have a Woodcraft store local, it'll be there on the shelves. You want the latest edition with color photos on glossy paper. It's excellent. To gild the lilly, you can also "finish the finish" as he calls it, by flattening it, then rubbing it out. This will remove dust nibs, hairs, dust...all the imperfections you're concerned about now. This last step is critical to removing these defects...and it's a great task to learn how the pros do it.
 
Thanks for that suggestion!

So I went down today, a few days after the last coat, and while the first morning after - when I put the fingerprint in it, it seemed almost there, in the meantime (two more nights), the fingerprint flattened out and a LOT more dust nibs showed...

So I went back after it with some 320 grit paper and some 0000 wool...

268AE8E4-0046-4D0F-BC75-2ABAB2874E25_zpsegzzvjfu.jpg


I tried photographing my "rub outs" to see if I was on the right track. It was tough to get the camera and light perfectly aligned 2x. Guess I should have used a tripod. Here was the first one I attacked. Before:

18938C5C-E14B-464B-BCD4-879CA9771734_zpsmopug6fs.jpg


After:
8B04BB8A-D266-42BD-B2BE-FA9218ED0222_zpsjo4g95pj.jpg


Some of the ones I tried to rub out became almost hollow and collected dust. I guess they were bubbles?

0FB10733-DE93-4D75-A393-A91D76A9E984_zpsk5vi4m0y.jpg


Others were raised enough to have a ring:

F2E591C1-B138-4ABD-B08B-206A819BA00E_zpsvvcamxzs.jpg


Not being able to maintain a satisfactory picture, I surrounded a spot with tape to be able to show the contrast.

B42099DC-D373-418A-8045-80D779CC14A8_zps9obj5lvx.jpg


CE8D07DC-7D61-4E56-A7FB-F7A8D5F13CA4_zps05d43fmi.jpg


and below that spot:

138968F7-523E-476B-B7DC-8664B7ADBF68_zps1mfbm7zu.jpg


4949355B-B9B0-4ADC-9CFF-8F30B1F24788_zpsmqsxtdtc.jpg


I found that 0000 wool worked better from a grasping, dynamic removal and build-up basis. So I tended to use that more for the spot adjustments.

Also, notice on that last one, how at the very end, there was some ireegularity and there was some entry into that seam? Im assuming that the seam will fill and then self level after another coat or two, but what about the irregularity? I noticed that at the very edges, even if I wet it fully, it will draw back from the very edge and make for a thicker coat more to the center of the piece. This happens all around. Does this mean I need to sand the edges more or something to help the material stay in place?

Though Id love to do another coat tonight, I have too much to do. Im going to plan to heat my basement shop after work tomorrow and hopefully put a coat tomorrow PM, pending suggestions to this post.

Thanks!
 
You might need to wipe it down with some alcohol or something before recoating. Some steel wool has oil in it from production.
 
Status
Not open for further replies.
Back
Top