Ceiling Sealing, Part II

Status
Not open for further replies.
Joined
Feb 6, 2010
Messages
4,836
Location
Central Texas
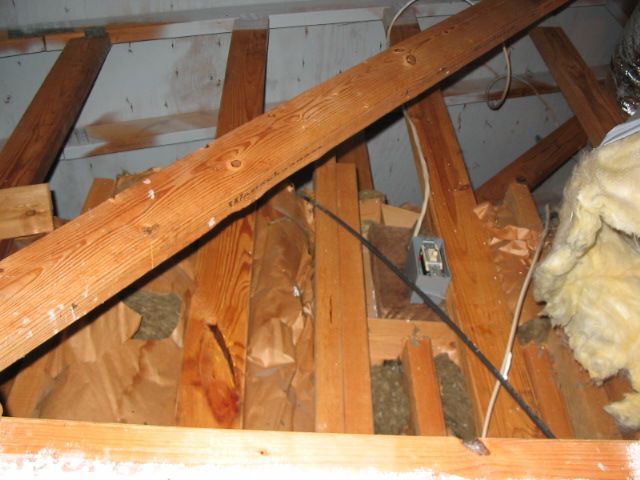
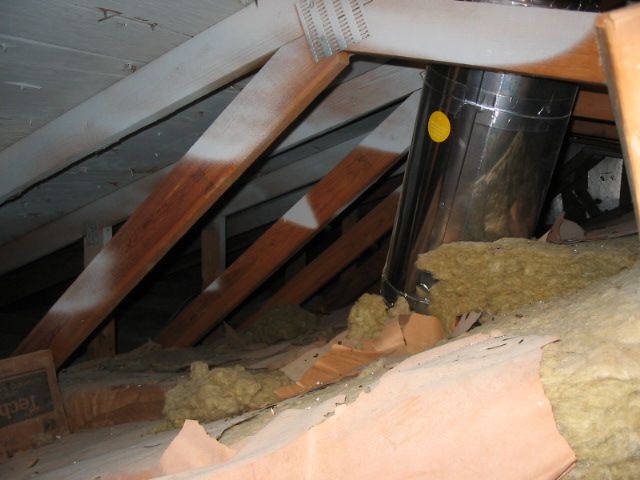
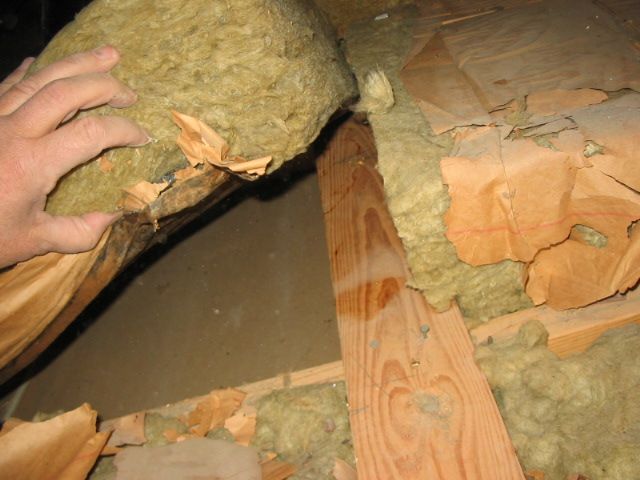
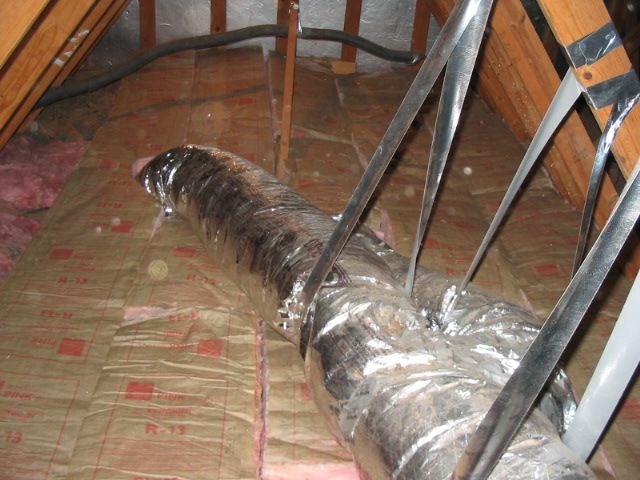
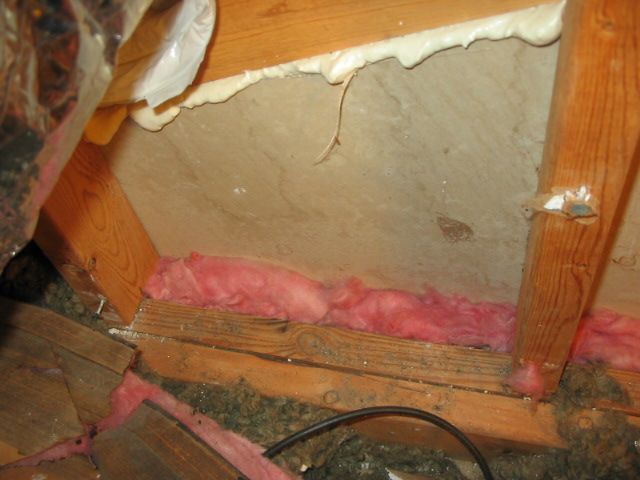
A few years back, I got up into my attic during Winter to seal every ceiling and top plate penetration I could find. I also cut up foam board to fit open fur downs and walls and sealed it into place with either foam or caulk.

It took about 2 weeks of part-time work, often late into the evenings. However the results were worth it.

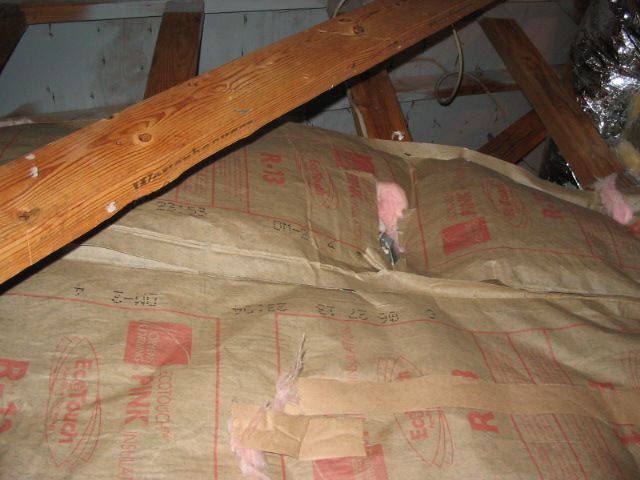
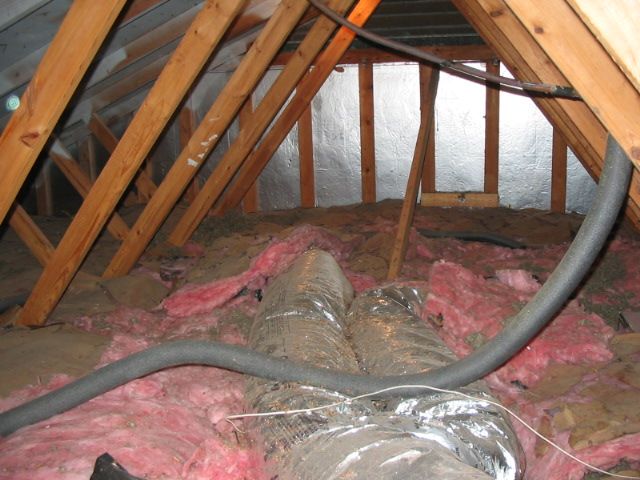
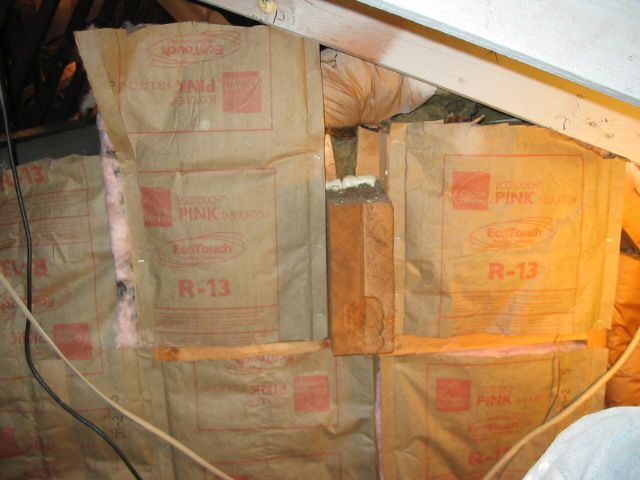
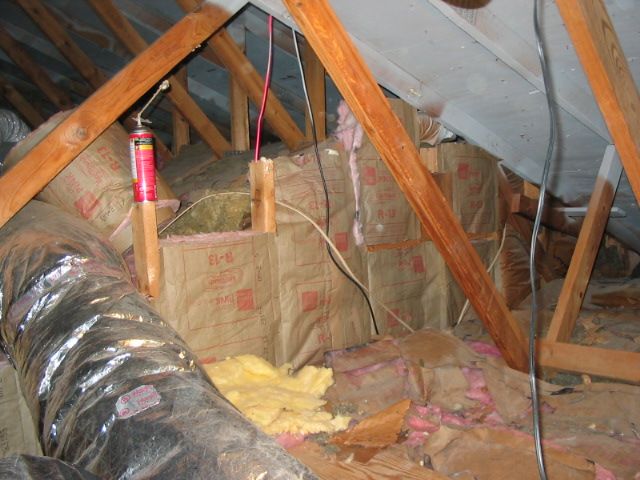
I recently picked up some R13 rolled fiberglass to add to the existing insulation this Winter as I think mine needs to be supplimented. Originally, the builder blew in about 4" of rock wool. I added R15 rolls on top, parallel to the ceiling joists as the rock wool began to settle. Now I'm going to add the R13 perpendicular to the joists so that the tops of the joists are also insulated and to bridge the gaps between each previous roll.

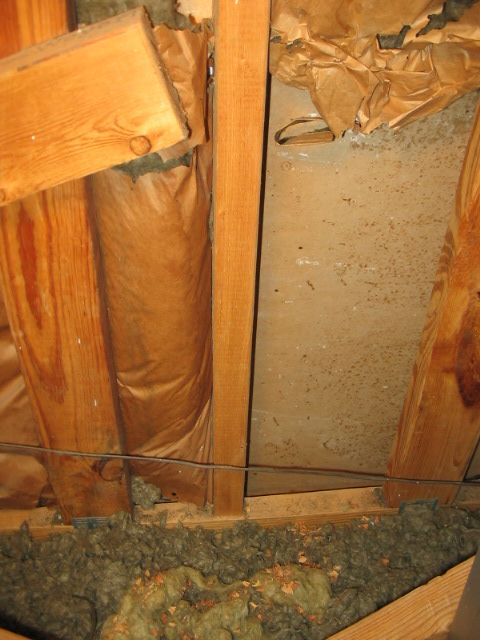
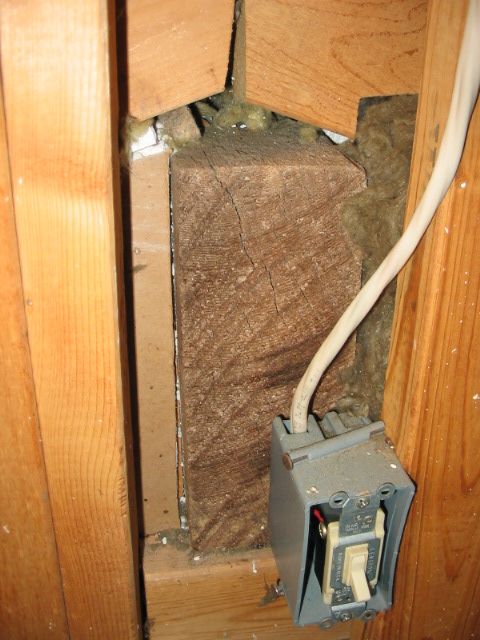
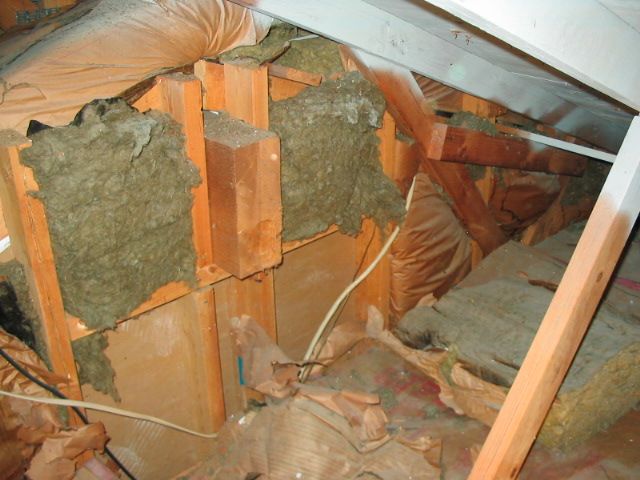
I also got to thinking about the 'cathedral' ceiling in the living room. Each end wall is on the interior, however I don't think they have any insulation in them and further, I don't believe they are air-sealed at the top. Thus cold air enters the attic, sinks into all low spots, drops down these long, narrow 'chutes', cooling off both sides of the wall. As it warms, it rises until it cools again and the cycle repeats.

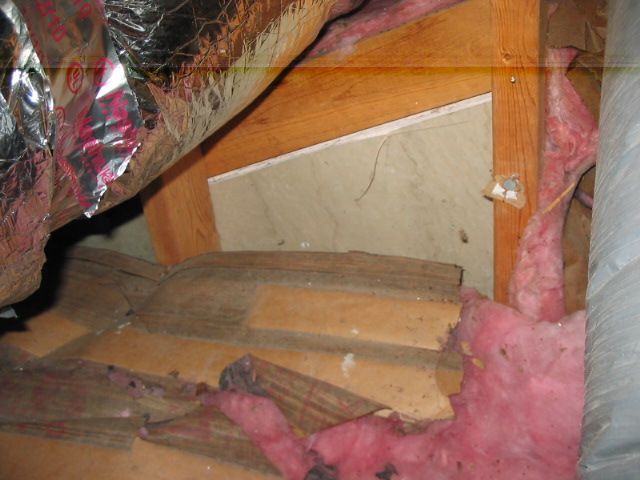
Some are so close to the edge of the outer walls and with a 5/12 pitch, will be too tight of fit for me to get to. Perhaps all I can do there is to just stuff fiberglass into the tops to slow down the air.

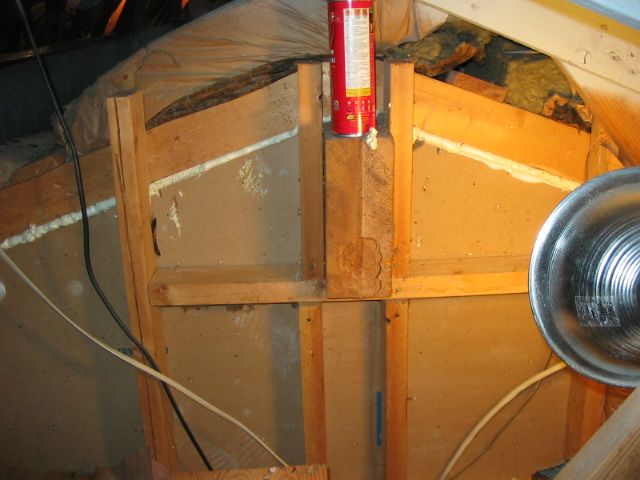
In the others though, I plan on fitting foam into each cavity and sealing it off. This should stop this chimney effect of cool walls.

Lastly, my thermostat is located on one of these 'chimneys', which probably effects its accuracy. It'll be interesting to see how it behaves when that cavity is sealed from above.

Also, I have a plain, middle range electric water heater off the back porch in a small closet. I noticed when I opened the door in cold weather, it was warm inside. So I wrapped it in R15 rolled fiberglass and made a collar up top that extended about 5" up from the top of it. Then I shredded fiberglass and gently filled up the collar to the top. My rationale being that heat rises, so heat was leaking out of the top. Thus not only do the walls need insulating, but also the top. The result is that when I open the door now, it's no longer warm inside. This was a very simple, inexpensive, but highly effective fix.

I'll snap some photos as I get into it and post here.
 
Nice work! So you actually affixed some sort of barrier/insulation up against the roof? I thought that was bad for shingle longevity... ?

looking forward to the pictures. I guess the only issue is that you lose storage space? We have a walk-up attic that we use for all kinds of stuff, but if there are ways to upgrade it, Im open...
 
Originally Posted By: JHZR2
Nice work! So you actually affixed some sort of barrier/insulation up against the roof? I thought that was bad for shingle longevity... ?

No. Ceiling joists, not roof rafters.
 
Roof venting is absolutely critical to prevent moisture and rot. An attic space should be the same temp as the ambient temps outdoors. The ventilation is critical and sealing the attic or somehow impeding its ability to flow air will cause ceiling joists to crown and "uplift",insulation to absorb moisture which then compromises the insulating ability and the now moist area will breed mould,fungus and makes a great home for insects and vermin.
An attic or roof needs as much venting as possible because a house radiates heat and this heat rises and ends up in the attic. Because of this heat a roof/attic space requires venting to equalize the temps and promote convection moving the warm air out via the vents at top of the roof which then pulls cool air in from the soffit vents.
If you've impeded the roofs ability to move air you are going to have moisture problems including rot and the framing will now flex and heave due to the increased moisture content in the air.
Your vaulted section should have insulation batts flush with the bottom of the framing and an airspace above it for air to move. Without this airspace you've created a thermal bridge and no ability for moisture to escape which will lead to serious structural deficiencies.
I'm a journeyman carpenter with over 20 years building custom homes and multi unit residential. I suggest you research what you've done.
 
Originally Posted By: Clevy
Roof venting is absolutely critical to prevent moisture and rot. An attic space should be the same temp as the ambient temps outdoors. The ventilation is critical and sealing the attic or somehow impeding its ability to flow air will cause ceiling joists to crown and "uplift",insulation to absorb moisture which then compromises the insulating ability and the now moist area will breed mould,fungus and makes a great home for insects and vermin.
An attic or roof needs as much venting as possible because a house radiates heat and this heat rises and ends up in the attic. Because of this heat a roof/attic space requires venting to equalize the temps and promote convection moving the warm air out via the vents at top of the roof which then pulls cool air in from the soffit vents.
If you've impeded the roofs ability to move air you are going to have moisture problems including rot and the framing will now flex and heave due to the increased moisture content in the air.
Your vaulted section should have insulation batts flush with the bottom of the framing and an airspace above it for air to move. Without this airspace you've created a thermal bridge and no ability for moisture to escape which will lead to serious structural deficiencies.
I'm a journeyman carpenter with over 20 years building custom homes and multi unit residential. I suggest you research what you've done.


With respect to your experience, you've completely misunderstood what I'm doing. Perhaps JHRZ's post suggested this?

Frankly, what do ceiling joists have to do with roof ventilation? I suggest you both wait for photos.
 
Originally Posted By: Clevy
Roof venting is absolutely critical to prevent moisture and rot. An attic space should be the same temp as the ambient temps outdoors. The ventilation is critical and sealing the attic or somehow impeding its ability to flow air will cause ceiling joists to crown and "uplift",insulation to absorb moisture which then compromises the insulating ability and the now moist area will breed mould,fungus and makes a great home for insects and vermin.
An attic or roof needs as much venting as possible because a house radiates heat and this heat rises and ends up in the attic. Because of this heat a roof/attic space requires venting to equalize the temps and promote convection moving the warm air out via the vents at top of the roof which then pulls cool air in from the soffit vents.
If you've impeded the roofs ability to move air you are going to have moisture problems including rot and the framing will now flex and heave due to the increased moisture content in the air.
Your vaulted section should have insulation batts flush with the bottom of the framing and an airspace above it for air to move. Without this airspace you've created a thermal bridge and no ability for moisture to escape which will lead to serious structural deficiencies.
I'm a journeyman carpenter with over 20 years building custom homes and multi unit residential. I suggest you research what you've done.


I misread the OPs comments on what he had done a few years back... But I agree that a trough of some sort is necessary from the eaves to the roof top line.

I'm assuming your issue is with the installation of baffles of some sort to allow the eaves to vent to the top ridge vent or a soffit vent...

Attic%20Ventilation%20Baffles.jpg


The OPs approach is just to minimize transferred heat heading upwards through the ceiling and joists. I'm no fan of overly sealed homes, but there is some limit too to leakiness, even in the attic. Also, the volume of space that is effectively the same temperature as ambient perhaps should be considered.

On balloon frame homes there is potential for a lot of airflow. More modern homes have insulation in the outer walls. Preventing all upwards drafts within the wall pockets may well be a good thing, assuming that the eaves to soffit and ridge vents are set up properly, no?
 
IMG_7316_zps72129842.jpg

Looking up through the attic access hatch. The wall you see is the top section of the valted ceiling mentioned earlier. The gray surface above it is the roof decking with a sprayed on radiant barrier. It's this vertical surface I wished to better seal and insulate as it protrudes into the attic.


IMG_7317_zps9bc16f02.jpg

Here's another view, once into the attic. The brownish/gray vertical surface to the right is sheetrock from the upper wall of the vaulted ceiling. Down inside is where I thought were no blocks. Fortunately, I was wrong. However the insulation on the vertical face doesn't extend down into the stud cavity at all. Therefore, I had a whole section of uninsulated ceiling sheetrock exposed to the attic.


IMG_7319_zps4400fd61.jpg

This shows the amount of space between the vaulted ceiling and the roof decking. Clearly not on the same framing.


IMG_7321_zps27e0fecf.jpg

What's wrong with this picture?


IMG_7322_zps11f4915d.jpg

Another view. Both ends of the thick batt insulation are sitting on top of the brace, thus leaving a rather large air gap between it and the ceiling sheetrock. Thus this nearly 4' section of sheetrock is exposed to the attic heat/cold. This is in an awkward place so I haven't noticed it before. Unfortunately, it's been like this for 30+ years now! (Stuff like this just drives me nuts....)


IMG_7320_zps2bd661ee.jpg

Behind the switch box is a large rough-cut cedar beam that runs the length of the ridge of the vaulted ceiling. It's sitting here exposed to the attic. A few decades ago, I had removed all interior trim around this beam from the interior side, and caulked cracks that ran the entire length of the beam, on both sides. Talk about an air leak!!


IMG_7329_zpse734f0fe.jpg

Compare this photo with the one above and the first one. After stuffing some loose insulation down into the uninsulated cavity, I ran a long piece horizontally to cover the ends of the studs and another above it so the face of this vertical wall is now fully insulated inside the attic. I used hot glue to join the paper seams between the two as duct tape wouldn't stick. Besides the glue will hold over time.


IMG_7325_zpsc1f4a7fd.jpg

The insulation in this section of the attic is a bit of a mess. The insulated line is to the solar water heater system I still need to re-install on the roof after putting on a new roof. The silver ductwork is the new stuff I installed year-before-last.


IMG_7327_zpsf2d598ca.jpg

This is the after shot. I made some temp. trapezes with duct-tape to 'fly' the ductwork so I could get underneath it. I re-fluffed the loose rock wool, then pieced back together the pink layer layed on top of it, parallel to the ceiling joists. Then layed down this new layer perpendicular to that so it insulates the tops of the ceiling joists and bridges the gaps. The result being about R30. Note I still have one more section to do on the left, where the truss triangle ties in to the ceiling joist. I ran out of insulation, so I'll hoist another few rolls up tomorrow.

Next I'll take care of the opposite end wall of the vaulted ceiling and continue with laying down more insulation perpendicular to the existing, just like above.

I wanted to do this last year, however the local box stores only carried R30. It's about $45/roll. I didn't need that much. Besides they wouldn't fit through the attic access hatch. This year I noticed HD now has this R13 and it's about $12/roll. Perfect for adding to what I already have and this is the perfect time to work in the attic in central Tx as we only have two seasons: Summer & January!

More to come later....
 
Today I finished up the South side, including removing quite a bit of trash, old insulation and moved the old ductwork to another section of the attic where I could toss it onto the porch ceiling where there is no insulation.

Moved to the North side, where the roofline is lower and access is harder. Here's an initial photo of what it looks like:
IMG_7330_zps323bc5ff.jpg

This is the apex of the vaulted ceiling. You can see missing insulation and the now-30+yrs-old rockwool. The holes where the wires penetrate the top plate need sealing. So do the sheetrock seams between the wall & ceiling.


IMG_7331_zpse257a2a6.jpg

This face had no insulation at all.


IMG_7333_zps69287a9a.jpg

I started out by removing all the old insulation, and using a can of foam to seal the top plate wire penetrations and the backside of the sheetrock joints. (BTW the best foam-in-a-can I've used is made by Hilti. HD used to carry it. Not only does it have better control, but you can use it a week or two or three later. Seems HD jettisoned any and everthing made by Hilti.)


IMG_7335_zpsbe0b52bb.jpg

Next comes laying in layers of insulation into these small areas that were previously uninsulated. There is a 2x4 about 6" down (fireblock) but the original insulation never went into this area. Furthermore, the joint between the backside of the sheetrock and the 2x wasn't sealed. This allowed cold, dense air to sink into the empty, uninsulated wall cavity below, slowly filling it up. To me, it's worth it to insulate these types of walls, even though they are interior.


IMG_7334_zps2914a793.jpg

This is now looking better: All the sheetrock joints are sealed, new insulation has been stapled into place and all wire penetrations have been foamed. Now no more cold air can get into these cavities.
IMG_7336_zps4c6f3227.jpg


I still have to get on top of the peak of the ridge beam, pull back the thick batts and have a look. I'll be sealing all of those joints from the top as well as making sure all insulation is in tight contact with the sheetrock.

Once this is done, I can continue running new insulation perpendicular to what's in there.
 
Forgot to add an excellent source to read up on this: Finehomebuilding.com > videos > air-sealing and insulation. You'll have to temp sign up for a trial to view them. Great info and video from a true pro Mike Guertin.

Notice he uses a professional foam gun with replaceable cartridges. I highly recommend one of these if you're just beginning as you'll save frustration and get much better control over the long run vs. consumer can foam.
 
Update;
There's been some very cold air (20°F) roaring down from the Great White North into central Tx, giving us the Big Chill. Makes for a nice test environment for the insulation work completed thus far.

I've noticed that the heat pump stays off longer and the South rooms hold their heat gained from the Sun shining into the windows throughout the day, longer. The additional insulation shown above is directly over these two Southern rooms.

On the North side, there is a similar area where the insulation has been damaged and needs to be repaired. That room is typically cold. Adding more 'loft' there should result in similar results.
 
Sleddriver,

I did not study your posts extensively and I don't totally understand all the details.

Is that vapor barrier on your new insulation? I ask, because vapor barriers are sometimes controversial and yours appears to be installed on the "cool" side vs. the conventional wisdom to install it on the warm side (norther climates).

To Clevy and others who understand the conventional wisdom of attic venting, in hot climates there is another controversial building method that involves a sealed attic space. Google "sealed unvented attic" for some interesting reading. It defies the conventional wisdom that we northerners have.

Here is just one article that touches on the subject: http://www.builderonline.com/codes-and-standards/eliminating-attic-vents.aspx

"He says that researchers have found that, in hot, humid climates, buildings with unvented attics are actually less likely to have condensation and mold than those with vented attics. That's because, in these climates, most moisture comes from outside, and the foam keeps the attic dry by sealing that moisture out."

It's goes against everything I know about the importance of attic ventilation.
 
Yes, the new insulation does have a paper facing..not quite a tough vapor barrier and you are right, in my climate it should face towards the living area.

What you can't see on the horizontal new batts is that I slit it with a razor knife so that any moisture could escape. On the vertical sections, I didn't slit it as the ends are exposed and these are short vertical walls.

Re: Sealed attics in hot, humid climates.

Very controversial down here. What you may not realize though is that although the attic is sealed with foam, it's kept dry and cool by the HVAC system just like the rest of the house. It becomes just another room in effect. There is also no insulation on the ceiling as the insulation layer has been moved to the roof.

I have a traditional vented attic and no desire to 'seal it' as it's very expensive and not worth it to me.
 
Originally Posted By: doitmyself
Sleddriver,

I did not study your posts extensively and I don't totally understand all the details.

Is that vapor barrier on your new insulation? I ask, because vapor barriers are sometimes controversial and yours appears to be installed on the "cool" side vs. the conventional wisdom to install it on the warm side (norther climates).

To Clevy and others who understand the conventional wisdom of attic venting, in hot climates there is another controversial building method that involves a sealed attic space. Google "sealed unvented attic" for some interesting reading. It defies the conventional wisdom that we northerners have.

Here is just one article that touches on the subject: http://www.builderonline.com/codes-and-standards/eliminating-attic-vents.aspx

"He says that researchers have found that, in hot, humid climates, buildings with unvented attics are actually less likely to have condensation and mold than those with vented attics. That's because, in these climates, most moisture comes from outside, and the foam keeps the attic dry by sealing that moisture out."

It's goes against everything I know about the importance of attic ventilation.

Sealing the attic prvents condensation building up on the cooled "floor" of the attic.
If a house is mostly going to be cooler than outside, the vapour barrier should be on the outside of the insulation. Up north, the exterior walls are mostly cooler than the house so we put the vapour barrier on the inside of the wall to keep condensation out of the wall.
 
Update:
I've now finished installing new R-13 roll fiberglass on the North side close to the area shown above. This area was a bit of a mess and I wanted to get it straightened out. Fortunately, I finished here before the 'warm-wave' hit. We've had some very spring-like weather lately..too warm to get in the attic. However, the Big Chill II is about to arrive from the Great White North so I'll get back in to touch up the ceiling coffer box in the kitchen and examine this area to see if the insulation needs replacing or not.

I'll also be doing some phone/data rewiring while I'm up there, for more details see my post in the 'consumer electronics' section.
 
Update:

After several hours in the attic over the vaulted ceiling, I now understand why the living room is drafty and the heat pump cycles more than it should.

IMG_7321_zps27e0fecf.jpg

This photo shows the problem. Instead of tucking these 6" rockwool batts underneath the 1x4's, the contractor just laid it across the top!

What this did was to separate the insulation from the drywall, allowing hot/cold air directly onto its surface. Further, since these rockwool batts are 6" thick and rockwool is much stiffer than fiberglass batts, about 16" on each side of the 1x4 was exposed.

A 2x4 is 3-1/2" 'deep'. A 1x4 is 3/4" thick. Therefore there was a max gap of 4-1/4" of nothing-but-air, extending 16" on each side.

IMG_7322_zps11f4915d.jpg


There are nine of these sections, each about 24" wide and every one of them had at least one, sometimes two, sections where the insulation was improperly installed as shown above.

FUBAR.

Small wonder when it's 30° degrees inside the attic, that the walls and large sections of the ceiling remain cold: There's no insulation on the backside! A FLIR camera would have instantly shown this. Sure would be handy to borrow one.

Needless to say I fixed all of these, in addition to filling in the cracks from above between the cedar ridge beam and the sheetrock. Though I'd removed the trim from the inside and sealed as best I could from that side years ago, I took the time to caulk it from the top while up there. This isn't an easy space to get to and move around in, particularly when you're 6'4". There's very little room.

Fixing this should prevent the cold air from cooling large sections of the sheetrock, causing the interior air on the other side to cool, then sink, causing air movement within the room. I.E.: a very slight draft.

With this accomplished, I can lay insulation on top, perpendicular to the lower truss chords, at least on one side of the vault. There's so little room on the side opposite the ridge, I'm not sure how I'd manuever 20' sections of roll R13 between all the truss chords. What a PITA.
 
Originally Posted By: JHZR2
Great work! Thanks for sharing pictures!

You're welcome. Thanks for reading. I Was out this evening weighing my insulation options and came home with a ~ 25# bag of AtticCat (loose fiberglass). I'm going to use it for loose fill in some areas. Since I didn't rent the machine that chews it up and blows it out, I'm going to try a hand garden rake with about 6 tongs to rake it out and fluff it.

What I need is ~ 6" thick, 24" wide, unfaced, in a compressed roll. HD doesn't carry it.

I'll need to run some new data cables first before reinsulating those areas to simpify this and work efficiently. Fortunately, we're actually having Winter down here so working in the attic isn't bad at all! Stay tuned...
 
Update:
While running more data cables this evening, I found a long thin, open joint between an inner wall and the vaulted ceiling. I had shined a light into the uninsulated wall cavity from below so I could be sure I was at the right place when drilling the top plate in the attic.

Before I even drilled, I noticed this open joint about 24" wide, by an 1/8" or so! Evidently the top of the sheetrock wasn't even nailed in, else it would have cracked with this gap.

Now with the new wiring finished in this section, I can get back to inspecting these joints, sealing cracks and laying down some new fiberglass. Small wonder my walls (and ceiling) in the living room were cold given these insulation gaps and open cracks I've found!
 
Update:

Current outdoor ambient temp: 95°F
Outdoor humidity: __________48%
Solar Heat Index: __________115°F
Solar Intensity: ____________525W/sqr. meter.
Indoor temp: _______________78°F
Indoor humidity: ____________40%

Summer has arrived in Central Tx. High pressure will continue to build, lowering the humidity and increasing the ambient outdoor temp.

The update here is regarding the weatherstripping and insulation work I did earlier this year. Even with the thermostat kept on 78°F, it doesn't seem warm indoors nor do I notice the rising outdoor heat...even in my South-side office where the confuser runs 24/7, putting out heat.

I already have installed my solar screens on the West-facing windows to minimize the heat gain from the early evening sun.

Eliminating the large air gaps between the thick blankets and the backside of the ceiling insulation has helped a lot with comfort in the living room. So did properly insulating the vertical end-walls that extend up into the attic.

Lastly, I resealed the floor-level air-return box using duct mastic and installed new pvc pipe for the condensate drain. While doing this I discovered the slab penetration for the drain + lineset was rather large and not sealed well. I fixed this with mastic.

I'm getting a 20°F drop across the evaporator using a TXV, which is about right.

I have toyed with the idea of moving the thermostat from the living room into a short hallway about 5' away, as this hallway has no air supply vents and relies on air from two bedrooms and a very small amount from a small bath. The rationale for this is that I suspect my unit might be short-cycling: Because of the work I've done over the years to improve the 'envelope' the unit, a three-ton, is now too large. Further, the T-stat might also 'feel-a-breeze' when the blower kicks in. I'll have to verify this with an incense stick.

I'm very pleased with the results! This is NOT a good time of year to be in an attic in Tx...
 
Status
Not open for further replies.
Back
Top