Ball joint replacement Chevy 4WD 2010 Silverado

Joined
Dec 31, 2017
Messages
15,276
Location
SE British Columbia, Canada
My son and I replaced the lower ball joints ( and upper A arms ) on his 2010 Silverado.
Funny how the videos sometimes miss a few pertinent things.

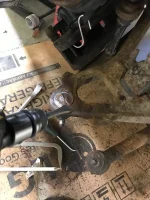
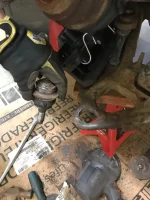
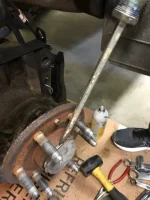
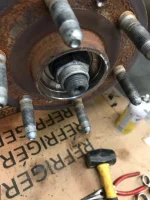
This being a 4 wheel drive we had to remove the CV axles to get at the ball joint. There is protective cap over top the axle nut. It worked really well using a chisel and hammer and lightly tapping on the edge then flicking it out with a large screw driver. I didn’t have a socket larger than 30 mm to remove the axle but so my daughter hot shotted a 36 mm socket from town. Turned out the nut was actually smaller than 36 mm but it sufficed with only a bit of collateral damage to the nut. My Nut Buster impact wrench easily spun it off.

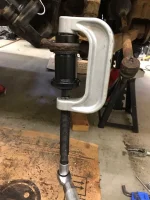
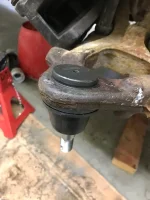
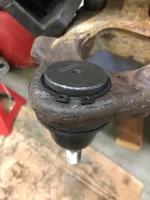
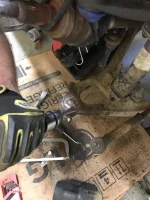
The next issue to deal with is that the ball joints were original and did not have snap rings but instead had a metal ring that was fused to the top and was larger in diameter than the hole in the lower A arm. We used a air chisel to peel it off and then used a BFH to start the ball joint moving downward inside the hole, aided with an air hammer with a puny compressor. We finally got it out and used my Orion Tools ball joint installation kit to install the new AC Delco ball joints with C-rings. The kit worked great and the ball joint moved with every turn of the handle.

This would be an everyday boring procedure for a pro mechanic, but was a fun father son project for us.

A couple of important tips was to have the proper socket for the axle nut and have a cheater bar to turn the handle on the installer. Also, the socket size for the stock ball joint nut was 15/16 and had to be a tall one. The nut on the AC Delco replacement was 7/8 inch (22 mm). Enjoy the photos.
9D8E2FA1-62E5-4F2B-90F1-336013148DD1.jpeg6D0203EA-8CFC-4B13-B5F8-E96964FC4304.jpeg126EE52F-1239-4F9F-A84A-456FEF81EAED.jpeg27872C94-DBD0-492D-A557-93F37CEA1294.jpeg58D2E352-5386-4876-8B62-D064BB915396.jpeg616060AA-9E94-45EB-B701-F0ED91B71E3F.jpeg568399EC-46A5-4E27-83C4-B7A83996EC28.jpegE4441CAF-64E4-4078-9F8E-7331893FAA51.jpeg
 
Last edited:
Good job, I did ball joints on my 97 Explorer and it was a job I used a ball joint press rented from Auto Zone. Glad you and your son we’re able to do that together hopefully he learned something.
 
Is there much of a cost difference between doing the ball joints, and just replacing the entire A-arms? I am about due (2011 Silverado with ~160k) and am thinking about just doing the entire A-arms, as then you get new bushings on the chassis side as well...thoughts?
 
Is there much of a cost difference between doing the ball joints, and just replacing the entire A-arms? I am about due (2011 Silverado with ~160k) and am thinking about just doing the entire A-arms, as then you get new bushings on the chassis side as well...thoughts?
It would be another $250 for genuine AC Delco lower arms and is probably a good idea if you are going to keep it, but then since you are going to have to disconnect the shocks, maybe get a new pair of shocks, but since you are replacing the front shocks maybe you should do the rears, but since the truck is up in the air to do the rear shocks, why not refresh the brake pads. That’s how it seems to work with me. I stopped at the upper arms and lower ball joints but already decided to add outer tie rod ends. $$ :)
 
Last edited:
I did upper and lower ball joints on my '78 Malibu when I was about 20 while sitting on my butt on a gravel driveway with nothing but cheap tools and a rented ball joint remover/installer. I don't even remember how I got the rivets out of the uppers. Not sure I'd want to tackle something like that now 30 years later. Nice job!
 
My son and I replaced the lower ball joints ( and upper A arms ) on his 2010 Silverado.
Funny how the videos sometimes miss a few pertinent things.

This being a 4 wheel drive we had to remove the CV axles to get at the ball joint. There is protective cap over top the axle nut. It worked really well using a chisel and hammer and lightly tapping on the edge then flicking it out with a large screw driver. I didn’t have a socket larger than 30 mm to remove the axle but so my daughter hot shotted a 36 mm socket from town. Turned out the nut was actually smaller than 36 mm but it sufficed with only a bit of collateral damage to the nut. My Nut Buster impact wrench easily spun it off.

The next issue to deal with is that the ball joints were original and did not have snap rings but instead had a metal ring that was fused to the top and was larger in diameter than the hole in the lower A arm. We used a air chisel to peel it off and then used a BFH to start the ball joint moving downward inside the hole, aided with an air hammer with a puny compressor. We finally got it out and used my Orion Tools ball joint installation kit to install the new AC Delco ball joints with C-rings. The kit worked great and the ball joint moved with every turn of the handle.

This would be an everyday boring procedure for a pro mechanic, but was a fun father son project for us.

A couple of important tips was to have the proper socket for the axle nut and have a cheater bar to turn the handle on the installer. Also, the socket size for the stock ball joint nut was 15/16 and had to be a tall one. The nut on the AC Delco replacement was 7/8 inch (22 mm). Enjoy the photos.
View attachment 58191View attachment 58192View attachment 58193View attachment 58194View attachment 58195View attachment 58196View attachment 58197View attachment 58198
Nice write up and good pictures 🇨🇦🍺
 
We found we had a stripped thread on tie rod end so we we decided to install a new set from AC Delco. All done. Now to throw on the wheels and find a few cliffs to drive by. An alignment will get done by a shop. :)

6A0063AB-3525-42D1-B62F-1AA972F11529.jpeg
 
Is there much of a cost difference between doing the ball joints, and just replacing the entire A-arms? I am about due (2011 Silverado with ~160k) and am thinking about just doing the entire A-arms, as then you get new bushings on the chassis side as well...thoughts?
Regarding your idea about replacing the lower A arms, here are two photos, one of the upper A arm which we replaced and the lower A arm we didn’t replace. They both had some deterioration of the bushings but the upper was worse in our case. As far as I know they were the originals and the truck has 160,000 miles on it. Hope that helps.

4BE3A514-98CC-45E6-826C-EECA0751A389.jpeg
803E79B5-EC17-443E-B79E-3779B1B20733.jpeg
 
Last edited:
Before I put away my Orion Tools ball joint kit, I used green tape to mark the three components I used to install the new ball joints This is for a GM truck. The kit was obtained through Amazon.

E2B0135D-CF8F-4772-AC7B-AB75B62B4FC7.jpeg
 
Last edited:
We found we had a stripped thread on tie rod end so we we decided to install a new set from AC Delco. All done. Now to throw on the wheels and find a few cliffs to drive by. An alignment will get done by a shop. :)

View attachment 58451
We had the alignment done and all is good. The shop had no issues and didn’t try up-sell us on any components. The truck steering wheel is dead center and tracks well. :D
 
Back
Top