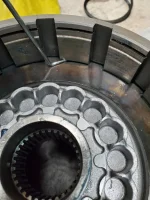
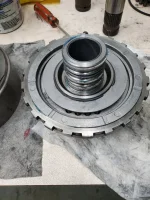
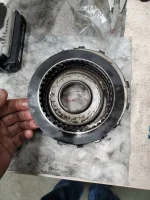
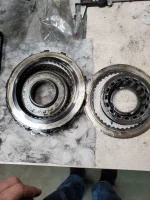
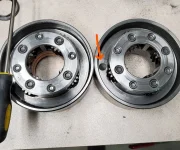
4l80E Part order list

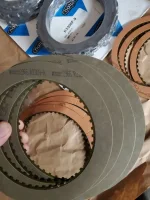
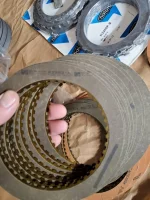
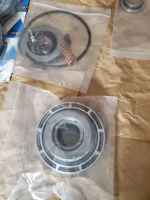
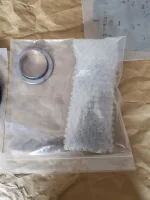
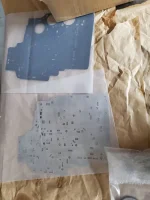
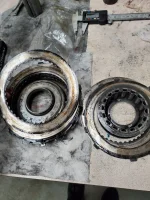
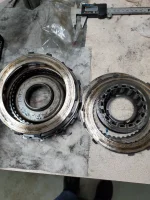
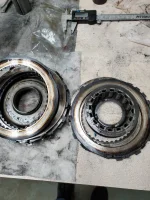
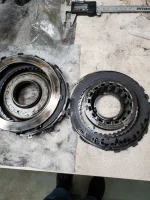
Some parts are starting to roll in, still need to order pump, and converter, an extra friction, and the wiring harness(when credit card gets done smoking a lil bit).
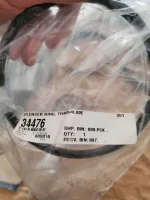
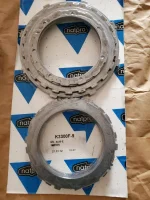
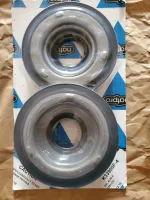
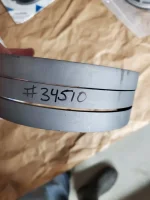
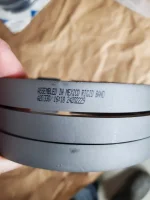
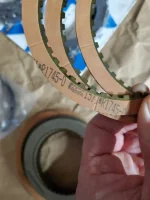
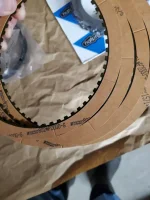
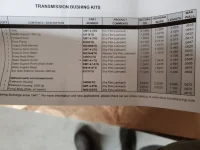
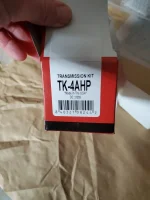
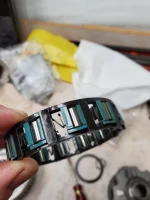
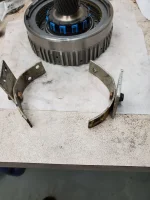
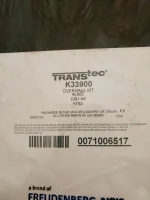
I've read where sometimes questionable parts get delivered from some transmission dealers, so thought I would show what came in this kit.
 

Attachments

  • 20210205_150111.jpg
    20210205_150111.jpg
    97.8 KB · Views: 31
  • 20210205_150151.jpg
    20210205_150151.jpg
    93 KB · Views: 32
  • 20210205_150600.jpg
    20210205_150600.jpg
    143.5 KB · Views: 33
  • 20210205_150607.jpg
    20210205_150607.jpg
    144 KB · Views: 31
  • 20210215_135323.jpg
    20210215_135323.jpg
    82.9 KB · Views: 31
  • 20210215_135339.jpg
    20210215_135339.jpg
    79 KB · Views: 30
  • 20210215_135423.jpg
    20210215_135423.jpg
    82.6 KB · Views: 32
  • 20210215_135449.jpg
    20210215_135449.jpg
    98.5 KB · Views: 31
  • 20210215_135513.jpg
    20210215_135513.jpg
    120.1 KB · Views: 30
  • 20210215_135553.jpg
    20210215_135553.jpg
    146 KB · Views: 31
CK Performance Kit, came in a timely manner(showed up before the rebuild kit did), I called them and checked if it was in stock before ordering. And the durabond bushing kit.
 

Attachments

  • 20210215_135257.jpg
    20210215_135257.jpg
    119.1 KB · Views: 40
  • 20210215_135302.jpg
    20210215_135302.jpg
    97.7 KB · Views: 43
  • 20210215_135307.jpg
    20210215_135307.jpg
    103.3 KB · Views: 46
  • 20210214_165223.jpg
    20210214_165223.jpg
    111 KB · Views: 49
  • 20210214_165232.jpg
    20210214_165232.jpg
    74.3 KB · Views: 50
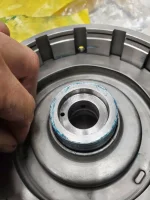
Finally got some free time to work on this some, so resurrecting my old post. While replacing the bushing in the overrun clutch housing, there was a difference in the larger bushing. The factory (i'm assuming federal mogul, had FM on it) was fluted and the the Durabond one is not. In the CK Performance Kit it includes the fluted bushing for the smaller bushing(sun gear). Will that combination be good to go? Fluted smaller sungear bushing and non fluted larger bushing?
 
Haven't been able to get the coated bushing kit from my supplier in awhile.....But the standard TK-4A kit has a fluted front overrun housing bushing.

Did you take it out of the bag & make sure??
 
Guess it was amateur hour time...You the man Cline, with the dark coating it looked smooth...I think after dealing with those 2 seals on the overdrive assembly I was looking for a reason to take a break😅.
 
Resurrecting my old thread after a million other projects got in the way and this got set aside...
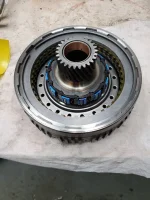
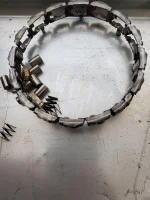
Starting with over run noticed a little flaw in one springs on the sprag, so ordered a new one. After ordering replacement I saw where Clinebarger said the earlier version is better. Maybe on next rebuild

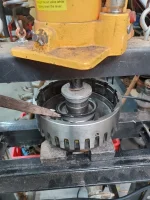
2nd pic is my home made tool from scraps laying around to compress the spring to dissassemble. Used press with a bar across top to push down...I have since picked up an old spring compressor at a local auction for $5.

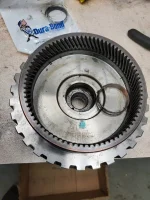
3rd pic is final assembly...New parts: both bushings, including a fluted ck performance, piston, frictions, and steels. Clearance seemed a little loose for me around .070 dry, but that was within specs.

I didn't get a lip seal in my transtec kit, and was afraid to use a feeler gauge method, so I used some 10mil plastic I had laying around. Seemed to work good and could use 2 pieces at same time to do inner and outer lip of seals.
 

Attachments

  • 20220107_150529.jpg
    20220107_150529.jpg
    89.7 KB · Views: 30
  • 20220107_150654.jpg
    20220107_150654.jpg
    158.3 KB · Views: 30
  • 20220107_150446.jpg
    20220107_150446.jpg
    156.2 KB · Views: 30
How I removed inner seal on forward clutch. Just light pressure to hold it in place. I'm sure there is a special tool for installing also which I don't have. I didn't have a socket large enough, but had a ball joint press/removal tool set (can be loaned from most parts stores) that had an adapter that worked just fine with the press to install.

2nd pic: For alot of these bushings it was easier to use an inner snap ring and washer to press out. PS for those doing quicky rebuilds and not replacing bushings, clean real good behind these bushings, there is alot of debris that builds up in that cavity.

3rd pic: Not sure if makes a difference but I lined up the wave plate section with no notch with the hole.

New parts: bushing, bonded rubber pistons/seal, frictions/steels...clearance around .055 dry
 

Attachments

  • 20220109_185525.jpg
    20220109_185525.jpg
    111.6 KB · Views: 24
  • 20220108_132013.jpg
    20220108_132013.jpg
    176.8 KB · Views: 24
  • 20220108_131501.jpg
    20220108_131501.jpg
    194.5 KB · Views: 24
Started to assemble direct with new ck performance piston, and noticed wave plate is under the notch bottom groove. Not sure if that could spin and get stuck under groove, locking clutch? CK's instructions don't mention not using wave plate

Still waiting on order for disk and friction to finish assembly

pic #2. center support with new bushing that had me cussing and nervous I'd bend in the press. New teflon seals, used a small pic and just worked them down. Used the the 10mil plastic and a hose clamp to compress teflon back to shape. Luckily i had spring compressor for the heavy duty springs from ck performance and thick plate.
 

Attachments

  • 20220112_143146.jpg
    20220112_143146.jpg
    166 KB · Views: 25
  • 20220112_190842.jpg
    20220112_190842.jpg
    197.9 KB · Views: 25
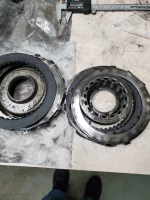
that was some of the good, now for some of the bad...here is what the directs looked like when I took them apart...beyond burnt and oddly only some were complete gone while others still measured close to specs...stacked in order they came out...Is this a normal high mileage scenario?

1st pic has a weird wear line...that was the one next to pressure plate.
 

Attachments

  • 20220112_150221.jpg
    20220112_150221.jpg
    204.9 KB · Views: 30
  • 20220112_150229.jpg
    20220112_150229.jpg
    219.8 KB · Views: 28
  • 20220112_150240.jpg
    20220112_150240.jpg
    231.4 KB · Views: 27
  • 20220112_150246.jpg
    20220112_150246.jpg
    211.5 KB · Views: 25
  • 20220112_150254.jpg
    20220112_150254.jpg
    230.4 KB · Views: 25
  • 20220112_150300.jpg
    20220112_150300.jpg
    231.2 KB · Views: 28
  • 20220112_150310.jpg
    20220112_150310.jpg
    215.3 KB · Views: 30
Now for some ugly...

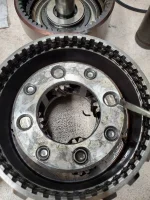
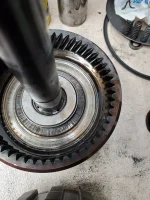
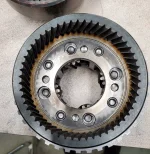
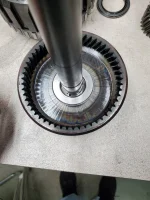
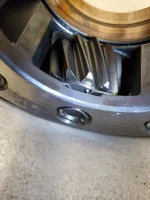
Pic #1: rear planet, 3 of the pins had started to move out( I knocked them back in, they were sticking out. and hitting the ring gear pic #2.

I can tig them but worried not enough meat is left on the pin for strength.

So now I'm debating on getting a used rear planet and ring gear from ebay. Or trying the sonnax repair kit 34880RK https://www.sonnax.com/parts/2017-planetary-rebuild-kit and tig the new pins in place, and ebay the ring gear.

Starting to think working on transmission is like working on boats.
 

Attachments

  • 20220113_163158.jpg
    20220113_163158.jpg
    191.1 KB · Views: 31
  • 20220113_163203.jpg
    20220113_163203.jpg
    176.8 KB · Views: 31
Last edited:
Started to assemble direct with new ck performance piston, and noticed wave plate is under the notch bottom groove. Not sure if that could spin and get stuck under groove, locking clutch? CK's instructions don't mention not using wave plate

Still waiting on order for disk and friction to finish assembly

pic #2. center support with new bushing that had me cussing and nervous I'd bend in the press. New teflon seals, used a small pic and just worked them down. Used the the 10mil plastic and a hose clamp to compress teflon back to shape. Luckily i had spring compressor for the heavy duty springs from ck performance and thick plate.

Anytime you're working with a cut down piston you have to make sure that the Wave or Steel cannot get under the ledge as it can & will rotate causing either partial or no apply of the clutch. Late TH400 & Early 4L80E's with Dished Cushion plates were notorious for breaking & getting lodged under the ledge of the drum.

For comfort....I'd run a wave/cushion plate. To fit 6 frictions....You almost need a OE TH400 wave plate GM# 8623851. They're getting hard to come by unless you find used ones in cores or NOS. Raybestos used to make them but are discontinued now.

A 5 Friction set-up works well past 500 foot pounds of torque being Dual Fed with good line pressure!

See if a .077" Forward Steel will sit flat on the piston without being able to get under the Direct Drum ledge. If it can't get under there....
Stack the wave on top of the .077" Steel, Then another .077" Steel.....Then attempt to stack 5 Frictions & 4 .090" Direct Steels.
 
I know a .090 doesn't go under the ledge, so I'll order a couple forward and direct steels on next parts order to work out the clearance. Will it be ok to use a used forward steel as the shim if still in good shape? The forward assemble wasn't burnt up, just the direct assembly.

Did some ebay shopping, was trying to find a front and rear planetary combo thinking the gears would have a matching wear pattern on teeth.

Description said 04 and up, but WIT's part number says only difference is 2 tab plastic planet to planet washer from 2004 to 2001 model. But that gets replaced by the rear metal output washer when rollerizing output anyway I believe. Other sites just specify 97 and up for replacements.

The good: Pic #1 #2 Rear planetary seem to be ok gears don't look wore out, pins still in place unlike mine lol.

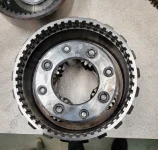
pic #3 rear ring gear seems to be in good shape as well. Shaft seemed to be in good shape as well, but I'll prolly use my original one.
 

Attachments

  • 20220122_190354.jpg
    20220122_190354.jpg
    259.7 KB · Views: 17
  • 20220122_190404.jpg
    20220122_190404.jpg
    264.8 KB · Views: 16
  • 20220122_190459.jpg
    20220122_190459.jpg
    182.1 KB · Views: 16
Last edited:
Luckily those are the 2 things I needed, now the bad:

Pic #1 The horseshoe washer is wore down on at least one of the front planetary.
pic #2 It included the rear sprag, but it wasn't as pictured and has some heavy contact marks. My original one still looks fine.
pic #3 #4 Sun gear looks to be wore down pretty good. My original looks better.
pic #5 Front planetary comparison: 2001 on right, has little machined indent(red arrow), new to me 2004? on left is machine flat all the way around.

So I guess I'll pair up my 2001 good front planetary/sun gear with this supposedly 04 rear planetary and rear gear. Unless you forsee an problem with that.
 

Attachments

  • 20220122_185811.jpg
    20220122_185811.jpg
    110.1 KB · Views: 31
  • 20220122_190741.jpg
    20220122_190741.jpg
    164.7 KB · Views: 31
  • Inked20220122_185846_LI.jpg
    Inked20220122_185846_LI.jpg
    240.9 KB · Views: 31
The 2 tab thrust vs the 4 tab thrust is the only change to the 1999 & up Output Carriers that I know of, Usually a 2 tab thrust style Carrier will only have 2 locating holes drilled, Just make sure that the Carrier you bought has the same height gears as your original.....'91-'98 have slightly shorter gears.

The machined indent in the Reaction Carrier was part of the balancing process.

Yes....You can use a good used Forward Steel as a shim.
Is it worth taking the planetary to my friend(pro welder) with a tig, and put a little tack on those pins to prevent that issue again? I gotta go over to his place anyway to drop off another project.
 
Referencing off your information from P10's 4l80 build and Sonnax's end play guide https://www.sonnax.com/tech_resourc...l-endplay-to-prevent-th400-gear-train-failure . I made a jig to measure the front to rear planetary play, not anywhere near as nice as P10's but was repeatable. And this clearance is not in spec, even with the CK thicker bushing. If I understand correctly, in P10's build you recommended to use Sonnax part# 34006-05 shims under the CK bushing to bring this measurement into spec. My clearance was .040 +/- .002, will it be ok to stack that many shims under there? Tang/leg on the bushing was .140, and I measured the stock gm plastic tangs/leg at .130. That would leave ~ .110 still in rear planetary holes after I bring it into spec. I assuming there isn't much rotation load on that bushing?

I think most of the clearance is coming from the front planetary where the bronze bushing to the center support rides, I guess they don't make a thicker bushing for this location.

The forward to direct clearance is out of spec, but with the sonnax .078 oversized bushing will bring it into range.
 
Last edited:
@clinebarger there's a guy on ebay that goes by trans_parts_direct that has the durabond TK-4AHP black coated bearings for 97+ in stock for $85

@jdr7 Can you post a link to P10's jig? Sounds like I need to build me one of those for my next tear down! I didn't have a jig when I did mine so I used wire rods and the case itself on a transmission stand that could be rotated. I also used a pair of saw horses with a board on top and a hole cut in the middle for the shaft to go through. Backyard builders special lol. You are in good hands with clinebarger. He helped me during my entire build and I had never even opened a transmission prior to talking to him lol.

I'll post what follows below, and then I will step away as clinebarger knows more than I ever can possibly fathom about these transmissions!

When I was dialing in my front endplay I got so tired of doing the math to re-check everything that I made an excel file that allowed me to just see what the theoretical endplay result would be when looking at various shim combination scenarios. I basically entered in the rear end play that I dialed in first, and then entered in the front endplay taking the ring float into account measured with a feeler gauge but the best way I think is to actually feel the ring float when you are pulling up on the shaft and just note what that number is on the dial prior to pulling up even further to measure the real end play. There's a .010" shim that can be fit under the bearing in the forward drum but most of the time that's not needed.


endplay.jpg


Most of this information that follows is what clinebarger shared with me. I apologize if any of this sounds redundant to you as you have already read Randall @ Sonnax excellent writeup, but I will post it here as this is exactly how I set mine up. Note that I machined a pocket in my reaction carrier to rollerize it and I replaced the 2 tang washer with a bearing I used a shim with that bearing as well to dial in the endplay correctly for the Reaction Carrier to Center Support. Also the rear unit endplay spec below applies if you have rollerized the rear. Note the differences in spec below.

Are you using a billet forward hub with a bearing on it or the stock forward hub. Note the differences in spec below.
Are you using a rollerized rear output setup?

Setting Endplay

Forward Hub to Direct Drum end play
– If using a rollerized forward hub, the endplay should be zero.
Normally it would be .003"-. 008" if NOT using a rollerized forward hub.

Stack the gear train up to the direct drum, Place the Forward Hub over the Main Shaft, Hold the forward hub
down with your palms & lift the direct drum with your fingers.....The play you feel is the end play. Since a billet
rollerized forward hub is being used, endplay should be zero for this measurement

Reaction Carrier to Center Support - If the front planet is being machined for a Torrington bearing and the 2
or 4 tang washer removed off the rear planet, the spec changes from .008” - .015” to .005” - .010”

To measure Reaction Carrier to Center Support endplay, stack the gear train up to the center support, Place
the Forward Hub over the Main Shaft, Hold the forward hub down with your palms and lift up the center
support to separate it from the Reaction carrier. Or Hold/Push down on the Center Support & Lift up on the
Reaction Carrier. Add enough shims underneath the bearing so that you feel zero endplay. Then slowly
change the combination of shims by .005” increments until you feel slight endplay. Add another .005” to that,
and use that combination of shims in that location. The endplay with a bearing and machined pocket should
be considerably less than what you felt when in stock configuration. Max endplay here should not exceed
.010” but you have to go by feel, since you cannot get a dial indicator in this measurement.

Total rear unit endplay..... .003"-. 008" (Rollerized)
Assemble the unit up to the Center Support (with the beveled Snap Ring installed)....Do not install the front
planet. Makes it easier and lighter as it does not affect rear endplay. Lift up on the output shaft using a crow
bar and have a dial indicator on the main shaft. I like to use a long piece of steel tubing cut to 1 foot and set it
inside the main shaft and also drill a hole in the top of the tubing for the dial needle to rest on. The rod can be
purchased at home depot. The picture shows a 3/8 extension being used, but the rod is much better.
Parts list that does need to be installed to check rear unit endplay (Top to Bottom).....

*Beveled Snap Ring.
*Center Support.
*Thin (Fretting) Snap Ring.
*Rear Sun Gear to Center Support Bearing.
*Rear Sun Gear.
*Rear Internal Gear to Rear Sun Gear Bearing AND the factory .041" shim!!!
*Output Carrier (Only to keep everything assembled & center the Sun Gear)
*Output Shaft to Internal Gear Bearing.
*Output Shaft.
*Selectable TH350 Shims.
*TH350 Bearing.

Front unit..... .005-.008" more/greater than the Rear Unit
Stack everything listed above, and also the direct drum, forward drum, all washers and bearings, and install the input shaft. Input Shaft needs to be pointing straight up for this measurement. There is free play between the OD Carrier & Input Shaft Snap Ring, so use a feeler gauge on the bench to measure this. Mine measured .022”

*You will need to lift up on the shaft 'till the Snap Ring barely touches the OD Carrier & ZERO your Dial Indicator.

*However much further the Input Shaft will lift is the Front Unit Endplay.

*You're not going to be able to see the Input Shaft Snap Ring.....you have to go by feel or use the measurement with the feeler gauge and subtract it from the total play felt when lifting up on the shaft. I like to use a short piece of steel tubing cut to 3.5 inches and set it inside the input shaft and also drill a hole in the top of the tubing for the dial needle to rest on. The rod can be also be purchased at home depot.

Endplay adjustments can be made in the following locations:
1. Selective washers under the pump in position 211 on the diagram (front endplay)
2. Selective shims under the bearing in the output (rear endplay) position 269
3. A single .010” shim under the 217 bearing in the front drum (last resort)
4. Selective shims under the bearing in the front planet inside the machined pocket (bearing replaces 268
washer in between the front and rear planets (for measuring reaction carrier to center support endplay)

Your 211 selective washer sizes can be one of the 5 thicknesses: 0.059, 0.075, 0.091, 0.107, 0.123. These are all contained in the washer kit having part number 34200E.

Your selective shims in the output under the rollerized bearing, or in the front planet machined pocket can be any combination that is obtainable through the use of the shims which are offered in these sizes: .010”, 0.15”, .020”, .025”, .030”, .035”, .040” These are found In part #44200F. The individual sizes are part numbers 44212A, 44212B, 44212C, 44212D, 44212E, 44212F

The shim .010” shim under the 217 bearing in the front drum is part number 44255

The forward hub to forward drum washer (#232 in diagram) is offered in stock thickness of .063” but is also made in a thickness of .078” and .094” for helping with reducing front endplay adjustment. Sonnax part numbers 34301-078 (.015" oversized) and 34301-094 (.030" oversized).

To quickly determine needed washer sizes for adjusting front endplay, the quickest way is to make a excel sheet where you enter in your original measurements and shims/washers used (measurements A) to compute desired end result. For example if your rear end play is .005”, and your front endplay measurement was .052” (ring float included) with the snap ring float measured at .025”, shim size under the pump being .091” and the #232 shim being stock size 0.063”, your actual front endplay is .027” which is not in spec. Front endplay needs to be .005-.008" more/greater than the Rear Unit, so your target value is .010” - .013” based on the chart above, the best option is in column 18, which gives you a theoretical endplay of .012”. Note that the values in the first 7 rows need to be adjusted to YOUR measurements to get the correct theoretical value for
measurement B.
endplay 2.jpg

layout.jpg
 
Last edited:
@primetime here is the link to P10's build that Cline assisted with. https://bobistheoilguy.com/forums/threads/4l80e-build.304941/page-6

P10 has some series machining skills and made all his bushing drivers and nice jig to measure(post #117).

I initially measured my planetary clearance with a stack of feeler gauges, and have made several backyard special setups to remove/install bushings and measure. I so know you pain and pleasure when it works lol. My build is little more tame than yours. I'm just doing the CK performance kit, and rebuild for 200k apparently very worn out towpig. Not rollerizing the front, just the rear. So I use sonnax's recommendations except for the rear end play which I use Cline's numbers.

My backyard special jig is based off Cline and P10 jig, started with what I was told is an Express van 2wd yoke and bolted it to a table. This yoke has a flat section on it where I can put the magnetic dial caliper holder.

When the shop thaws out I'll try to remember to take a picture.

And nothing wrong with redundancy when measuring stuff, that goes with information too. After I get these 3 rear clearances setup, I'll prolly refer to your infomation to help set up the front end play.
 
Back
Top