I had someone bring me their computer for repair, the workstation would turn on, but would half turn off shortly afterwards (PSU kept power to some parts of the board as the Power LED was still lit). The workstation needed a new motherboard (bad, leaky and oozy caps, yummy!) but the user didn't want to put the $100+ into the aging system so they opted to have a new machine built. Only problem was that they had data to retrieve from the machine but weren't exactly sure on what they were looking for and where it was stored.
Some Specifics: The OS that is being booted is Microsoft Windows XP Media Center Edition (Basically Professional with the MCE application and a different theme). The workstation is an AM2 AMD system.
My Goal: To boot the OS installation one last time for the user to see their beloved desktop, data, and for me to get an idea on what to transfer to the new workstation.
What Didn't Work: Creating a new virtual machine and specifying the hard drive as a physical disk. You will receive a blue screen upon boot.
How To Make a System Boot:
First, download these tools (they’re all free).
- Disk2VHD from Microsoft’s Sysinternals team.
- StarWind V2V Image Converter
We will be making an image of the hard drive with Disk2VHD which will first give us a ‘.vhd’ (Microsoft Hyper-V/Virtual PC disk image) then converting it to a ‘.vmdk’ (VMware disk image with StarWind V2V Image Converter. Then booting it under VMware workstation.
1. Somehow connect the hard drive to a working PC, I choose eSATA with a Thermaltake dock. You can use a USB dock, connect internally, etc. Just note that eSATA and internal SATA will probably be your quickest options.
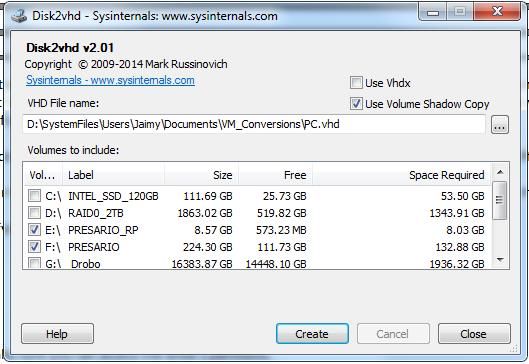
2. Extract Disk2VHD and launch the application (I’d recommend ‘Run as Administrator’ if on a Vista/7/2008 and up workstation.
3. Check the boxes next to the partitions you wish to make an image of. Make sure to un-check ‘Use Vhdx’ and keep ‘Use Volume Shadow Copy’ checked. Specify the location you’d like to store the virtual image, then let ‘er rip (click Create)! This will take a little bit.
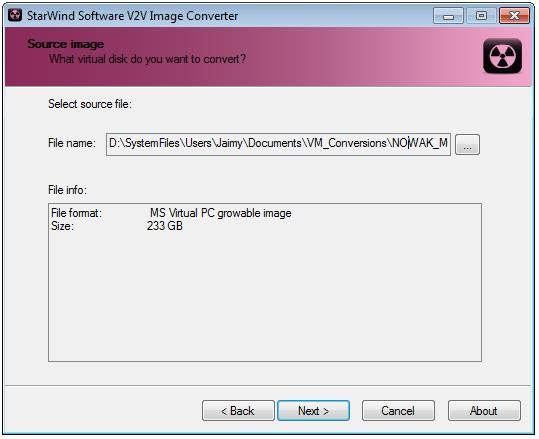
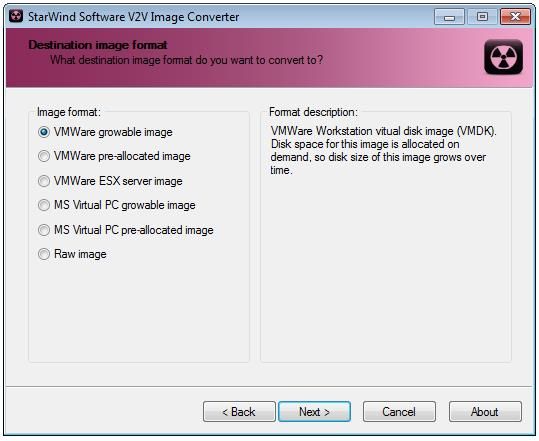
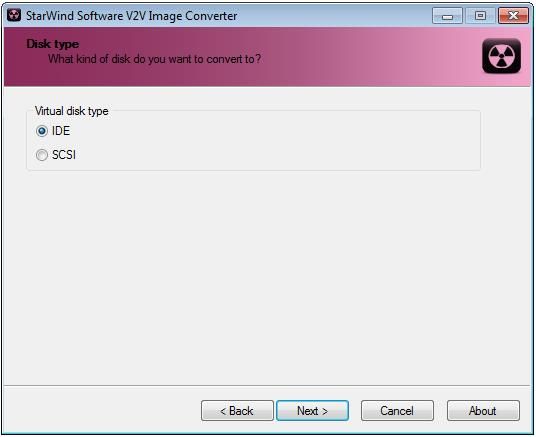
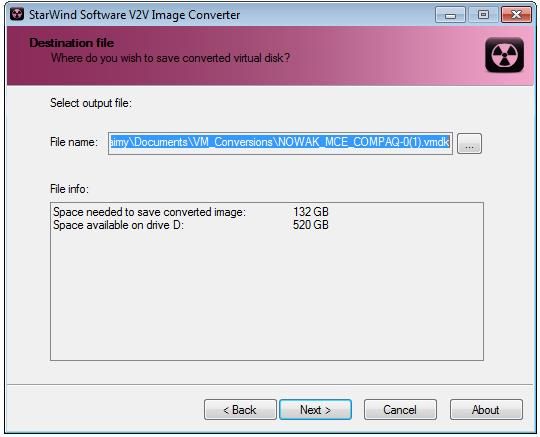
4. After you have that image, open the image with StarWind V2V Image Converter, I choose ‘VMware Grow-able Image’ as the type to convert to and ‘IDE’ as my bus type. Pick your output destination and proceed through the prompts, this will take a little bit to convert as well.
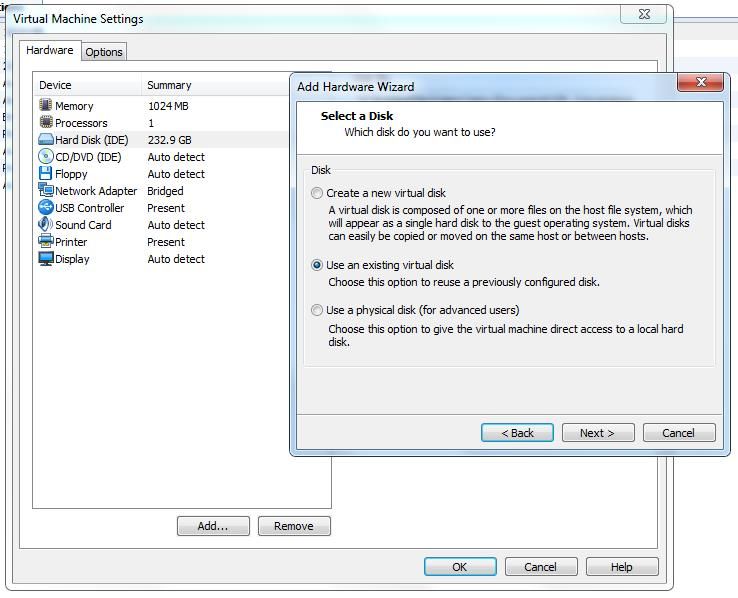
5. After it’s finished converting, create a virtual machine in VMware Workstation (or ESX) with an appropriate amount of resources and add the disk image.
6. VMware may ask you if you want to convert the disk image to a newer VMware format. It will prompt you that if you do, previous versions of VMware Workstation will not be able to read the disk image. I did not convert my image to the newer format (I’m running VMware Workstation 7). I’m not sure if it would give you problems or not.
Success, the workstation that you once knew should now boot! You can install VMware Tools and continue to use this as a Virtual Machine, or just pull data/configurations and dump the whole ‘program’. Of course making a Virtual Machine from a working OS install is a lot easier, but in this case, it definitely wouldn't boot!
I'd assume you could boot this virtual machine with Microsoft Virtual PC (which I believe is free at this point). You would just make a '.vhd' and then boot that. However, I didn't try it. If you know it works, let me know.
Hoping this will help someone out there at some point.
Some Specifics: The OS that is being booted is Microsoft Windows XP Media Center Edition (Basically Professional with the MCE application and a different theme). The workstation is an AM2 AMD system.
My Goal: To boot the OS installation one last time for the user to see their beloved desktop, data, and for me to get an idea on what to transfer to the new workstation.
What Didn't Work: Creating a new virtual machine and specifying the hard drive as a physical disk. You will receive a blue screen upon boot.
How To Make a System Boot:
First, download these tools (they’re all free).
- Disk2VHD from Microsoft’s Sysinternals team.
- StarWind V2V Image Converter
We will be making an image of the hard drive with Disk2VHD which will first give us a ‘.vhd’ (Microsoft Hyper-V/Virtual PC disk image) then converting it to a ‘.vmdk’ (VMware disk image with StarWind V2V Image Converter. Then booting it under VMware workstation.
1. Somehow connect the hard drive to a working PC, I choose eSATA with a Thermaltake dock. You can use a USB dock, connect internally, etc. Just note that eSATA and internal SATA will probably be your quickest options.
2. Extract Disk2VHD and launch the application (I’d recommend ‘Run as Administrator’ if on a Vista/7/2008 and up workstation.
3. Check the boxes next to the partitions you wish to make an image of. Make sure to un-check ‘Use Vhdx’ and keep ‘Use Volume Shadow Copy’ checked. Specify the location you’d like to store the virtual image, then let ‘er rip (click Create)! This will take a little bit.

4. After you have that image, open the image with StarWind V2V Image Converter, I choose ‘VMware Grow-able Image’ as the type to convert to and ‘IDE’ as my bus type. Pick your output destination and proceed through the prompts, this will take a little bit to convert as well.


5. After it’s finished converting, create a virtual machine in VMware Workstation (or ESX) with an appropriate amount of resources and add the disk image.

6. VMware may ask you if you want to convert the disk image to a newer VMware format. It will prompt you that if you do, previous versions of VMware Workstation will not be able to read the disk image. I did not convert my image to the newer format (I’m running VMware Workstation 7). I’m not sure if it would give you problems or not.
Success, the workstation that you once knew should now boot! You can install VMware Tools and continue to use this as a Virtual Machine, or just pull data/configurations and dump the whole ‘program’. Of course making a Virtual Machine from a working OS install is a lot easier, but in this case, it definitely wouldn't boot!
I'd assume you could boot this virtual machine with Microsoft Virtual PC (which I believe is free at this point). You would just make a '.vhd' and then boot that. However, I didn't try it. If you know it works, let me know.
Hoping this will help someone out there at some point.
Last edited: