Hey guys, I thought I'd share my weekend project. Rebuilding a Toyota 8" V-6 third member (pig, drop out, etc) and installing a Eaton TrueTrac Torsen limited slip. This is the rebuild of a spare that I had laying around and will be replacing the current one in my truck that I rebuilt about 60,000 or so miles ago that has a Detroit Locker mechanical ratchet type locking differential. There is nothing wrong with the differential in the truck but I have grown tired of its driving quirks especially considering I no longer get off road as much as I would like and therefore do not require the Detroit locker. If I use the truck off road more I might be able to tolerate the terrible driving quirks associated with a Detroit locker. Instead I decided to install something that was a little bit more pavement friendly I hope you enjoy the pictures as I walk you through the installation and set up of a complete differential for a Toyota.
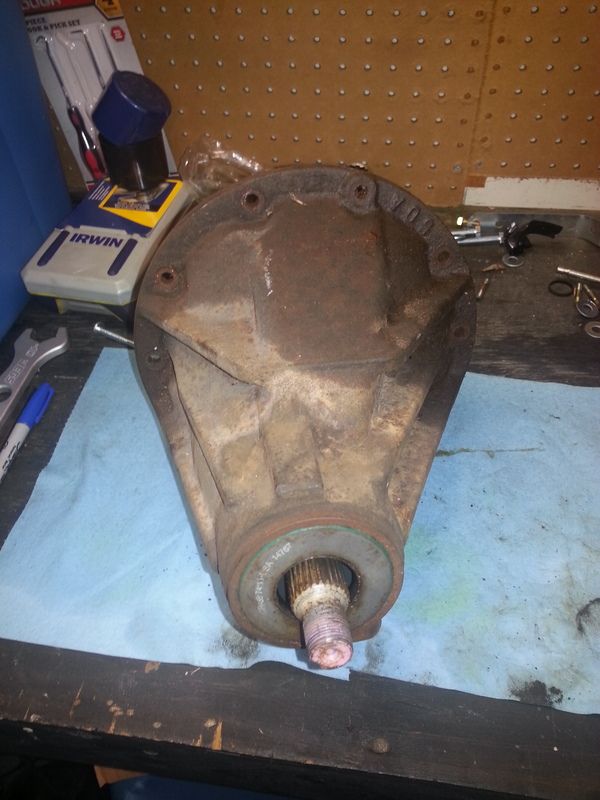
Here is the rebuild the candidate in all of its greasy disgusting glory. I have no idea what it came out of but it is just one that I had laying around. You will note that the end of the Pinion is painted pink, in early Toyota trucks this indicates a 4.10 gear ratio. It can be identified as a V6 differential buy the additional webbing on the case and the four pinion differential carrier assembly.
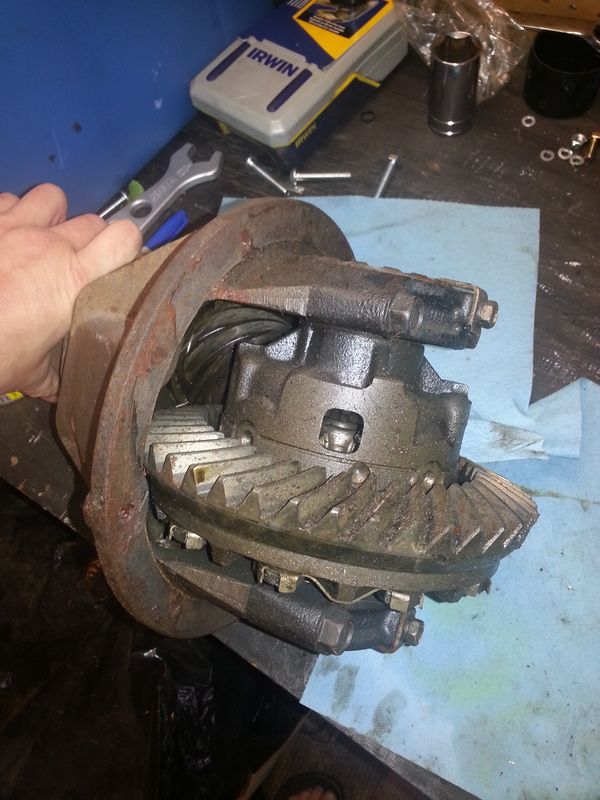
The first step I always take prior to disassembling the differential is to place match marks to keep the caps where they originated.
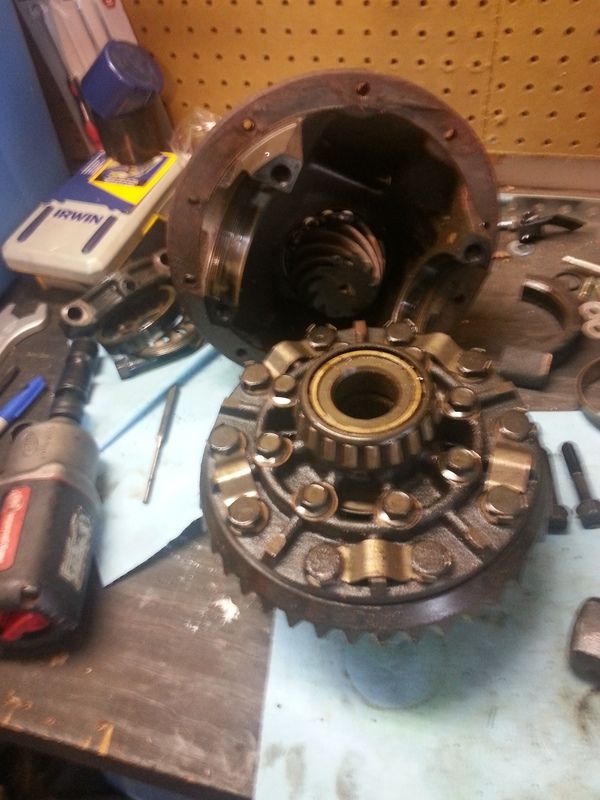
Once that is complete you can remove the carrier assembly complete with ring gear. The carrier cap bolts are 17 mm the torque spec for them is 70 foot pounds. The spanner lock tab bolts are 12 mm.
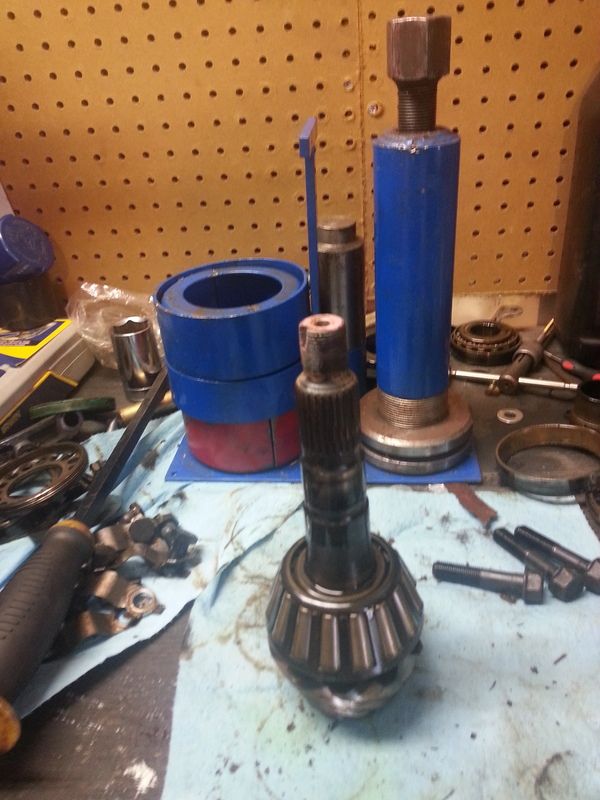
Once the carrier has been removed you can remove the pinion I highly recommend using a press to prevent damaging the threads on the end of the pinion. In this case there was no pinion yoke, I don't know where it went it was missing when I pulled this out of storage. In the event that you need to remove the pinion nut and drive flange the pinion that is 30 mm, I recommend a good sturdy impact for this I use in a 2135TI Ingersoll Rand .
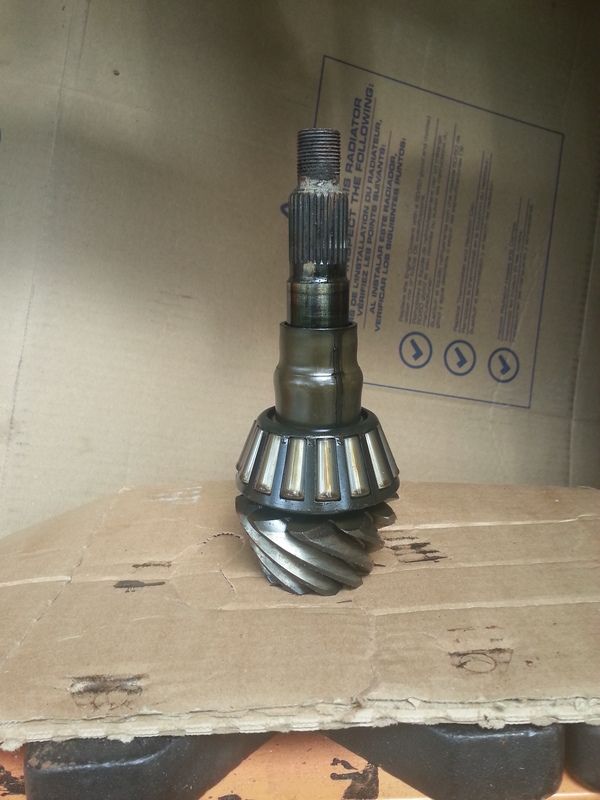
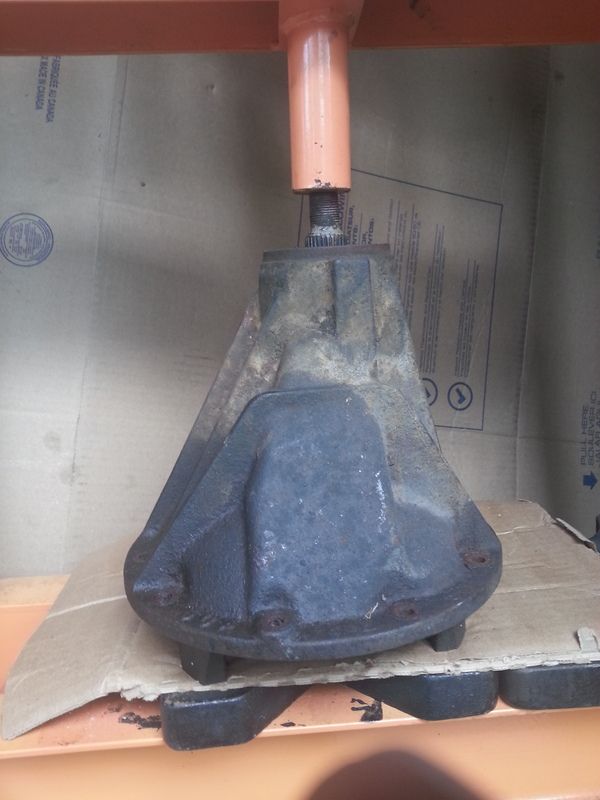
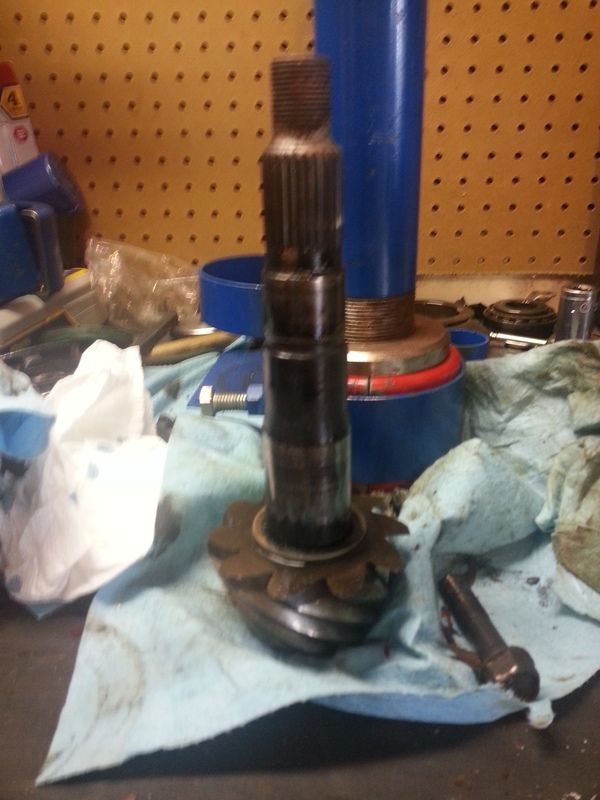
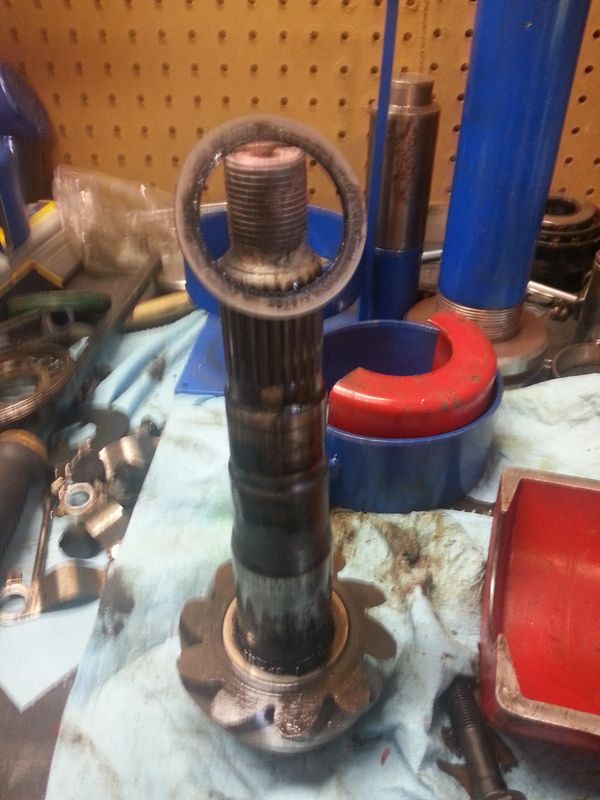
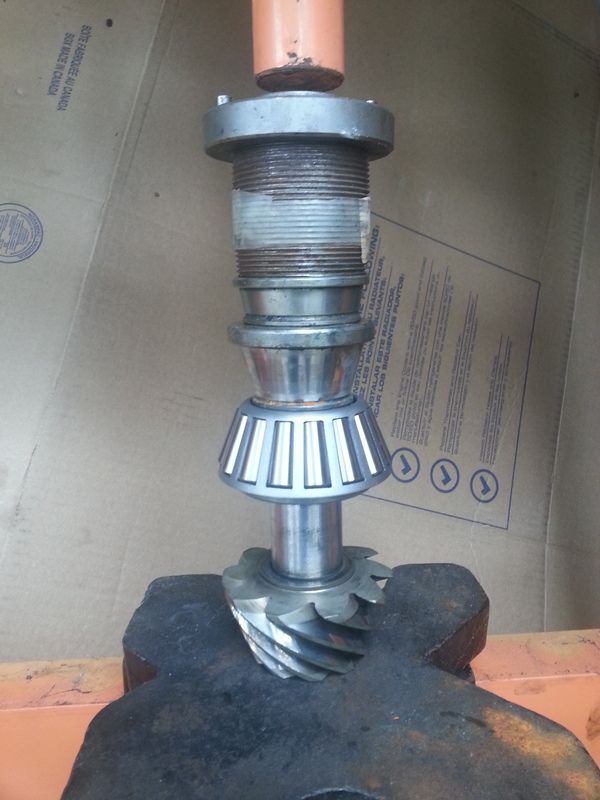
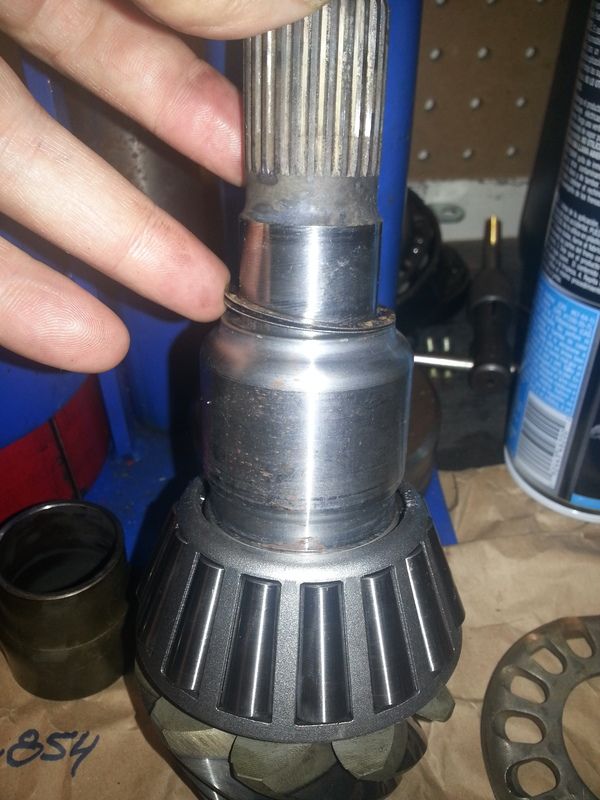
This is what the pinion will look like once you have liberated it from the case. Note the crush sleeve installed just above the lower Pinion bearing more on this later.

Once the pinion is removed you can pry out the pinion seal and drive out the pinion races with a bronze drift punch.
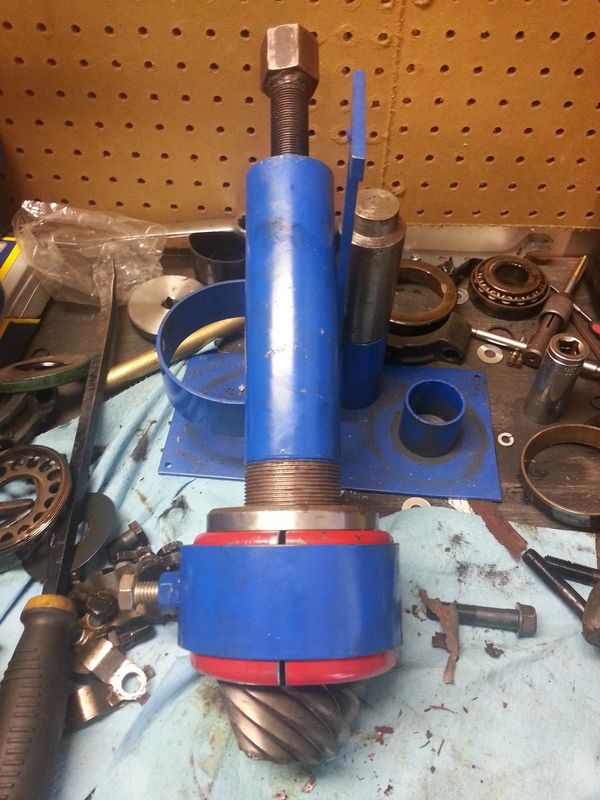
Now that you have the pinion out you need to remove the lower Pinion bearing. It is usually pressed on with a substantial amount of press. For this I use a clamshell style bearing puller to prevent damaging the bearing . Of note on this style differential there is a shim under the lower Pinion bearing, this shim must be reused, on other types of differentials there may or may not be a shim present. Since I'm not replacing the ring and pinion I will reuse this shim, on new ring and pinion I usually start with the factory shim and make adjustments for pinion depth from there. Additionally the shim is directional as it is relieved on one side with a baffle to prevent interference with the radius machined onto the pinion at the transition from the pinion head to pinion shaft.
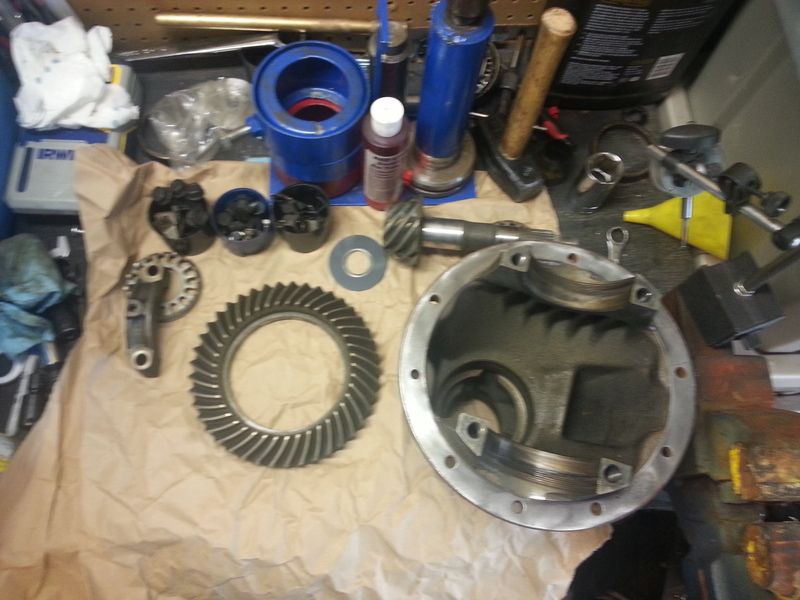
In this picture you can see that everything is all apart now and has been cleaned. For this I find that a brass bristle brush and regular old brake clean generally works fairly well. For those of you with sensitive hands I would recommend using heavy rubber gloves for the cleaning portion. Of note and not photographed elsewhere is the pinion oil slinger visible in this picture near the head of the pinion it is installed between the upper Pinion bearing and the pinion seal.
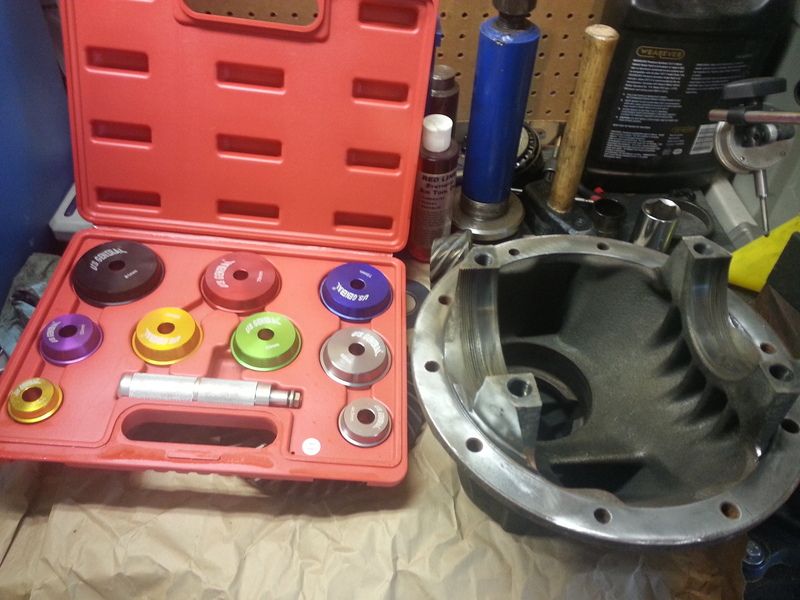
Now we can begin reassembly with the installation of the upper and lower Pinion bearing races. I used a combination of race drivers and old races on the press to install the new races. Of note it is extremely handy if you do very many of these to keep old races for use on the press. In many pictures on my press you will see a combination of old races being used to press new components together.
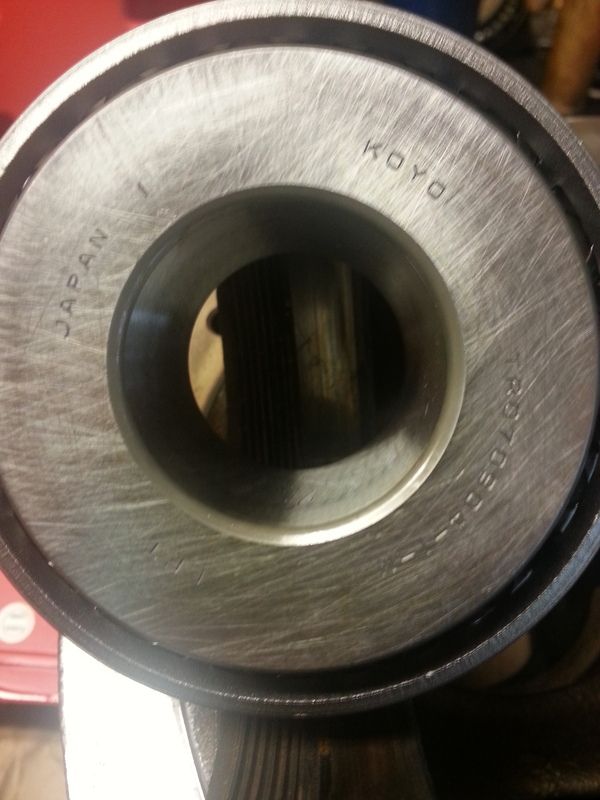

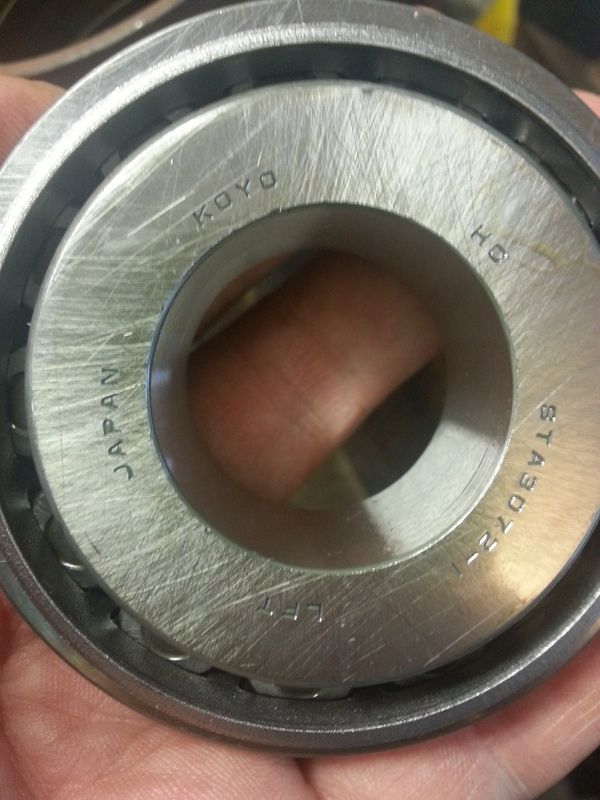
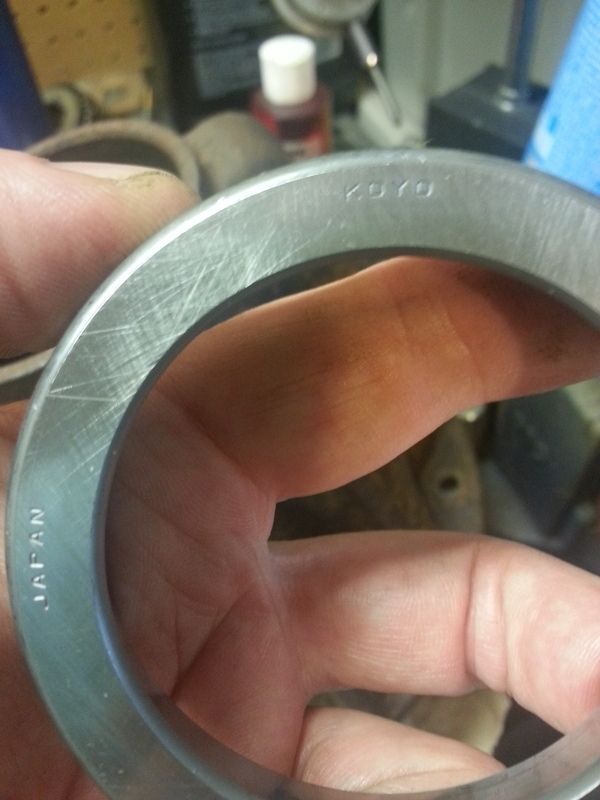
The installation kit that I chose for this application comes with all genuine Japanese made Koyo bearings. Almost all Toyota differentials I disassemble come with this bearing in them. I have had excellent luck with this brand of bearings and generally seek out a kit with them in it I find them to be of superior quality to a comparable US made Bearing. The kit used here is a US Standard Gear installation kit.
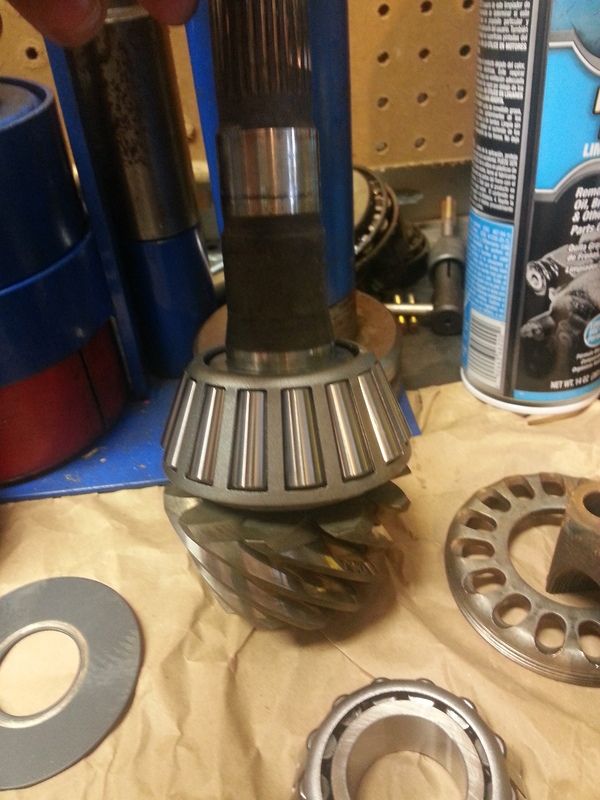
Pinion bearings are installed on the press, don't forget to install the shim underneath the lower Pinion bearing prior to pressing the bearing on. When installing the shim install it with the bevel towards the pinion head or in whatever orientation it was originally installed in, in this application the bevel goes towards the pinion head.
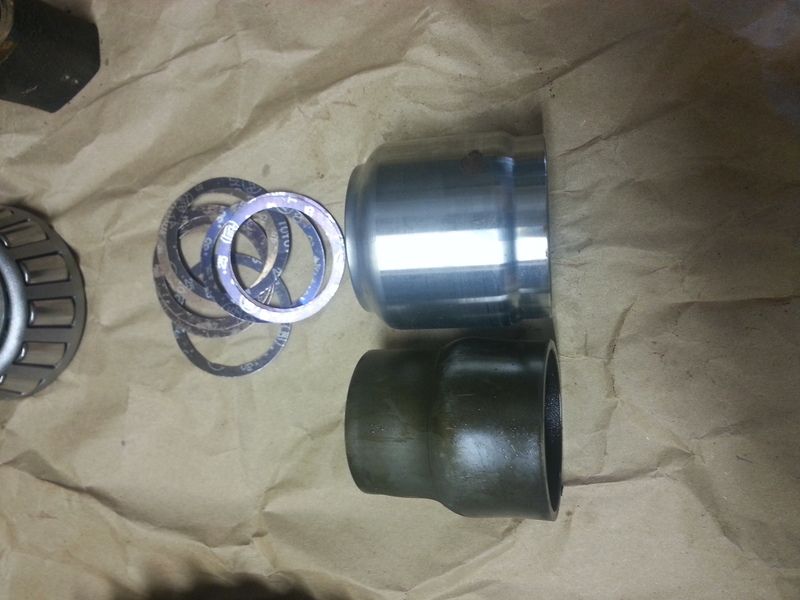
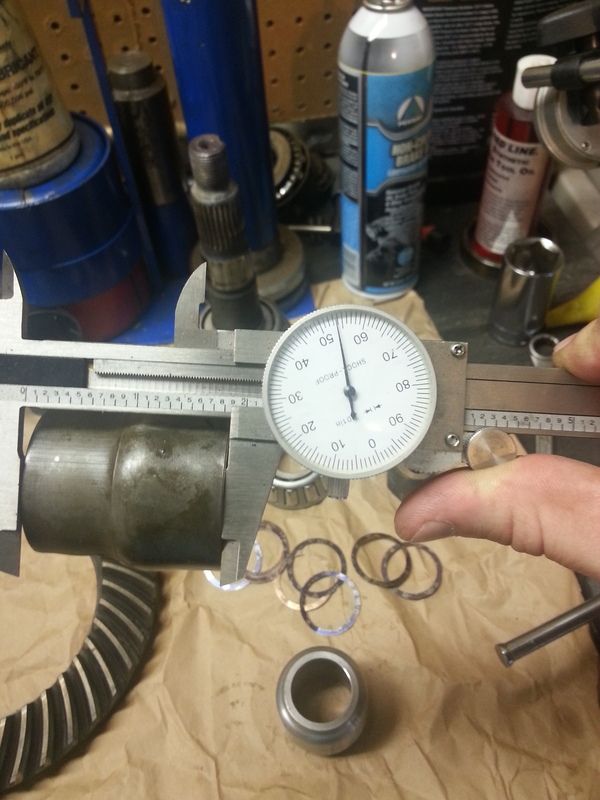
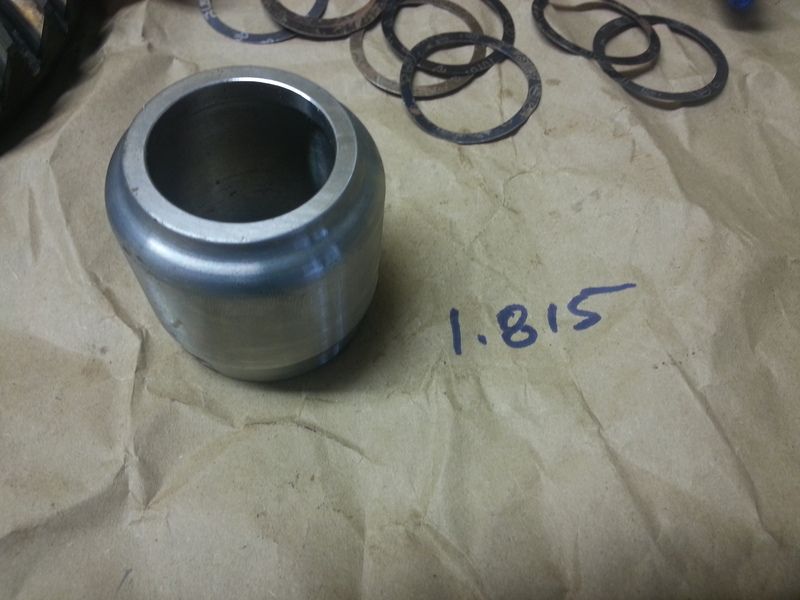
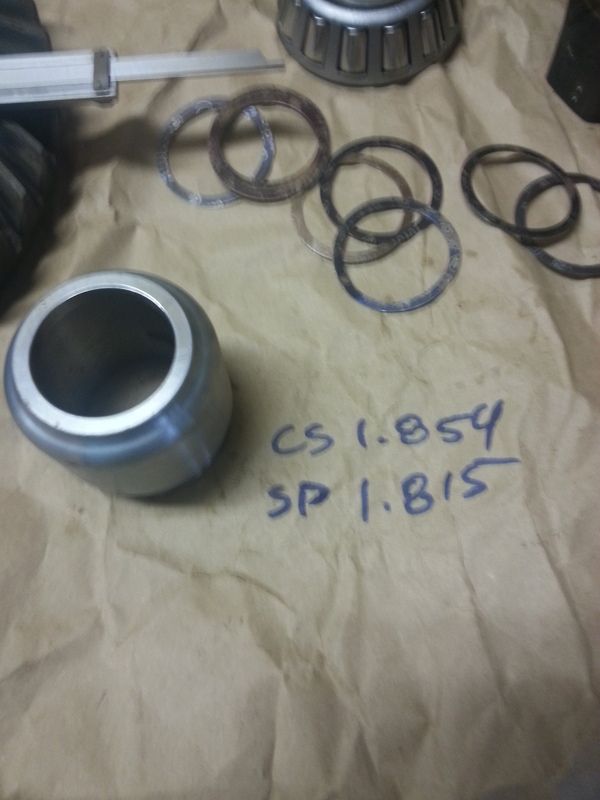
If you are using a crush sleeve for your installation this step will not apply to you. I prefer to use a crush sleeve eliminator in by differential set ups. In order to get a baseline for the amount of shims to use for setting pinion bearing preload I measure the crush sleeve that I removed and I measure the crush sleeve elimination spacer, I generally add about 5 thousandths of an inch to the difference as a starting place for the shim pack. In this case through a little trial and error the final shim pack thickness was 0.047".
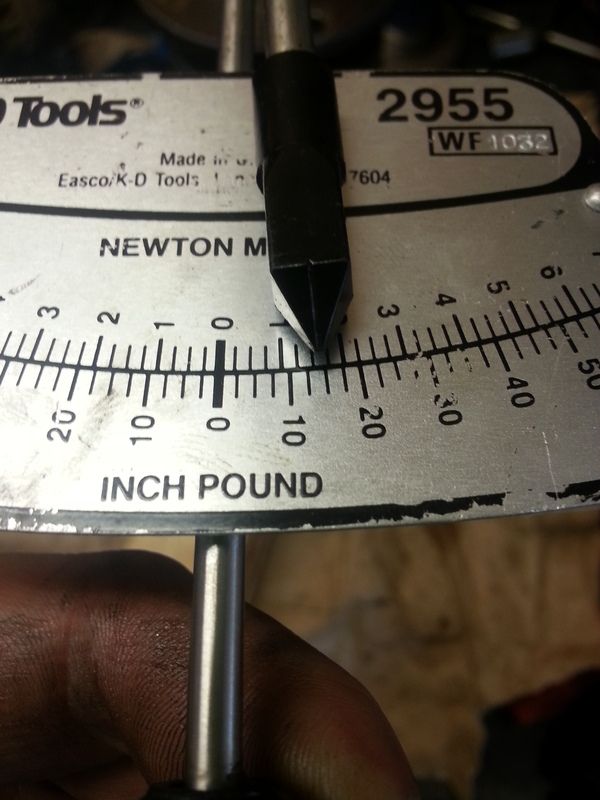
I preferred to measure Pinion bearing preload without the pinion seal installed to get a true reading of just the bearings. If you elect to use a crush sleeve this method is not possible. The final result was 15 inch pounds of rolling drag on the bearings. The spec for new bearings is 12 to 15 inch pounds.
Continued in post 2, too much for one post...


Here is the rebuild the candidate in all of its greasy disgusting glory. I have no idea what it came out of but it is just one that I had laying around. You will note that the end of the Pinion is painted pink, in early Toyota trucks this indicates a 4.10 gear ratio. It can be identified as a V6 differential buy the additional webbing on the case and the four pinion differential carrier assembly.
The first step I always take prior to disassembling the differential is to place match marks to keep the caps where they originated.

Once that is complete you can remove the carrier assembly complete with ring gear. The carrier cap bolts are 17 mm the torque spec for them is 70 foot pounds. The spanner lock tab bolts are 12 mm.

Once the carrier has been removed you can remove the pinion I highly recommend using a press to prevent damaging the threads on the end of the pinion. In this case there was no pinion yoke, I don't know where it went it was missing when I pulled this out of storage. In the event that you need to remove the pinion nut and drive flange the pinion that is 30 mm, I recommend a good sturdy impact for this I use in a 2135TI Ingersoll Rand .

This is what the pinion will look like once you have liberated it from the case. Note the crush sleeve installed just above the lower Pinion bearing more on this later.

Once the pinion is removed you can pry out the pinion seal and drive out the pinion races with a bronze drift punch.


Now that you have the pinion out you need to remove the lower Pinion bearing. It is usually pressed on with a substantial amount of press. For this I use a clamshell style bearing puller to prevent damaging the bearing . Of note on this style differential there is a shim under the lower Pinion bearing, this shim must be reused, on other types of differentials there may or may not be a shim present. Since I'm not replacing the ring and pinion I will reuse this shim, on new ring and pinion I usually start with the factory shim and make adjustments for pinion depth from there. Additionally the shim is directional as it is relieved on one side with a baffle to prevent interference with the radius machined onto the pinion at the transition from the pinion head to pinion shaft.

In this picture you can see that everything is all apart now and has been cleaned. For this I find that a brass bristle brush and regular old brake clean generally works fairly well. For those of you with sensitive hands I would recommend using heavy rubber gloves for the cleaning portion. Of note and not photographed elsewhere is the pinion oil slinger visible in this picture near the head of the pinion it is installed between the upper Pinion bearing and the pinion seal.

Now we can begin reassembly with the installation of the upper and lower Pinion bearing races. I used a combination of race drivers and old races on the press to install the new races. Of note it is extremely handy if you do very many of these to keep old races for use on the press. In many pictures on my press you will see a combination of old races being used to press new components together.


The installation kit that I chose for this application comes with all genuine Japanese made Koyo bearings. Almost all Toyota differentials I disassemble come with this bearing in them. I have had excellent luck with this brand of bearings and generally seek out a kit with them in it I find them to be of superior quality to a comparable US made Bearing. The kit used here is a US Standard Gear installation kit.


Pinion bearings are installed on the press, don't forget to install the shim underneath the lower Pinion bearing prior to pressing the bearing on. When installing the shim install it with the bevel towards the pinion head or in whatever orientation it was originally installed in, in this application the bevel goes towards the pinion head.


If you are using a crush sleeve for your installation this step will not apply to you. I prefer to use a crush sleeve eliminator in by differential set ups. In order to get a baseline for the amount of shims to use for setting pinion bearing preload I measure the crush sleeve that I removed and I measure the crush sleeve elimination spacer, I generally add about 5 thousandths of an inch to the difference as a starting place for the shim pack. In this case through a little trial and error the final shim pack thickness was 0.047".

I preferred to measure Pinion bearing preload without the pinion seal installed to get a true reading of just the bearings. If you elect to use a crush sleeve this method is not possible. The final result was 15 inch pounds of rolling drag on the bearings. The spec for new bearings is 12 to 15 inch pounds.
Continued in post 2, too much for one post...


