A friend of mine was tasked with removing paint overspray from his father's daily driver.
While the paint's condition was poor to begin with, removing the paint overspray inflicted serious marring, so we decided to proceed with a one-step paint correction and paint coating application.
Products Used:
Adam's Car Wash Shampoo
Meguiars D140 Wheel Brightener
Iron-X Paste
DP Universal Detailing Clay
Riccardo Yellow Detailing Clay
Optimum No Rinse diluted QD strength as lube
Menzerna FG400
Optimum Hyper Polish
Lake Country Hybrid Power Finish Blue Pad - 5"
Meguiars W8207 Soft Buff 2.0 Polishing Pad
Optimum Opti-Coat 2.0
Optimum Opti-Glass
Optimum Opti-Bond Tire Dressing
Stoner's Invisible Glass, Aerosol
Tools Used:
Flex 3401
Flex Changeable Backing Plate System by Lake Country
Brinkmann MaxFire Dual Xenon Light
Wheel Woolies -- Large and Medium
Uber No Name Super Plush MF Towels
Going in, we hoped that the Nanoskin Medium Mitt would remove the overspray, but this was not the case. We had to use a clay bar and some pressure, which resulted in marring.
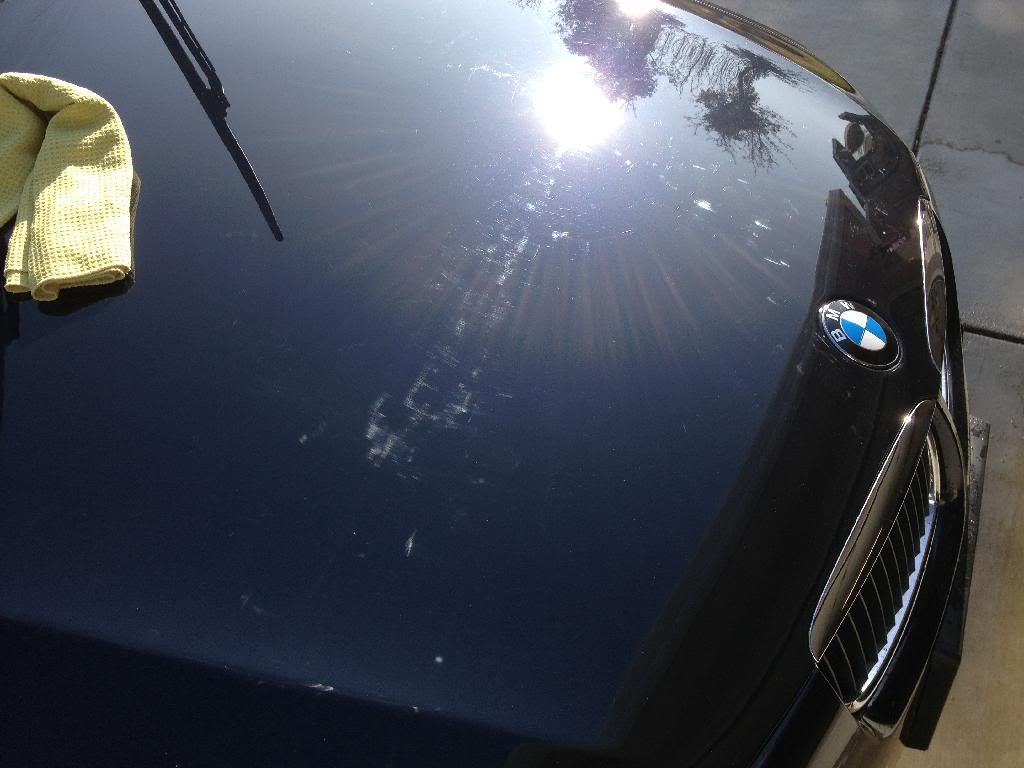
That was the result of pre-existing damage plus the additional marring we inflicted.
After consultation with a few detailing pros, we proceeded with Menzerna FG400 and 5" Lake Country HPF Blue Pads for the one-step correction.
While this combination gave us 90%+ defect removal and a great finish, we found very, very faint buffer trails upon inspecting the car under strong natural sunlight. This shows how important it is to re-inspect under natural light, as certain defects only appear under sunlight.
I suspect that the light buffer trails were caused by the forced-rotation nature of the Flex 3401. Due to the heat that FG400 generates, paint drop back may have been a factor as well -- especially since the buffer trails were not noticed until the next day.
As a result, we did some very quick passes using Optimum Hyper Polish and a Meguiars W8207 pad. This cleaned up the buffer trails quite nicely and also eliminated the need for an IPA wipedown before Opti-Coat application.
We also found this paint to be quite prone to marring -- we inflicted light marring while trying to do an IPA wipedown to confirm removal of the buffer trails. So, being able to go from Hyper Polish to Opti-Coat with only a damp MF towel wipedown was quite a relief.
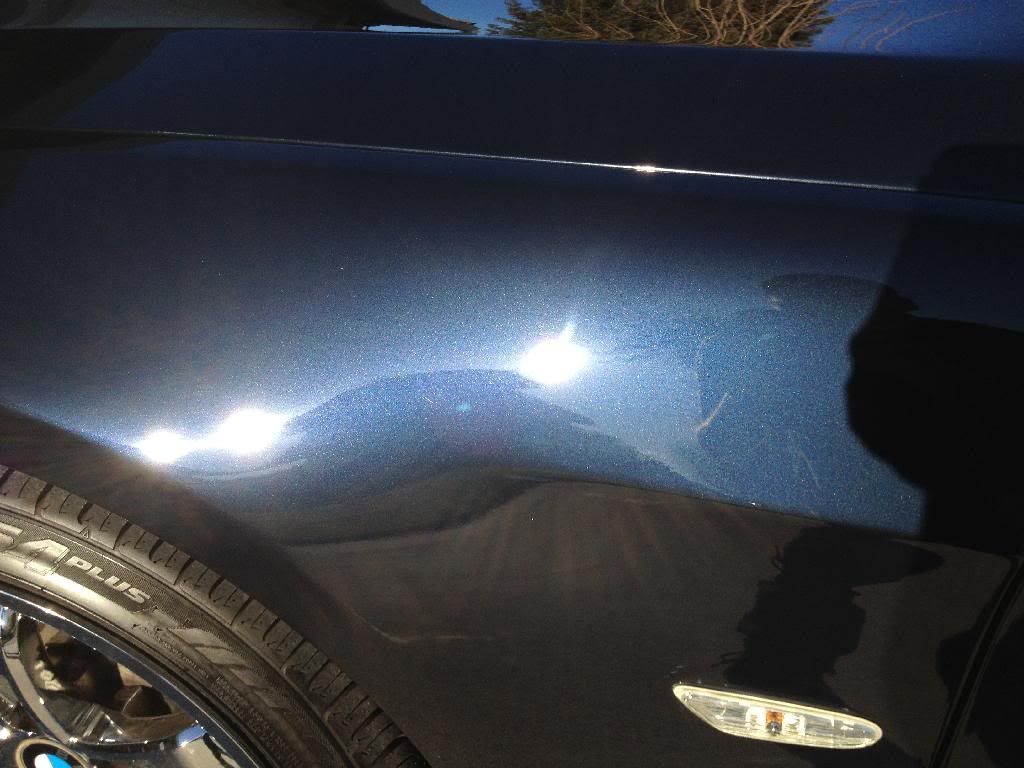
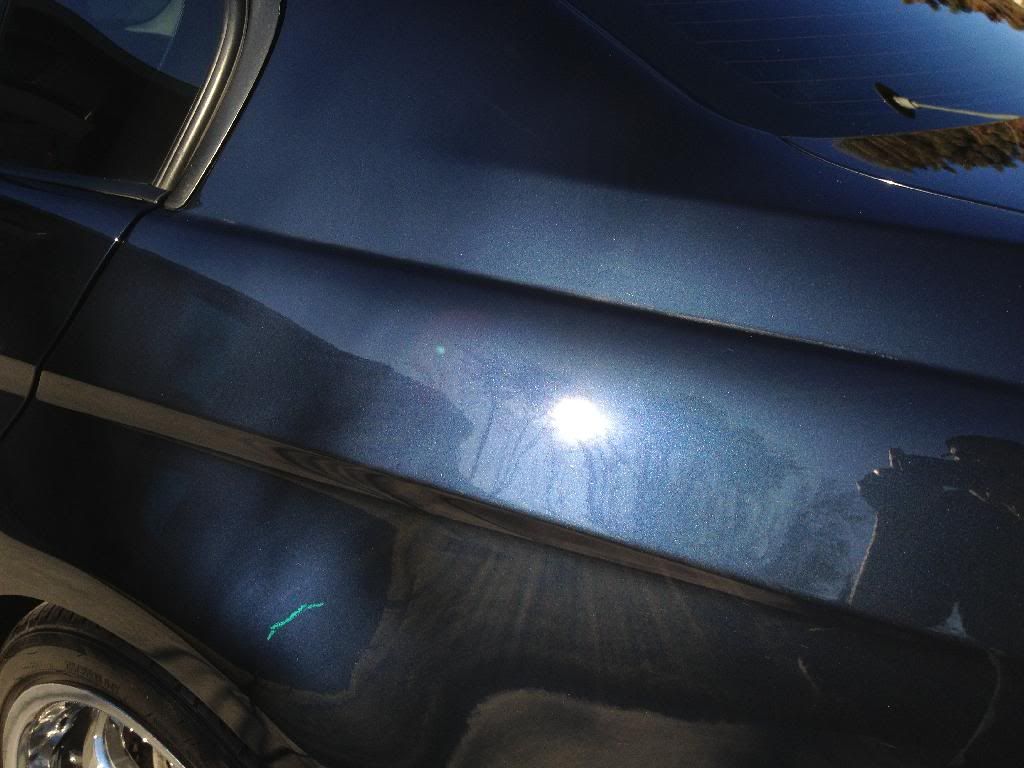
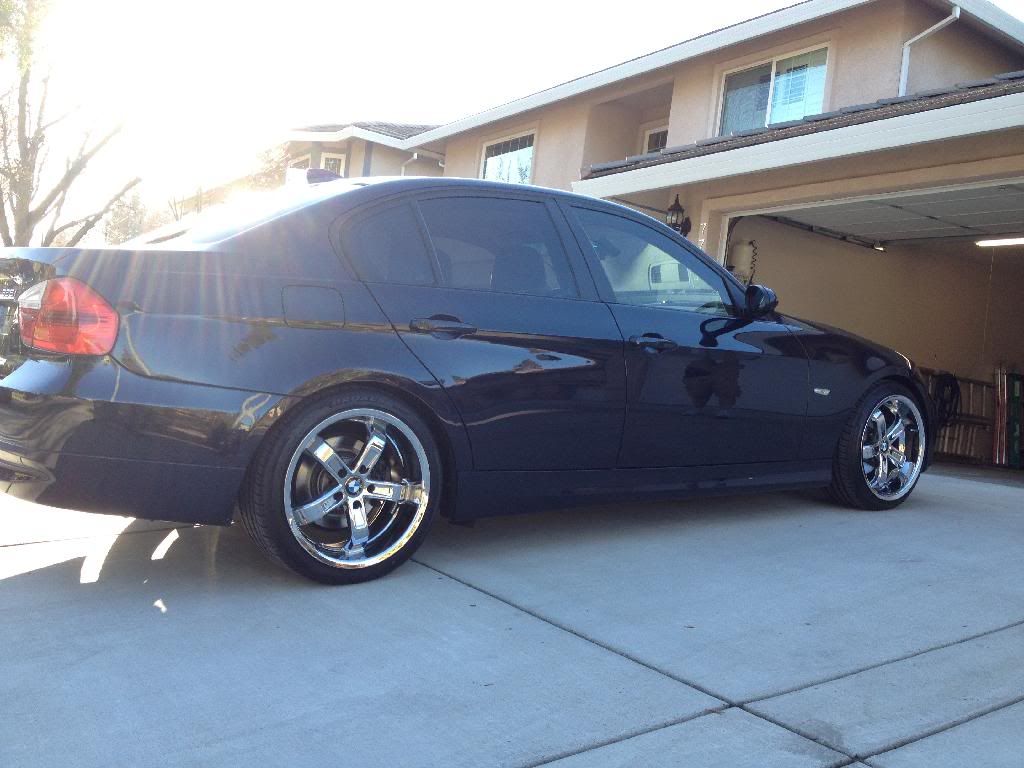
Here are the final pictures. I really like how the Opti-Coat has a slight darkening effect on the paint.
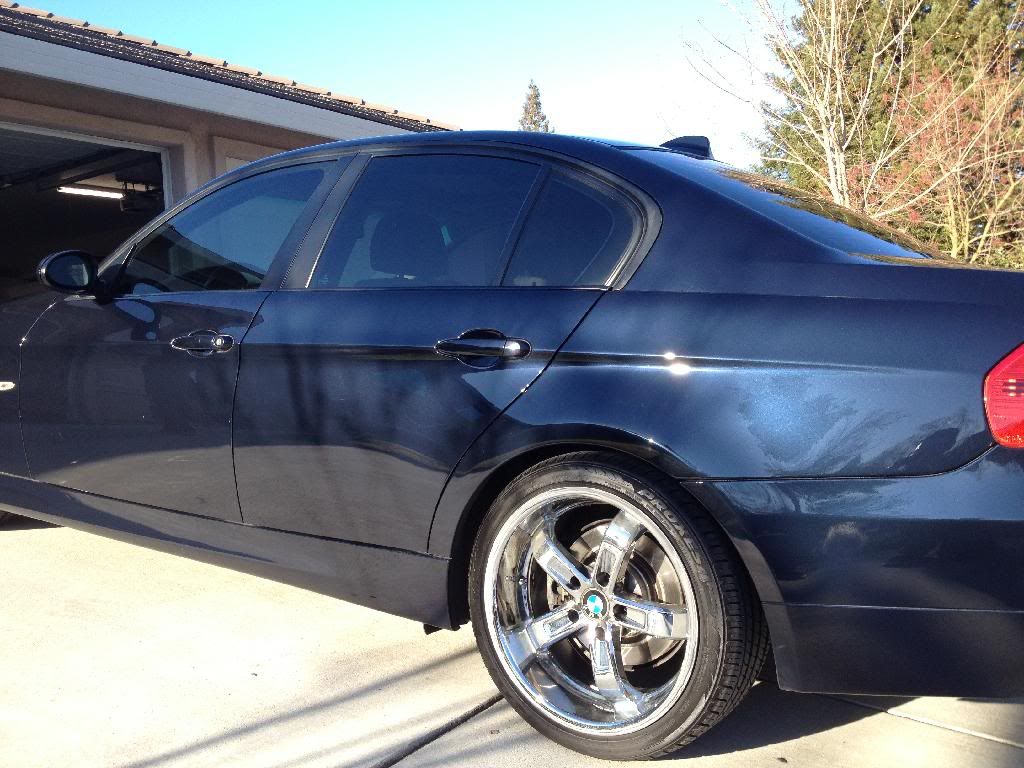
Defect-free!
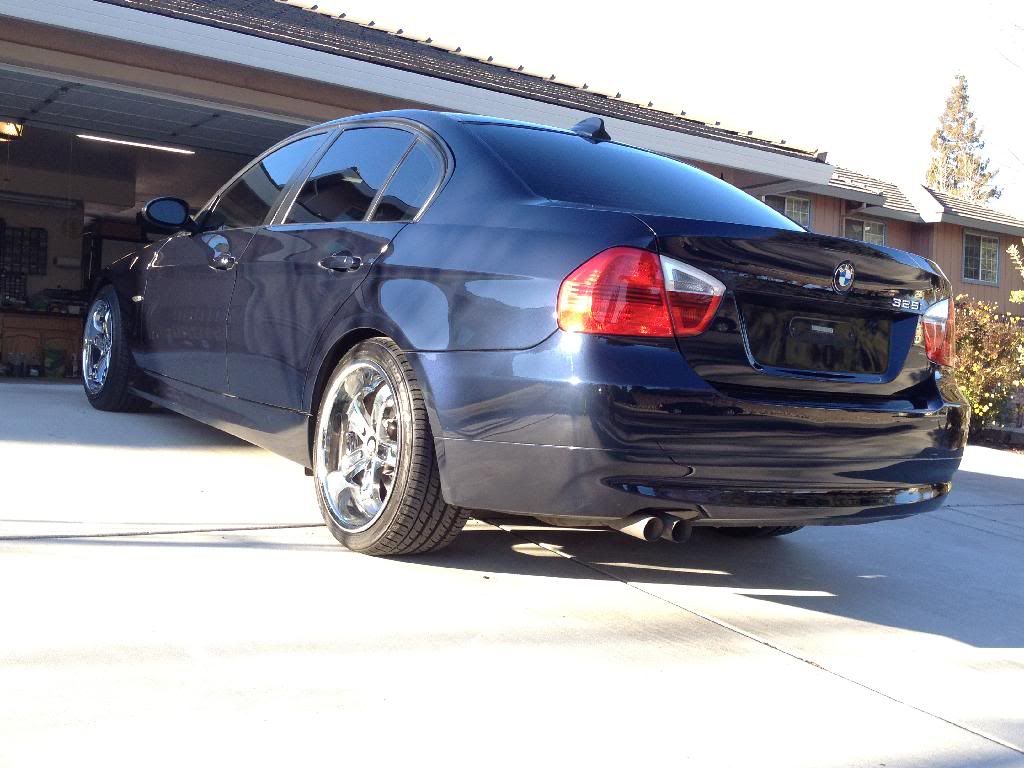
Not sure what the green line is from, but here's another one:
One last picture:
Working on this car taught me several things. First, many individuals claim that it is impossible to instill buffer trails and/or holograms while using a Flex 3401. This was not the case at all. Second, certain defects are only be visible under natural sunlight. If you are doing a more aggressive correction, it pays to do a final inspection under natural lighting before applying your LSP. Lastly, it is best to minimize contact with the paint -- anytime you touch the paint, there's a chance of inflicting marks.
Happy Detailing!
While the paint's condition was poor to begin with, removing the paint overspray inflicted serious marring, so we decided to proceed with a one-step paint correction and paint coating application.
Products Used:
Adam's Car Wash Shampoo
Meguiars D140 Wheel Brightener
Iron-X Paste
DP Universal Detailing Clay
Riccardo Yellow Detailing Clay
Optimum No Rinse diluted QD strength as lube
Menzerna FG400
Optimum Hyper Polish
Lake Country Hybrid Power Finish Blue Pad - 5"
Meguiars W8207 Soft Buff 2.0 Polishing Pad
Optimum Opti-Coat 2.0
Optimum Opti-Glass
Optimum Opti-Bond Tire Dressing
Stoner's Invisible Glass, Aerosol
Tools Used:
Flex 3401
Flex Changeable Backing Plate System by Lake Country
Brinkmann MaxFire Dual Xenon Light
Wheel Woolies -- Large and Medium
Uber No Name Super Plush MF Towels
Going in, we hoped that the Nanoskin Medium Mitt would remove the overspray, but this was not the case. We had to use a clay bar and some pressure, which resulted in marring.

That was the result of pre-existing damage plus the additional marring we inflicted.
After consultation with a few detailing pros, we proceeded with Menzerna FG400 and 5" Lake Country HPF Blue Pads for the one-step correction.
While this combination gave us 90%+ defect removal and a great finish, we found very, very faint buffer trails upon inspecting the car under strong natural sunlight. This shows how important it is to re-inspect under natural light, as certain defects only appear under sunlight.
I suspect that the light buffer trails were caused by the forced-rotation nature of the Flex 3401. Due to the heat that FG400 generates, paint drop back may have been a factor as well -- especially since the buffer trails were not noticed until the next day.
As a result, we did some very quick passes using Optimum Hyper Polish and a Meguiars W8207 pad. This cleaned up the buffer trails quite nicely and also eliminated the need for an IPA wipedown before Opti-Coat application.
We also found this paint to be quite prone to marring -- we inflicted light marring while trying to do an IPA wipedown to confirm removal of the buffer trails. So, being able to go from Hyper Polish to Opti-Coat with only a damp MF towel wipedown was quite a relief.
Here are the final pictures. I really like how the Opti-Coat has a slight darkening effect on the paint.


Defect-free!

Not sure what the green line is from, but here's another one:

One last picture:

Working on this car taught me several things. First, many individuals claim that it is impossible to instill buffer trails and/or holograms while using a Flex 3401. This was not the case at all. Second, certain defects are only be visible under natural sunlight. If you are doing a more aggressive correction, it pays to do a final inspection under natural lighting before applying your LSP. Lastly, it is best to minimize contact with the paint -- anytime you touch the paint, there's a chance of inflicting marks.
Happy Detailing!