Quick and to the point, the reason to change your brake fluid is to save your [censored]! Brake fluid is a hydroscopic which means it attracts water, big deal right? Wrong, through the brake lines and through your resevoir brake fluid attracts water, water has a really low boiling point, the more water in your lines the lower your boiling point. So you smash the brake pedal to stop you from slaming into the car ahead of you but your brakes barely keep you from hitting him. Your pedal feel may be very "mushy" as some may say. Your pads and rotors are fine so what's the deal. When you slammed your brakes their is a good chance your brake fluid boiled, in turn becoming a gas. Which we all know you can compress gas a lot! So your pedal sinks to the floor.
Of course that is worst case scenerio but that is the situation that we are trying to avoid by changing our fluid.
Another reason is with our expensive ABS ESP etc. etc. we want to prolong their life as long as we possibly can, new brake fluid will keep corrosion to an absolute minimum.

Bentley Recommends changing your fluid every two years regardless of mileage. Which is a pretty safe bet, however those of us that drive our asses off may want a bit more insurance, my recommendation is every 30,000 miles or 1 1/2 years. Whichever comes first. Mainly for the fact that in 2 years the fluid has already taken on too much water and is already doing too much damage.
Tools Required: Jack Jackstands, 11mm open ended wrench(9mm wrench for 6spd slave cylinder bleed) Motive power bleeder or equivalent, catch bottles or tubing to collect old fluid, turkey baster to remove old fluid from resevior.
Start with the simple part:
1.Begin loosening up your lugs on your wheels.
2.Jack up your vehicle and support it with jackstands.
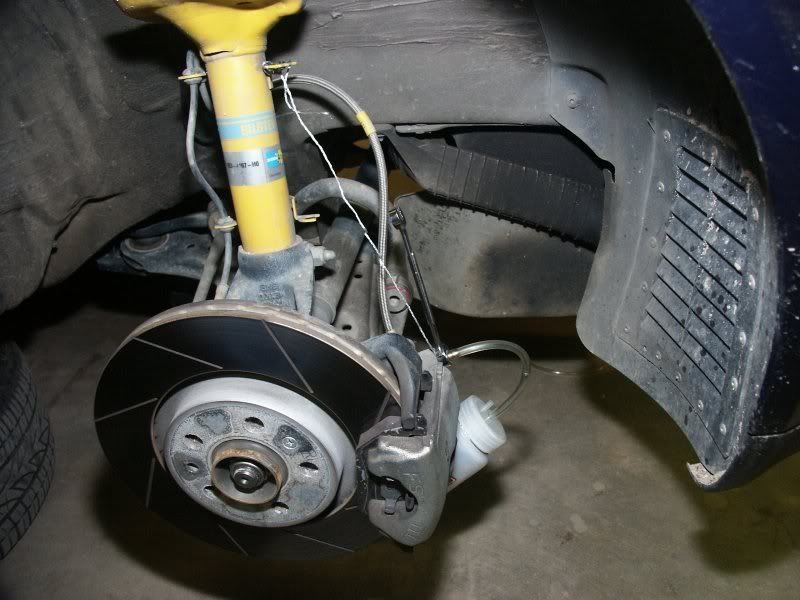
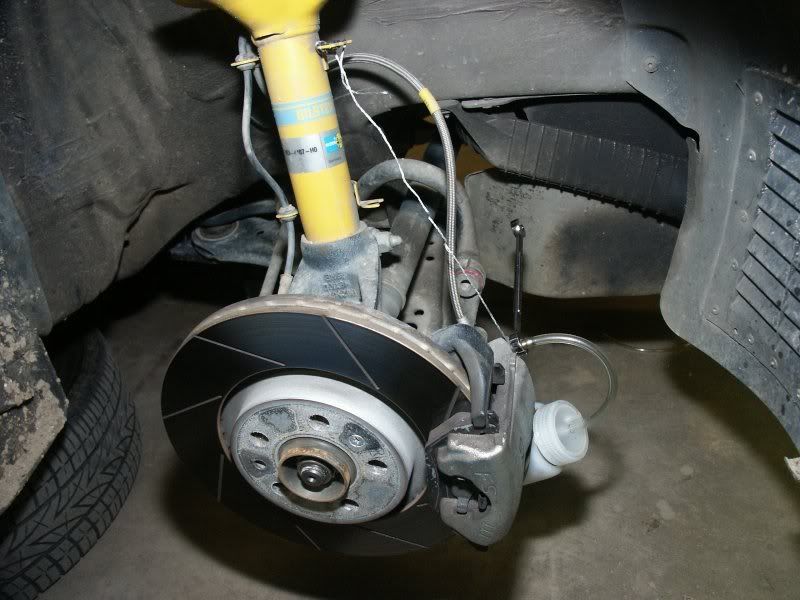
3. Remove your wheels. This will let you have plenty of room to work and the front calipers it is nearly impossible to bleed without removing the wheels.
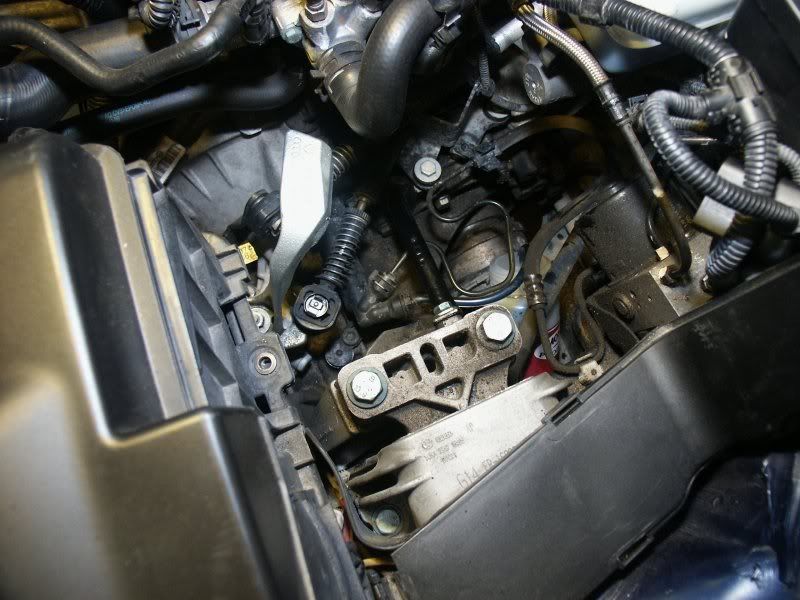
4.Due to variances in 1.8t, tdi, 2.0l, VR6, 3.2l. Remove whatever you need to to have good access to the front of the the brake fluid resevoir.
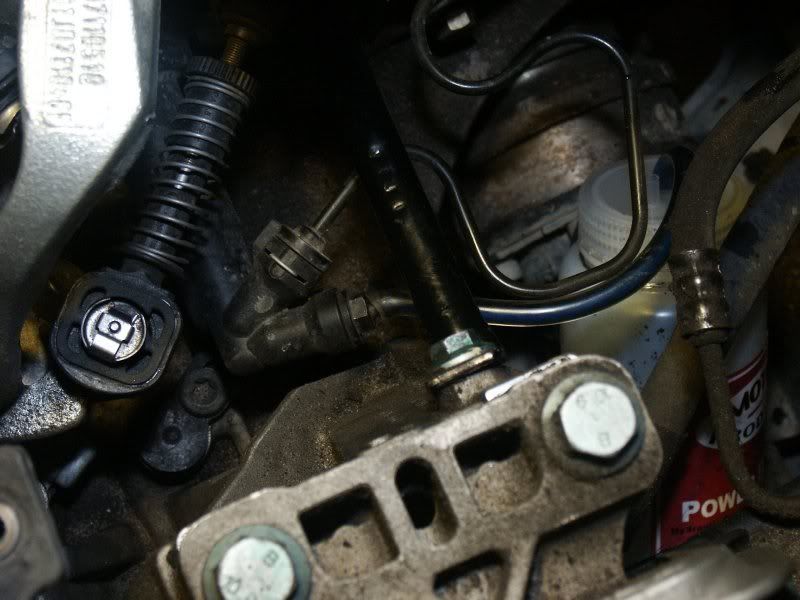
5. Now remove the yellow fluid level sensor from the brake fluid resevoir.
6. Next take out the plastic screen insert inside the resvoir with a flat head screwdriver as pictured.
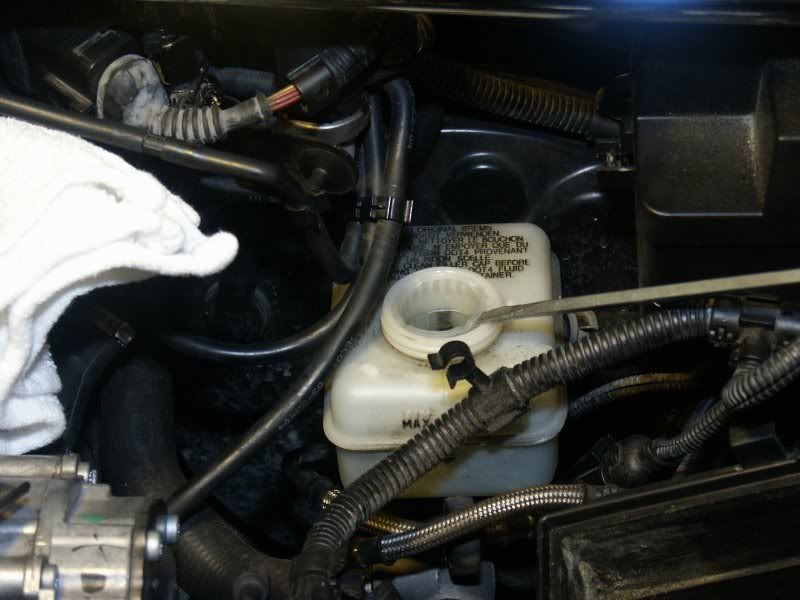
7.Take the time to remove any obvious dirt from the plastic screen or the sensor.
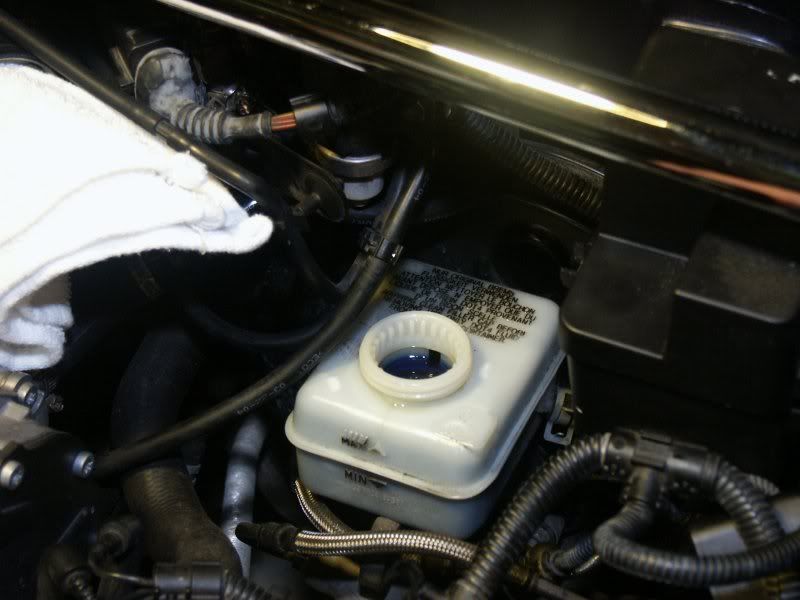
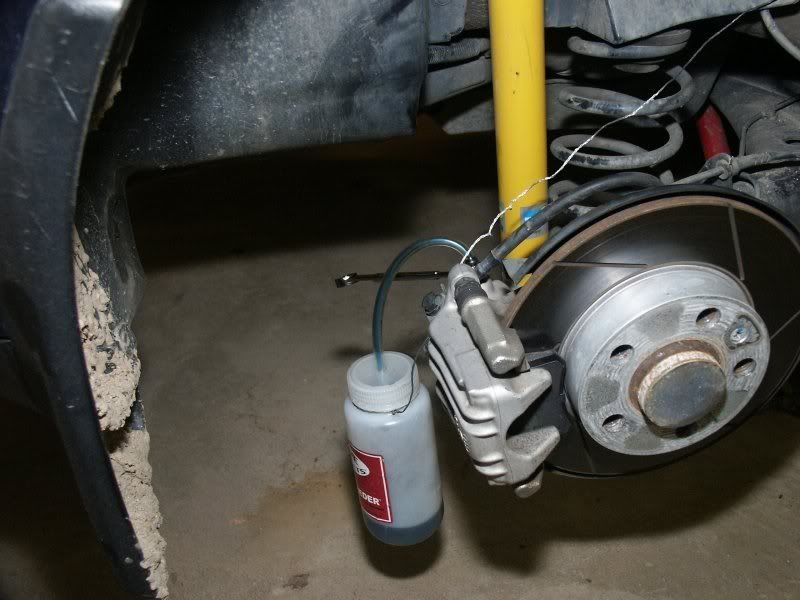
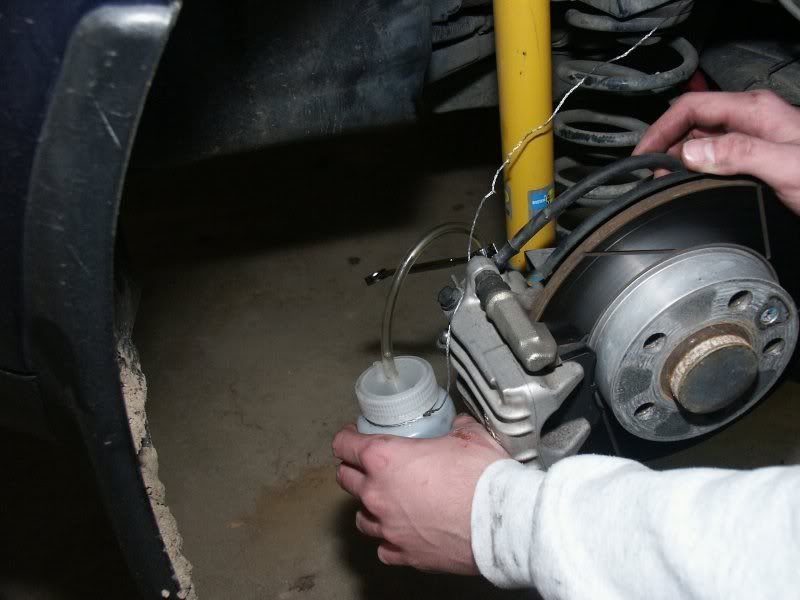
8. Begin removing the old fluid from the resevoir as pictured.

9.With a very clean paper towl or other item remove obvious dirt from inside the resevoir.
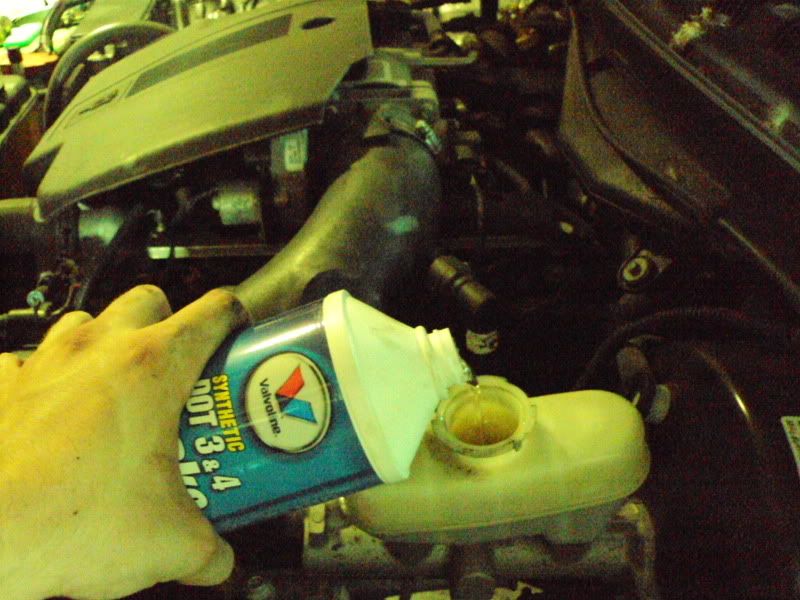
10. Fill the resevoir with whatever your choice of fluid is, my friend's choice was ATE SUPER BLUE.
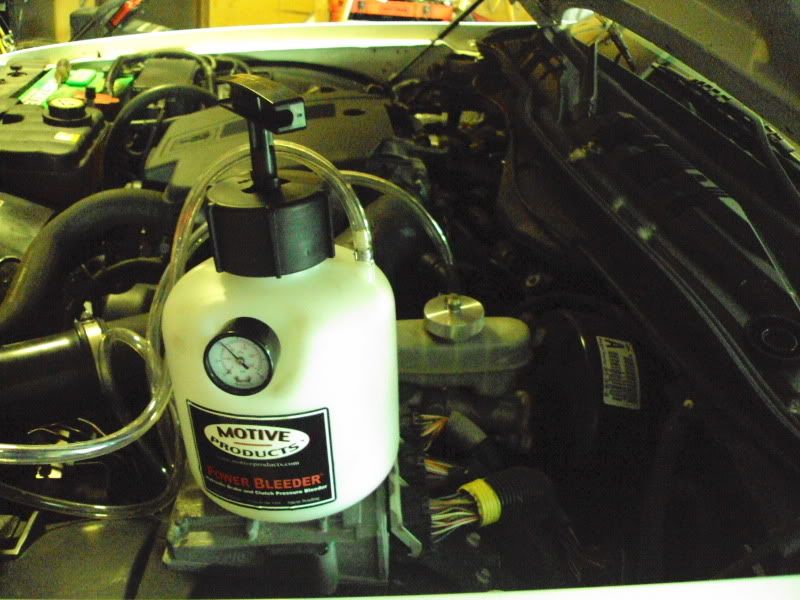
11. Now with an EMPTY Power Bleeder test the seal on the resevoir. This will save you the nightmare if their was an insufficent seal on the resevoir.
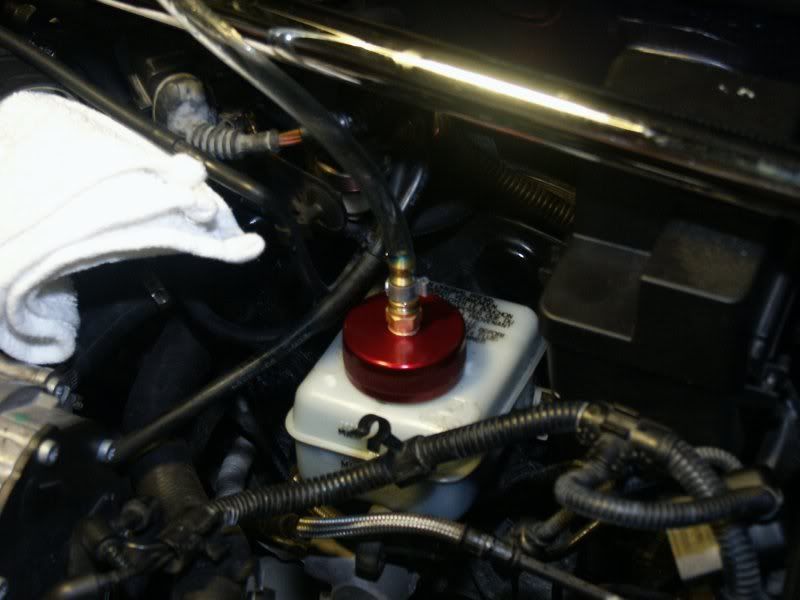
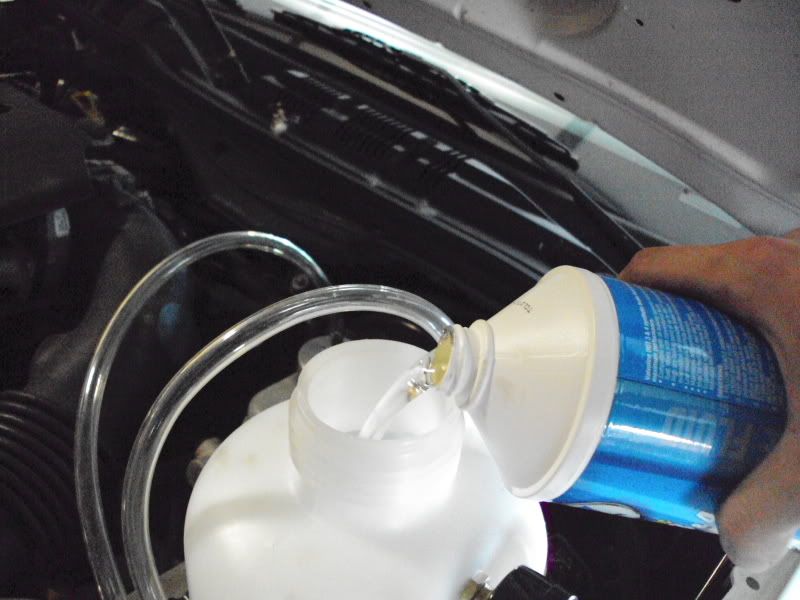
12.Now you can fill your power bleeder with the remainder of whatever fluid you have choosen.
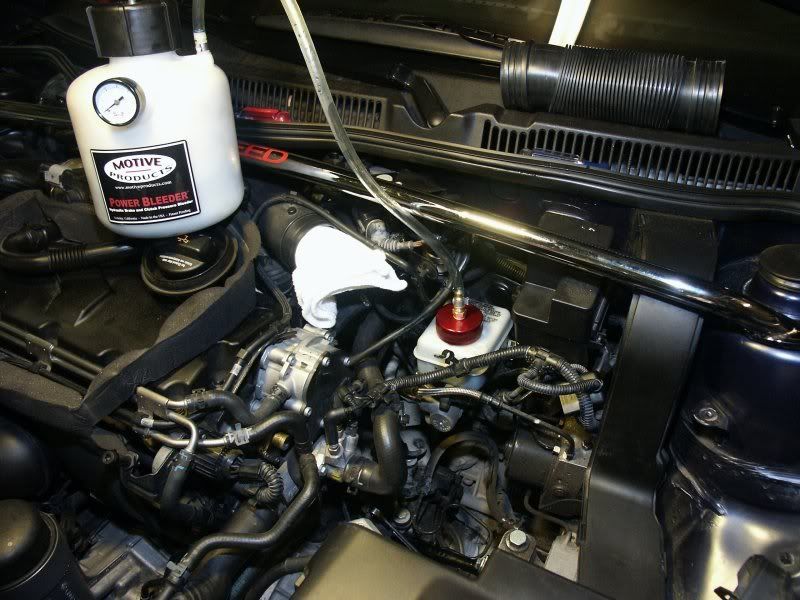
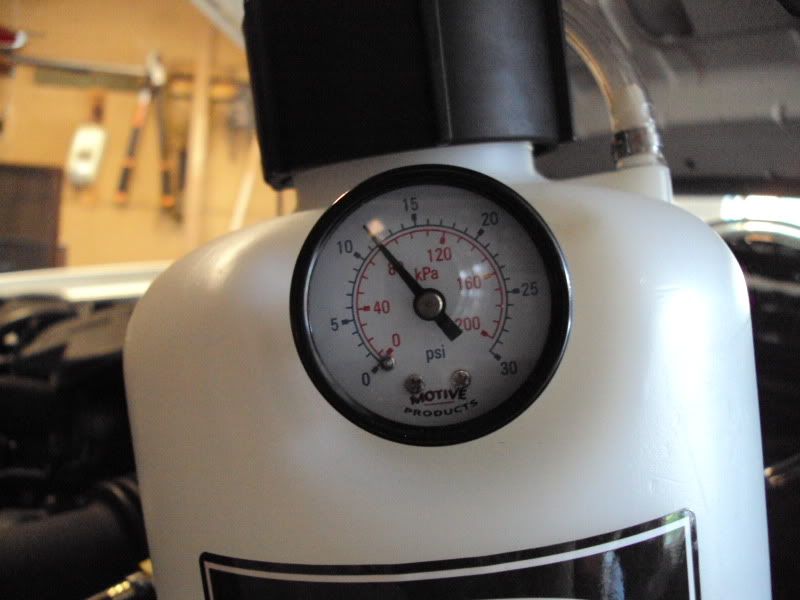
13. Pressurize the system to 10-13psi. The older the resevoir the less pressure you want to use. This keeps the resevoir from rupturing.(You really only need to worry about this on old resevoirs I would say 8 years old+
14.Now we begin the fun part of flushing your lines, bleed the clutch first, (5spdMK4 you simply bleed untill you get all new fluid.11mm wrench) (6spd bleed off about 100cc's of fluid, close the bleeder screw,quickly pump the clutch pedal 15 times, then bleed 50cc's of fluid.If I remember correctley this is a 9mm wrench)
15. Anyway crack open the bleed screw for the clutch and bleed as what is said above.
5spd
6spd, it is the fitting just left of the bottom center.

16. Close your bleed screw, and don't touch the clutch untill the rest of the system is flushed. This will keep old fluid from potentially mixing with the new fluid.
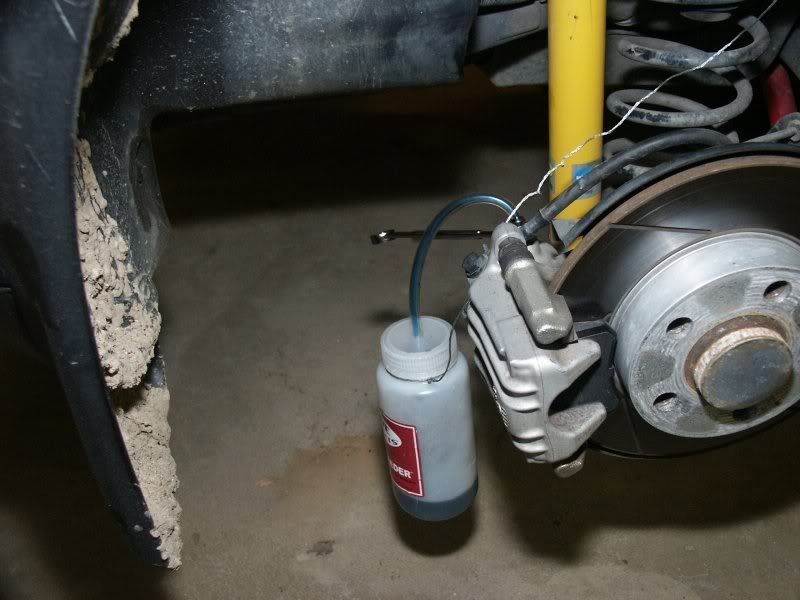
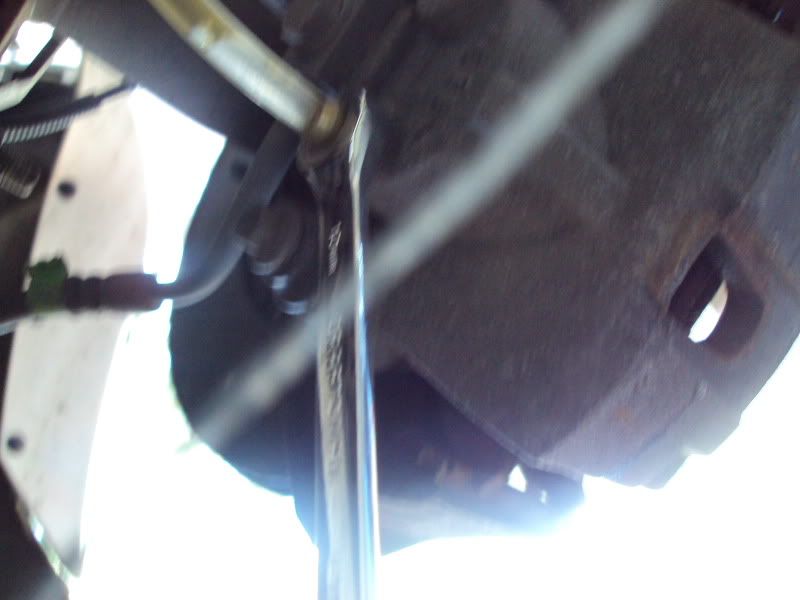
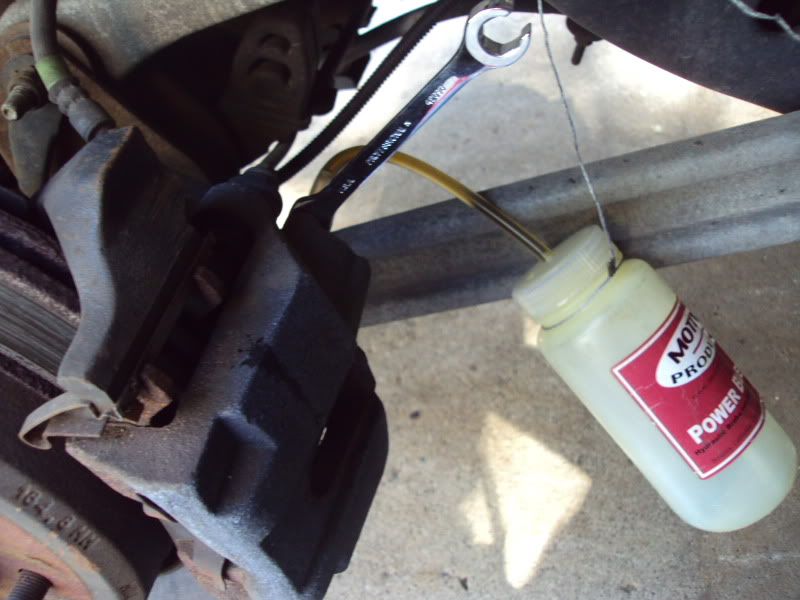
17. Now open the bleed screw on the right rear caliper. When only new fluid comes out. Their should be no air or corrosion coming out of the line when you close the bleed screw.


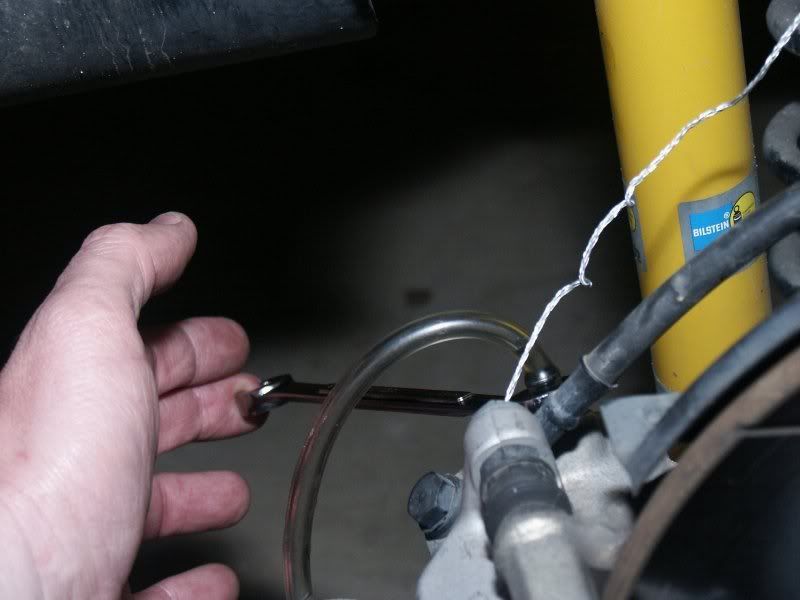
18.Repeat on the rear left(driver rear)
19. Repeat on the front right(passenger front)

20.Repeat on front left front(driver front)
21. Repeat as necessary I would hit all the brakes twice to get all the old fluid out for sure.
22. Now do the opposite of removing everything and deperessurize the pump.
23. Finally Have a beer
 and smash your brakes to cycle your abs pump, not in that order either

Modified by Steveo989 at 11:11 AM 4-15-2007
Modified by Steveo989 at 11:12 AM 4-15-2007
Modified by Steveo989 at 1:49 PM 4-15-2007
Modified by Steveo989 at 9:49 PM 4-20-2007
My views and opinions on the necessity of a brake flush has changed over the years. Originally, I really wanted fresh fluid in the system to maintain the high boiling point so there isn't any chance of brake failure during some unforeseen circumstance. In all reality though, a brake flush to maintain a high boiling point isn't really all that important. There are tens of millions of cars on the road with neglected brake hydraulic systems. Unless you tow a heavy trailer, and/or doing a lot of driving down large grades your brake system will likely never experience the temps to create brake failure or boil the fluid.
Currently my stance on the brake flush is to keep moisture out of the system to prevent and keep corrosion to a minimum. You definitely do not want your expensive ABS pump to fail prematurely due to brake fluid contamination.
Whatever your reason for choosing a brake fluid flush, a brake fluid flush, when performed correctly, will make your car safer and will undoubtedly extend the service life of the calipers, ABS pump, and related components.
To begin: You will need a 10MM flare nut wrench, Jack and four jack stands, power bleeder or similar device , brake fluid, and standard tools for removing wheels.
Step one: Raise your vehicle. (If you are not capable of doing this, do not even attempt this DIY.)
Step two: Remove your vehicles wheels. If you do not have an impact, you will want to break the nuts loose prior to raising your vehicle to prevent toppling the car. (Unlikely, but better safe than sorry)
Step three: Go to each brake caliper and remove the little plastic boots covering each brake bleed screw.
Step 4: Open the master cylinder cap and remove the fluid. I chose to use a turkey baster, but then found out this only removed maybe half the fluid because of the brake fluid gauge sensor. What I chose to do was be very careful and hook the Power bleeder up the the master cylinder. I then pressurized the pump and began bleeding. If you choose to do this just open one bleed screw and monitor the brake fluid reservoir. You DO NOT want the reservoir to go empty.
Step 5: Once the reservoir is nearly empty, you can begin filling the brake fluid reservoir. I would fill 3/4 full.
Step 6: Test seal on motive bleeder. Connect Power bleeder and ensure there is a tight seal between the connector and the reservoir. If this step is not taken you may end up spraying highly corrosive brake fluid all over your paint (hope you have a hose ready :n00b")
Step 7: Pressurize Power Bleeder. Begin pumping the power bleeder. You will want to pump it up to 10 or 15 PSI and leave it for 30 seconds or so. Has the pressure dropped, if so, ensure there is an adequate seal between the power bleeder and the brake fluid reservoir. The two other areas are the pump handle cap for the power bleeder, or the tube that connects between the power bleeder and the connector.
Step 8: Fill your Power Bleeder with fluid. Simply fill your bleeder with your choice of compatible brake fluid.
Step 9: Re-pressurize the power bleeder. I would recommend 15 PSI, any higher and it is on you.
Step 10: Begin Bleeding. The sequence I would recommend is Passenger Rear, Driver Rear, Passenger Front, Driver Front. I would repeat the sequence at least twice. You have an entire liter of fluid use it and get all new fluid through the brake lines. You will need the 10 MM flare nut wrench to crack the bleed screws.
You will want to bleed until you see fluid coming out of the bleed screw that is about the same color as the new fluid you just poured into your power bleeder/reservoir.
Step 11: Depressurize power bleeder. Remove the top of the Power Bleeder to remove the pressure from the power bleeder. DO NOT REMOVE THE CAP ATTACHED TO THE BRAKE FLUID RESERVOIR until the unit has been depressurized!
Step 12: Remove the Power Bleeder adaptor from your brake fluid reservoir.
Step 13: Re-attach your Brake fluid Reservoir cap after ensuring the brake fluid is at proper level.
Step 14: Replace Brake Bleed screw protective caps.
Step 15 Replace wheels.
Step 16:Lower Vehicle, Start car, and test brake pressure by pressing on pedal.
Note: Do not try to test brake pedal pressure until wheels have been reattached because the rotors will move leading you to believe there is air in the system.
Note: I can not be held liable for any damages incurred by not performing this maintenance correctly on your vehicle. I would suggest taking your car to a qualified mechanic if you do not live in an area where you can safely test your brakes once completing this as well.
Of course that is worst case scenerio but that is the situation that we are trying to avoid by changing our fluid.
Another reason is with our expensive ABS ESP etc. etc. we want to prolong their life as long as we possibly can, new brake fluid will keep corrosion to an absolute minimum.
Bentley Recommends changing your fluid every two years regardless of mileage. Which is a pretty safe bet, however those of us that drive our asses off may want a bit more insurance, my recommendation is every 30,000 miles or 1 1/2 years. Whichever comes first. Mainly for the fact that in 2 years the fluid has already taken on too much water and is already doing too much damage.
Tools Required: Jack Jackstands, 11mm open ended wrench(9mm wrench for 6spd slave cylinder bleed) Motive power bleeder or equivalent, catch bottles or tubing to collect old fluid, turkey baster to remove old fluid from resevior.
Start with the simple part:
1.Begin loosening up your lugs on your wheels.
2.Jack up your vehicle and support it with jackstands.
3. Remove your wheels. This will let you have plenty of room to work and the front calipers it is nearly impossible to bleed without removing the wheels.
4.Due to variances in 1.8t, tdi, 2.0l, VR6, 3.2l. Remove whatever you need to to have good access to the front of the the brake fluid resevoir.
5. Now remove the yellow fluid level sensor from the brake fluid resevoir.
6. Next take out the plastic screen insert inside the resvoir with a flat head screwdriver as pictured.
7.Take the time to remove any obvious dirt from the plastic screen or the sensor.
8. Begin removing the old fluid from the resevoir as pictured.
9.With a very clean paper towl or other item remove obvious dirt from inside the resevoir.
10. Fill the resevoir with whatever your choice of fluid is, my friend's choice was ATE SUPER BLUE.
11. Now with an EMPTY Power Bleeder test the seal on the resevoir. This will save you the nightmare if their was an insufficent seal on the resevoir.
12.Now you can fill your power bleeder with the remainder of whatever fluid you have choosen.
13. Pressurize the system to 10-13psi. The older the resevoir the less pressure you want to use. This keeps the resevoir from rupturing.(You really only need to worry about this on old resevoirs I would say 8 years old+
14.Now we begin the fun part of flushing your lines, bleed the clutch first, (5spdMK4 you simply bleed untill you get all new fluid.11mm wrench) (6spd bleed off about 100cc's of fluid, close the bleeder screw,quickly pump the clutch pedal 15 times, then bleed 50cc's of fluid.If I remember correctley this is a 9mm wrench)
15. Anyway crack open the bleed screw for the clutch and bleed as what is said above.
5spd
6spd, it is the fitting just left of the bottom center.
16. Close your bleed screw, and don't touch the clutch untill the rest of the system is flushed. This will keep old fluid from potentially mixing with the new fluid.
17. Now open the bleed screw on the right rear caliper. When only new fluid comes out. Their should be no air or corrosion coming out of the line when you close the bleed screw.
18.Repeat on the rear left(driver rear)
19. Repeat on the front right(passenger front)
20.Repeat on front left front(driver front)
21. Repeat as necessary I would hit all the brakes twice to get all the old fluid out for sure.
22. Now do the opposite of removing everything and deperessurize the pump.
23. Finally Have a beer
Modified by Steveo989 at 11:11 AM 4-15-2007
Modified by Steveo989 at 11:12 AM 4-15-2007
Modified by Steveo989 at 1:49 PM 4-15-2007
Modified by Steveo989 at 9:49 PM 4-20-2007
My views and opinions on the necessity of a brake flush has changed over the years. Originally, I really wanted fresh fluid in the system to maintain the high boiling point so there isn't any chance of brake failure during some unforeseen circumstance. In all reality though, a brake flush to maintain a high boiling point isn't really all that important. There are tens of millions of cars on the road with neglected brake hydraulic systems. Unless you tow a heavy trailer, and/or doing a lot of driving down large grades your brake system will likely never experience the temps to create brake failure or boil the fluid.
Currently my stance on the brake flush is to keep moisture out of the system to prevent and keep corrosion to a minimum. You definitely do not want your expensive ABS pump to fail prematurely due to brake fluid contamination.
Whatever your reason for choosing a brake fluid flush, a brake fluid flush, when performed correctly, will make your car safer and will undoubtedly extend the service life of the calipers, ABS pump, and related components.
To begin: You will need a 10MM flare nut wrench, Jack and four jack stands, power bleeder or similar device , brake fluid, and standard tools for removing wheels.
Step one: Raise your vehicle. (If you are not capable of doing this, do not even attempt this DIY.)
Step two: Remove your vehicles wheels. If you do not have an impact, you will want to break the nuts loose prior to raising your vehicle to prevent toppling the car. (Unlikely, but better safe than sorry)
Step three: Go to each brake caliper and remove the little plastic boots covering each brake bleed screw.
Step 4: Open the master cylinder cap and remove the fluid. I chose to use a turkey baster, but then found out this only removed maybe half the fluid because of the brake fluid gauge sensor. What I chose to do was be very careful and hook the Power bleeder up the the master cylinder. I then pressurized the pump and began bleeding. If you choose to do this just open one bleed screw and monitor the brake fluid reservoir. You DO NOT want the reservoir to go empty.
Step 5: Once the reservoir is nearly empty, you can begin filling the brake fluid reservoir. I would fill 3/4 full.
Step 6: Test seal on motive bleeder. Connect Power bleeder and ensure there is a tight seal between the connector and the reservoir. If this step is not taken you may end up spraying highly corrosive brake fluid all over your paint (hope you have a hose ready :n00b
Step 7: Pressurize Power Bleeder. Begin pumping the power bleeder. You will want to pump it up to 10 or 15 PSI and leave it for 30 seconds or so. Has the pressure dropped, if so, ensure there is an adequate seal between the power bleeder and the brake fluid reservoir. The two other areas are the pump handle cap for the power bleeder, or the tube that connects between the power bleeder and the connector.
Step 8: Fill your Power Bleeder with fluid. Simply fill your bleeder with your choice of compatible brake fluid.
Step 9: Re-pressurize the power bleeder. I would recommend 15 PSI, any higher and it is on you.
Step 10: Begin Bleeding. The sequence I would recommend is Passenger Rear, Driver Rear, Passenger Front, Driver Front. I would repeat the sequence at least twice. You have an entire liter of fluid use it and get all new fluid through the brake lines. You will need the 10 MM flare nut wrench to crack the bleed screws.
You will want to bleed until you see fluid coming out of the bleed screw that is about the same color as the new fluid you just poured into your power bleeder/reservoir.
Step 11: Depressurize power bleeder. Remove the top of the Power Bleeder to remove the pressure from the power bleeder. DO NOT REMOVE THE CAP ATTACHED TO THE BRAKE FLUID RESERVOIR until the unit has been depressurized!
Step 12: Remove the Power Bleeder adaptor from your brake fluid reservoir.
Step 13: Re-attach your Brake fluid Reservoir cap after ensuring the brake fluid is at proper level.
Step 14: Replace Brake Bleed screw protective caps.
Step 15 Replace wheels.
Step 16:Lower Vehicle, Start car, and test brake pressure by pressing on pedal.
Note: Do not try to test brake pedal pressure until wheels have been reattached because the rotors will move leading you to believe there is air in the system.
Note: I can not be held liable for any damages incurred by not performing this maintenance correctly on your vehicle. I would suggest taking your car to a qualified mechanic if you do not live in an area where you can safely test your brakes once completing this as well.