Forward Hub Tech.......
First thing you want to do is make SURE you have a 4L80E Forward Hub & not a TH400 hub! They are dimensionally the same & builders will swap them out because they don't know any better. The 4L80E hub is made of cast steel, The TH400 hub is cast iron. Lightly strike the hub with a wrench, The 4L80E hub will sound like a bell, The TH400 hub will make a dull thud. The 4L80E hub is not only stronger but more wear resistant....The main shaft will wear into a cast iron TH400 hub!
End Play, Forward Hub to Direct Drum specs.......
Using a Thrust Washer..... .008"-.015"
Using a Torrington Bearing....... .003"-.008"
If using a Thrust Washer between the Forward Hub & Direct Drum, You will need to buy a thicker Thrust Washer as no shims are available for this location.
Stock Plastic or Brass thrust thickness...... .059"-.064"
Sonnax Part# 34301-078 ...... .078"
Sonnax Part# 34301-094....... .094" This is the one usually needed.
Rollerizing the Forward Hub.....
This is highly recommended mod.....Almost needed if your trans spends long stints in low gear.
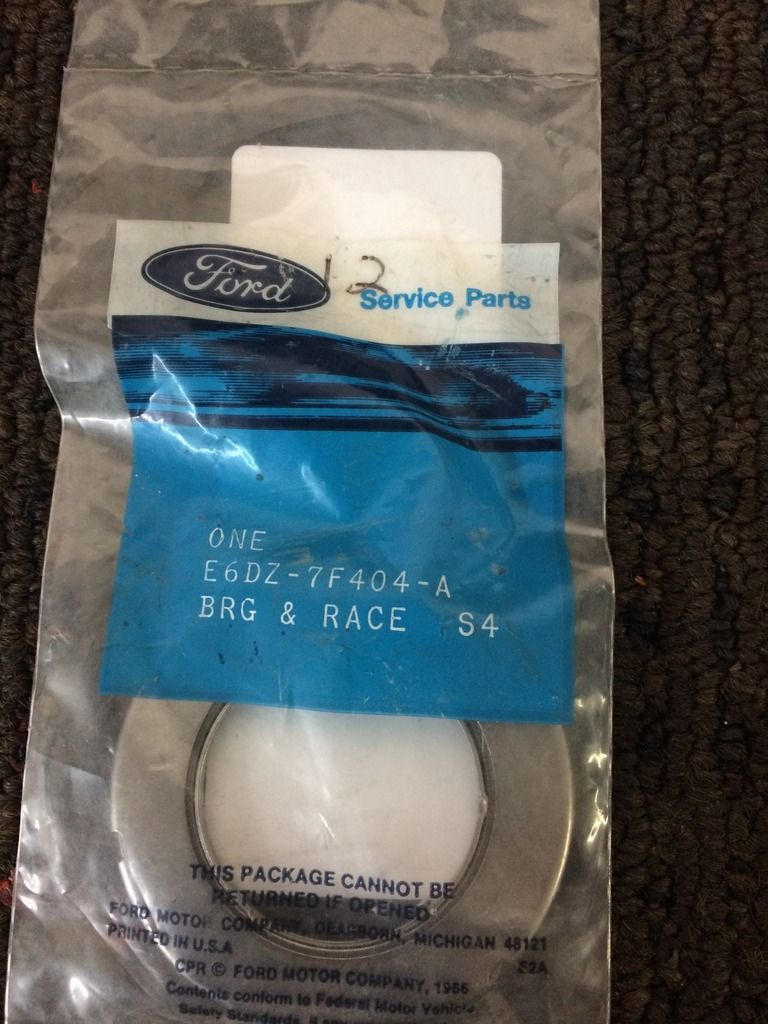
The best fitting bearing to use is a final drive sun gear bearing out of a Ford AXOD Part# E6DZ-7F404-A
Ford has discontinued this part, But Green Sales has them in stock Phone# 1-800-543-4959
Machining the Forward Hub rear thrust pad is necessary, Be very careful on your measurements because you will need to set Forward Hub to Direct Drum end play with the machining.
Start with +.035"......Lets say the bearing is .150", The original thrust is .064"
.150"-.064"=.086", .086"-.035"=.051"........051" is what you need to remove from the Thrust Pad. These are hypothetical numbers!! Measure your new Bearing & old thrust BEFORE machining!! You have to set-up each transmission individually when blueprinting!!
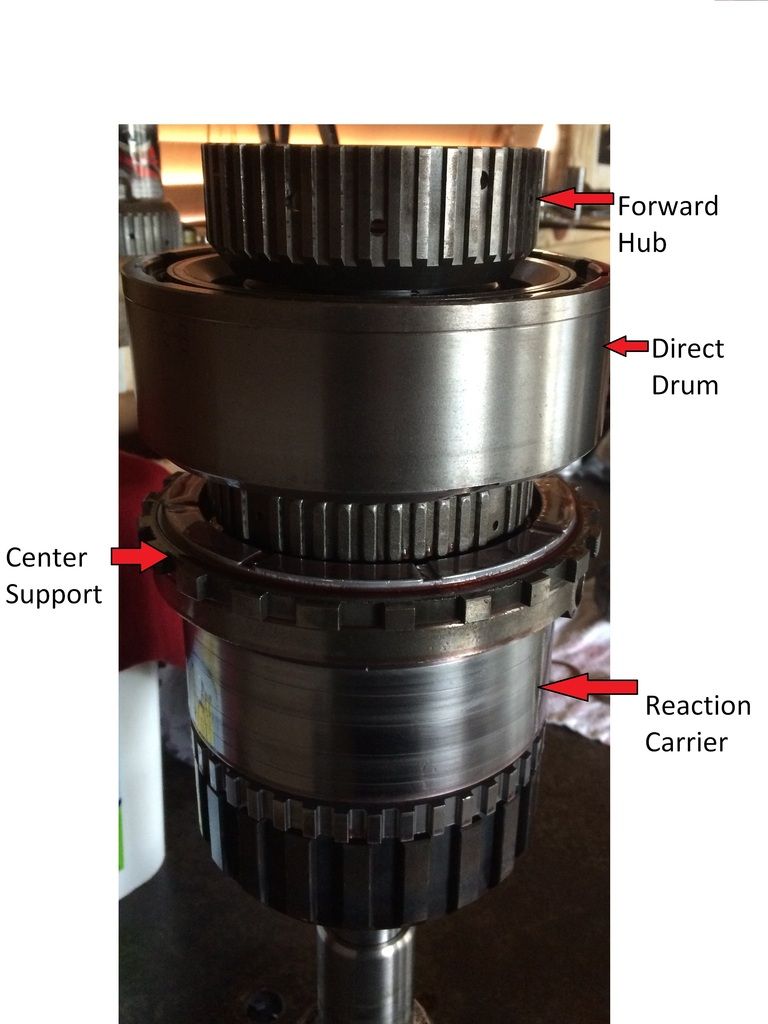
Checking Forward Hub to Direct Drum end play, Stack the gear train up to the Direct drum, Place the Forward Hub over the Main Shaft, Hold the forward hub down with your palms & lift the direct drum with your fingers.....The play you feel is the end play.....Pictures......
Check Forward Hub to Direct Drum end play, I know.....Same picture as above, But I'm talking different parts
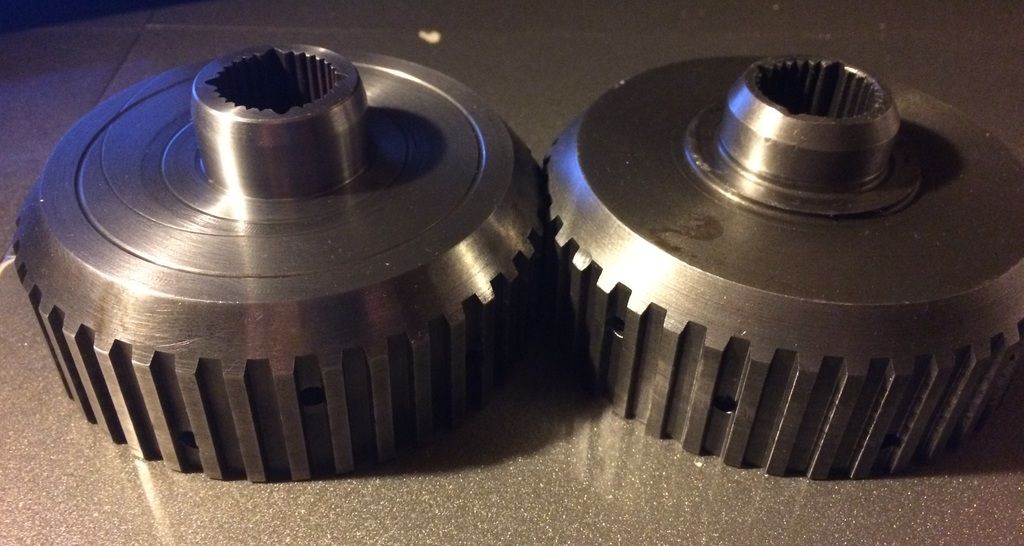
4L80E Forward Hub that has been machined for a bearing next to a stock TH400 Forward Hub
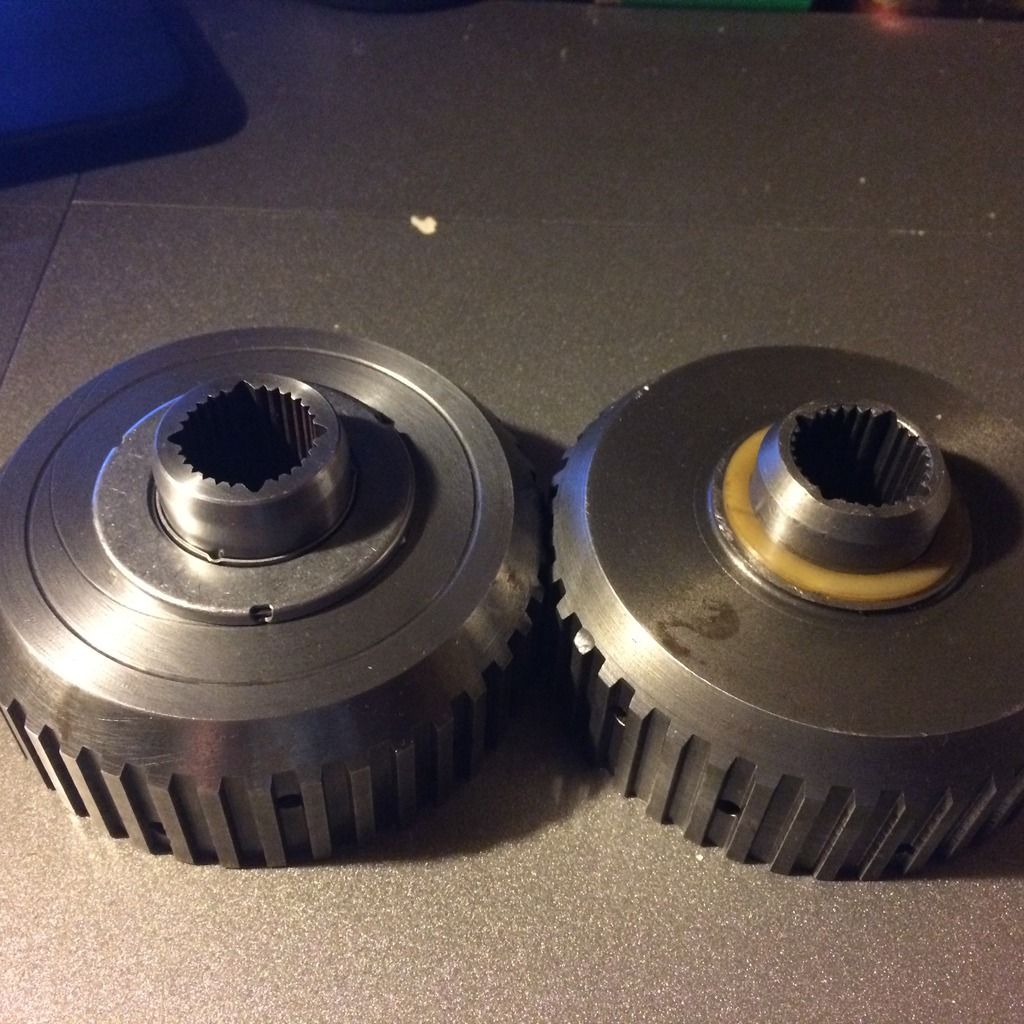
Bearing installed at +.035" which worked perfect on my personal '97 4L80E & does on most 4L80E's, Next to the TH400 hub with a stock plastic thrust washer
Ford AXOD final drive Sun Gear Bearing
First thing you want to do is make SURE you have a 4L80E Forward Hub & not a TH400 hub! They are dimensionally the same & builders will swap them out because they don't know any better. The 4L80E hub is made of cast steel, The TH400 hub is cast iron. Lightly strike the hub with a wrench, The 4L80E hub will sound like a bell, The TH400 hub will make a dull thud. The 4L80E hub is not only stronger but more wear resistant....The main shaft will wear into a cast iron TH400 hub!
End Play, Forward Hub to Direct Drum specs.......
Using a Thrust Washer..... .008"-.015"
Using a Torrington Bearing....... .003"-.008"
If using a Thrust Washer between the Forward Hub & Direct Drum, You will need to buy a thicker Thrust Washer as no shims are available for this location.
Stock Plastic or Brass thrust thickness...... .059"-.064"
Sonnax Part# 34301-078 ...... .078"
Sonnax Part# 34301-094....... .094" This is the one usually needed.
Rollerizing the Forward Hub.....
This is highly recommended mod.....Almost needed if your trans spends long stints in low gear.
The best fitting bearing to use is a final drive sun gear bearing out of a Ford AXOD Part# E6DZ-7F404-A
Ford has discontinued this part, But Green Sales has them in stock Phone# 1-800-543-4959
Machining the Forward Hub rear thrust pad is necessary, Be very careful on your measurements because you will need to set Forward Hub to Direct Drum end play with the machining.
Start with +.035"......Lets say the bearing is .150", The original thrust is .064"
.150"-.064"=.086", .086"-.035"=.051"........051" is what you need to remove from the Thrust Pad. These are hypothetical numbers!! Measure your new Bearing & old thrust BEFORE machining!! You have to set-up each transmission individually when blueprinting!!
Checking Forward Hub to Direct Drum end play, Stack the gear train up to the Direct drum, Place the Forward Hub over the Main Shaft, Hold the forward hub down with your palms & lift the direct drum with your fingers.....The play you feel is the end play.....Pictures......
Check Forward Hub to Direct Drum end play, I know.....Same picture as above, But I'm talking different parts

4L80E Forward Hub that has been machined for a bearing next to a stock TH400 Forward Hub

Bearing installed at +.035" which worked perfect on my personal '97 4L80E & does on most 4L80E's, Next to the TH400 hub with a stock plastic thrust washer

Ford AXOD final drive Sun Gear Bearing


