You are using an out of date browser. It may not display this or other websites correctly.
You should upgrade or use an alternative browser.
You should upgrade or use an alternative browser.
Oil in Spark Plug Tubes.. Has anybody changed out the LOWER spark plug tube seals ?
- Thread starter DannyM
- Start date
I used this video as my guide to replace the lower seals in the Accord (same generation as in the video) I had at the time. I followed the steps methodically and kept parts organized, and had no issues. Some of the details of the job are fading at this point, as it was about 12 years ago now. I do remember the lower seals had become very hard and brittle. The oil seeping into the spark plug well(s) didn't return after the repair.
I used this video as my guide to replace the lower seals in the Accord (same generation as in the video) I had at the time. I followed the steps methodically and kept parts organized, and had no issues. Some of the details of the job are fading at this point, as it was about 12 years ago now. I do remember the lower seals had become very hard and brittle. The oil seeping into the spark plug well(s) didn't return after the repair.
I don't have the space or all the tools to do it so I have to get a mechanic down the road from me to do it. He says he has done this before but the way Eric in the vid puts it.. the delicacy with the valves and everything lining up can make or break you .. still leave me with concerns..
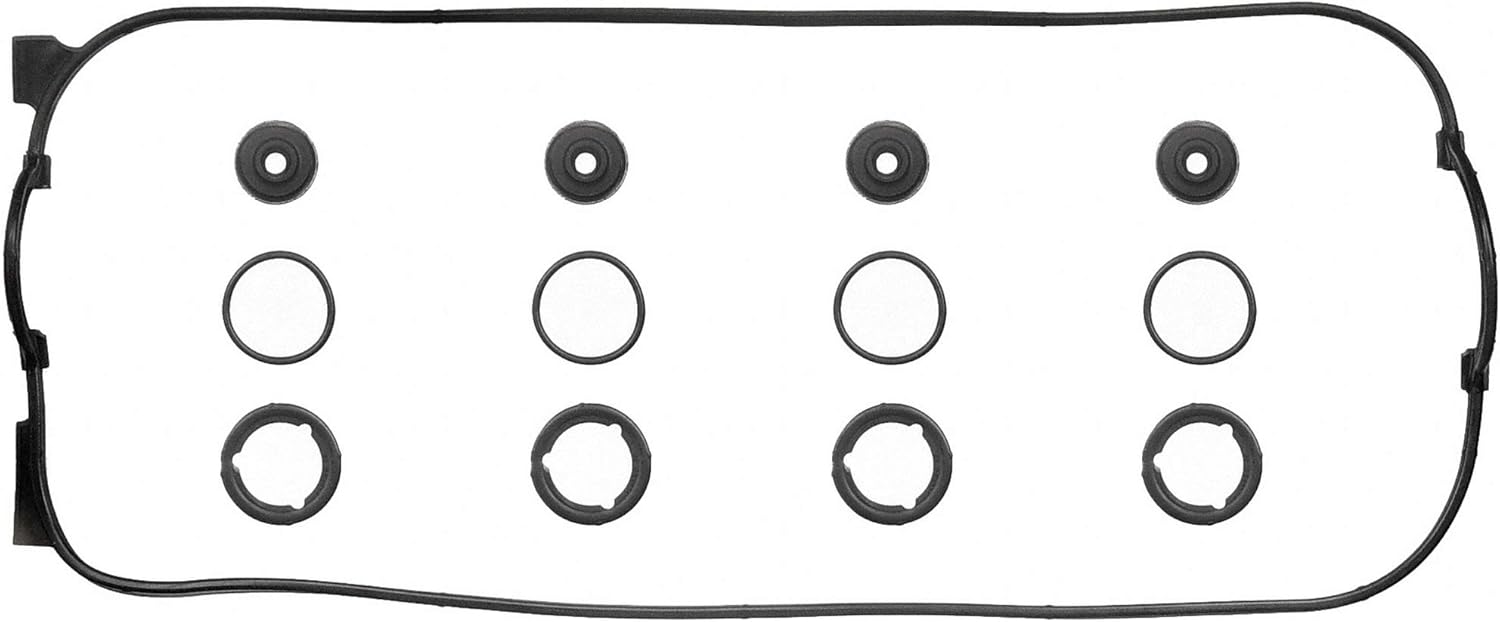
does it look like the correct seals come in this kit below ?
Wow memory lane!
Used to change these out and couldn't believe Honda designed the head that way. Simple to change, but many people get intimidated because you're touching valvetrain components. If you can take the valvecover off, you posses enough skill to change the orings. The shop I worked at replaced with viton, didn't install rubber orings.
Used to change these out and couldn't believe Honda designed the head that way. Simple to change, but many people get intimidated because you're touching valvetrain components. If you can take the valvecover off, you posses enough skill to change the orings. The shop I worked at replaced with viton, didn't install rubber orings.
Wow memory lane!
Used to change these out and couldn't believe Honda designed the head that way. Simple to change, but many people get intimidated because you're touching valvetrain components. If you can take the valvecover off, you posses enough skill to change the orings. The shop I worked at replaced with viton, didn't install rubber orings.
What do you think about that Felpro kit above in the photo ?.. do those look like the correct rings ?
That looks about right to me. This job was the deepest into an engine I had ever been, not counting disassembly/reassembly of a couple Briggs and Stratton lawnmower engines. I borrowed the garage of a friend, and got the job done with a few hand tools. If memory serves, this repair is the one that prompted me to buy a 3/8" torque wrench, which I've used many times since.I don't have the space or all the tools to do it so I have to get a mechanic down the road from me to do it. He says he has done this before but the way Eric in the vid puts it.. the delicacy with the valves and everything lining up can make or break you .. still leave me with concerns..
does it look like the correct seals come in this kit below ?
I'm sure they are 100% fine. Most of these aluminum heads run just north of 200 degrees.What do you think about that Felpro kit above in the photo ?.. do those look like the correct rings ?
Which engines does this potential lower spark plug tube seals issue apply to?
Which engines does this potential lower spark plug tube seals issue apply to?
I have the F22B2 1996 , but I think it could range anywhere from 90' to 02'.
4 cylinder only?
No I meant does the second set of spark plug seals apply to the V6?
I don't think so. Online OEM parts sites don't show them for the V6 and none of the aftermarket kits I saw on Rock Auto had the o-rings in a set.No I meant does the second set of spark plug seals apply to the V6?
Yes that is correct for an F22B2 engine. I've replaced them a few times on my old Accord. Just keep the rocker arm assembly together as you remove it (zip ties can help) and then adjust the valves when you're done. It's not to bad.I don't have the space or all the tools to do it so I have to get a mechanic down the road from me to do it. He says he has done this before but the way Eric in the vid puts it.. the delicacy with the valves and everything lining up can make or break you .. still leave me with concerns..
does it look like the correct seals come in this kit below ?
And yes those o-rings can get brittle.
Yes that is correct for an F22B2 engine.
Are the ones in the middle row are the seals for under the plug tubes ?
Yes those are the o-rings. Once you remove the rocker arms they are between that assembly and the head. There aren't any "tubes" as such, it is more of a tunnel or opening.Are the ones in the middle row are the seals for under the plug tubes ?
The other two seals go in the valve cover, the big ones underneath the top of the cover and the small ones on top under the attachment nuts.
Similar threads
- Replies
- 10
- Views
- 671
- Replies
- 20
- Views
- 720
- Replies
- 18
- Views
- 894
- Replies
- 13
- Views
- 2K
- Replies
- 31
- Views
- 2K