alternator croaking on easter vacation

I figured it out.
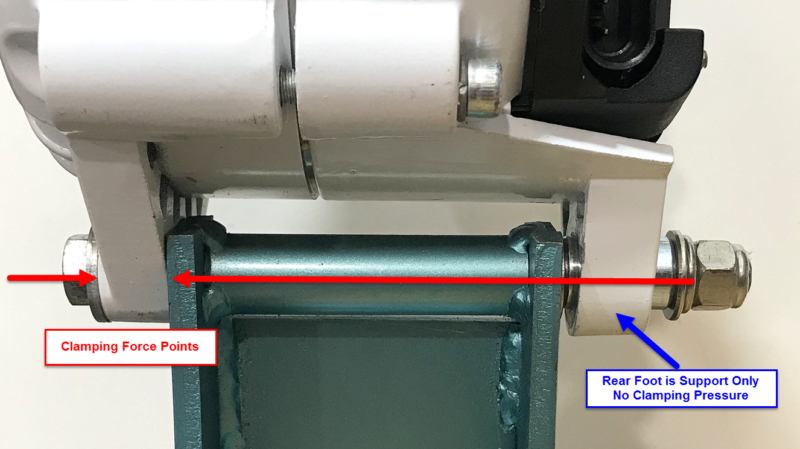
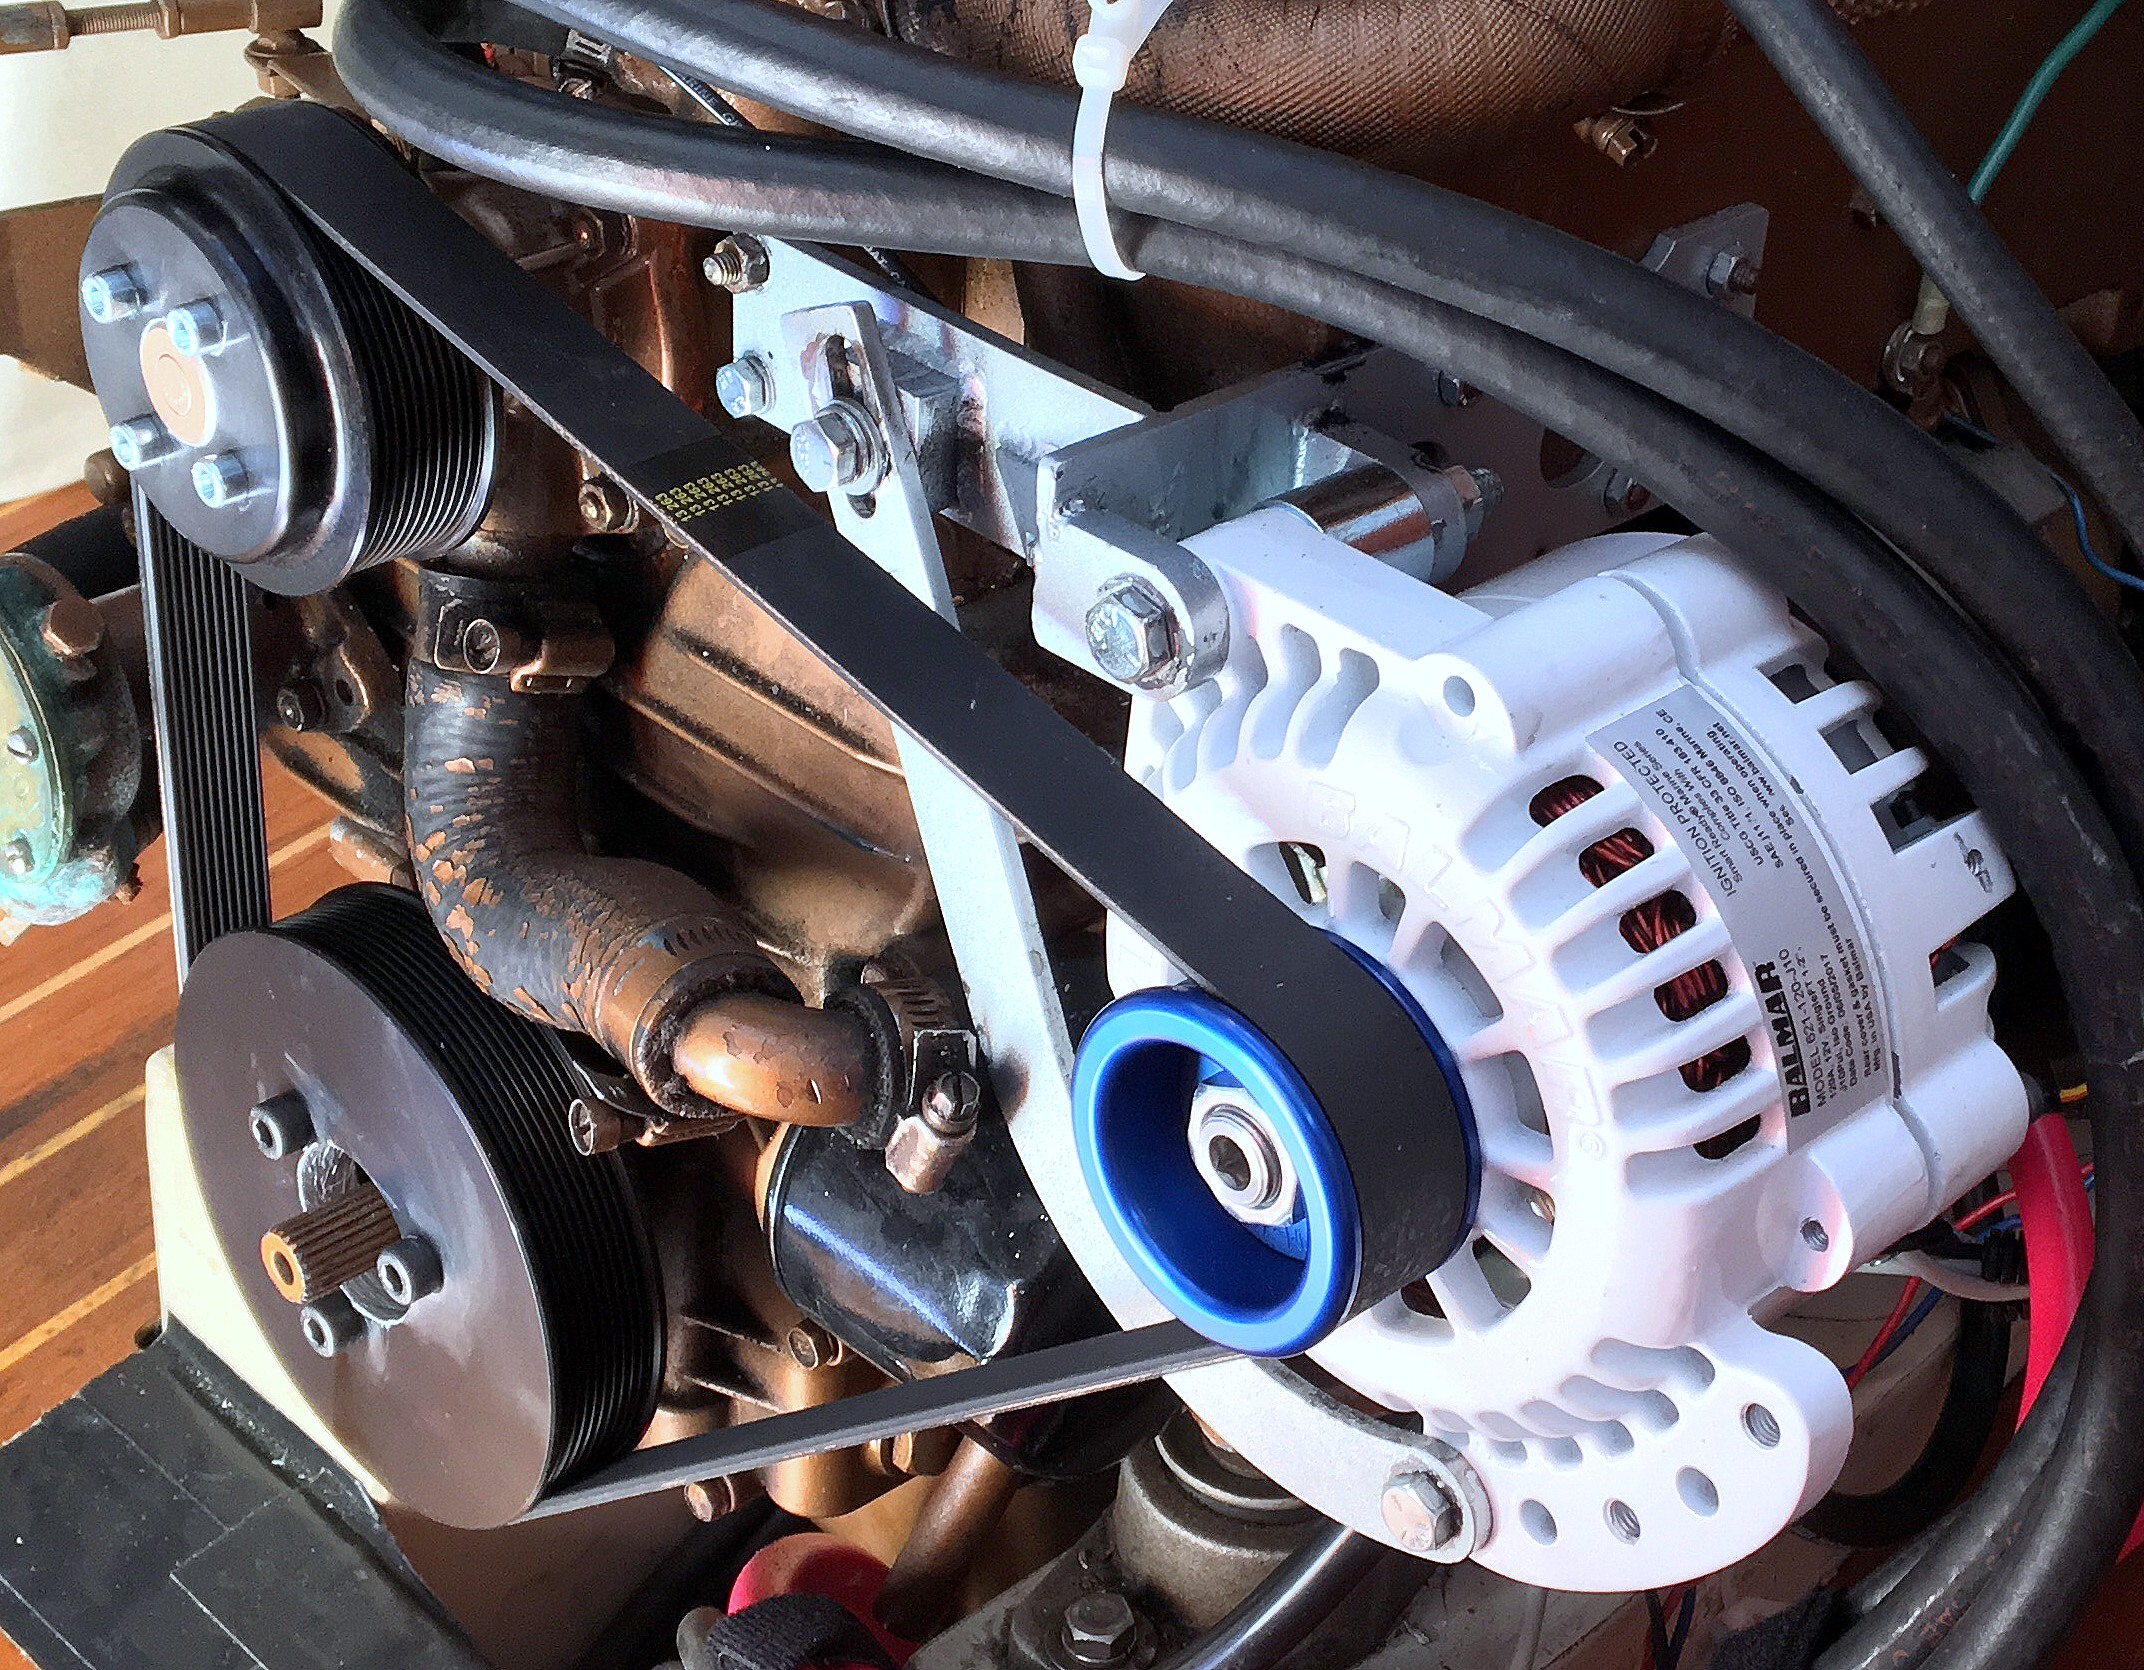
The 17 month old alternator I took out was a very snug fit on the bottom bolt. Like zero play.
The new one had some play like 1/32 to 1/16 inch of play.

When I torqued the top bolt to 16ftlbs and the bottom to 33ftlbs...
the play in the bottom of the alternator pinched together and caused the alternator to bind.(is the nut that bolt goes into supposed to be able to move in to close up this play. It appeared to be painted/glued in place)

I gotta go to work tommorow so my choices were
1.uber
2. Loosen lower bolt so pulley can spin and drive it kinda loose or
3. Add a thin washer to back side of alternator housing. To make up the play so when I torqued it down it can't bind. This is what I ended up doing.

Old Battery was fine(got a new one tho 🤦‍♀️) but the multimeter did drop to 6when the key was turned and the starter literally just let out a low pitched grunt/hum(sound of holding back an electric motor.)
Voltage returned to 12.4 ish when key released.
Never gave the click of typical low battery.

The starter was able to spin the serp belt a few inches before it would give up with a low grunt.

New question is how soon am I going to need a new starter 😃😃😃
 

Attachments

  • IMG_20201112_220456.jpg
    IMG_20201112_220456.jpg
    119 KB · Views: 27
Last edited:
So has anyone else seen an alternator bind up when installed?
I wonder if the metal housing is not completely screwed together?

I’d exhange it for another one. Sounds like someone may have ground the case down too much.
 
Usually the dual foot alternators, the back foot is not intended to be compressed towards the front foot, there is a drift bushing that takes up the slack.

Alternator-Upgrade-38-800x449.png


Pinching the two feet together can potentially do what you observed.

If your rotor was touching the stator and your starter torque was locking them up, I'd not want that alternator. I don't imagine your serpentine belt is very happy either.

more info about the drift bushing, can be seen better in this article, scroll about 2/3 the way down:

Thanks for the reply, I believe the rotor was touching the stator but it wasn't spinning while touching.

In the pic below I added the washer at the point circled. I believe the drift bushing was glued/painted in and did not move causing the binding.
Sounds like I should go get another free replacement alternator unless you think my added washer is fine log term?
Alternator-Upgrade-38-800x449~2.png
 
I'd want to see where the rotor touched the stator, before declaring it good to go. If it was touching the windings, and removed the insulating lacquer.....

The washer is fine as long as it is the proper thickness, but its better that the drift bushing, if one exists, can slide as designed.

I recently has to align an Alterantor properly, it required shaving the front the mounting support. It would have been much much easier, to instead remove 5/32 from the backside of the alternator's ear to achieve proper alignment.

A previous owner of your reman could have had alignment issues, and opened up the space between the alternator ear's feet.

YOu might want to check your pulley alignment, as that article shows. Properly aligned pulleys are more efficient, and the belts lasts longer and can transmit more energy before slipping.
Like with a laser level?
Or is there some proper way?
it looks good if I eyeball it.
 
That Article I linked shows a straight edge method of alignment.

If one can see pulley misalignment by eye, it is quite bad, and just because it looks good, does not mean it is. Get a good long straight edge and have a way of clamping it to a pulley face

But, if you do not get any squealing at higher rpm with lots of load on the alternator, then it can certainly be 'good enough', though still unideal.

If you have a charger... load your battery with headlights on high beams for 10+ minutes or so, engine off, then start engine and turn blower motor and AC compressor on Max/high and rev the engine turn on all possible DC loads.. If the alternator pulley is badly misaligned, the belt will let you know, Also you will want to see 14.2v+ at the battery terminals when revved while engine is still cold soon after starting.

Put your charger on the battery overnight afterwards to insure it is top charged. The more you discaharge the battery the high the load it can put on teh alternator and the belt, and more easily reveal a misalignment issue. As long as you can plug in overnight to charge it completely, there is no issue with intentionally cycling the battery, as long as you don't cycle it down below 11 volts or so under the high beams.
 
It's fine to put a washer there. The bushing is supposed to slide as the bolt is tightened so the case doesn't get distorted.

The belt alignment is based on the front lug touching the bracket. Anything you do at the back won't change it.
 
i warrantied another carquest reman,
drift nut was much better looking and the bolt was able to thread in by hand (the bad one i just took off the bolt could not be thread in my hand due to the excess paint I believe.
put it on and everything seems fine now
 
Back
Top